This chapter addresses a common pain point: using foreign AI services like Claude and Codex often comes with hassles. Accounts get inexplicably banned, you have to manually enable a proxy every time, subscription costs are high when shouldered alone, and sharing with friends is tricky without proper permission management.
I use these services myself, and I’ve always relied on my own self-hosted API relay. This chapter will walk you through the entire setup.
Why Build Your Own API Proxy
Let’s start with the motivation so you understand what problem this solves.
- Claude tends to ban accounts. Many people log in from various machines with messy IPs, and once flagged by the risk control system, the account gets banned. Using a relay fixes a single IP, routing all requests through the same server, significantly reducing the chance of a ban.
- More convenient to use. Once configured, you connect directly to the server without needing to manually enable a proxy each time.
- Multiple people can share one subscription. Claude Max and Pro subscriptions aren’t cheap, so several people can split the cost. Through the relay, you can create separate API keys for each user, each with independent permissions and usage statistics.
- Not buying from others because the risk is too high. There are many API relay services on the market, but it’s hard to tell genuine from fake, they might disappear anytime, and your data could be intercepted.
- Data security concerns. When using someone else’s relay service, all your requests pass through their servers. Sensitive content should not go through an uncontrolled third party.
- Supports multiple AI providers. This setup supports not only Claude but also other services like Codex.
What Project to Use
We’ll use this open-source project: claude-relay-service
Before we start, here are the deployment requirements:
- A VPS: Minimum specs are fine, 1 core and 1GB RAM is sufficient.
- Operating system: Linux (Ubuntu/Debian both work)
- Most importantly: The VPS must be able to directly access Anthropic’s API, meaning the server itself can reach claude.ai.
What is a VPS? Simply put, it’s a rented remote server that runs 24/7. You can run programs on it, it never shuts down, and it has a fixed public IP. Common domestic cloud servers (like Alibaba Cloud ECS, Tencent Cloud CVM) are similar, but they won’t work due to region restrictions; you need to rent one overseas.
Can you use your own computer instead of a VPS? In theory yes, but there are two hard requirements: first, your computer must be on 24/7; second, your network must be able to directly connect to Anthropic’s servers. Both conditions must be met, otherwise it won’t work. So in practice, renting an overseas VPS is much simpler.
This last point about “being able to reach Anthropic” is where many people get stuck. Where your VPS is located directly determines whether it works. I use a Japanese VPS with a datacenter IP, and without any extra configuration, it connects directly. Datacenters in Singapore, the US, and Japan are generally fine. Domestic servers in China definitely won’t work, and some Hong Kong datacenters may also be blocked. It’s best to confirm before purchasing.
One-Click Deployment
Connect to your VPS terminal and run the following command:
curl -fsSL https://pincc.ai/manage.sh -o manage.sh && chmod +x manage.sh && ./manage.sh install
Press Enter and wait for it to finish. After successful installation, the terminal will output something like:
Access URLs:
  Local Web: http://localhost:8080/web
  Public Web: http://YOUR_IP:8080/web

Admin credentials saved to: data/init.json
YOUR_IP is your VPS’s public IP. The admin password is stored in the data/init.json file; you can view it with cat data/init.json. Note down the public URL and password, as you’ll need them to log into the admin panel.
After installation, the system registers a crs command for managing the service:
crs install   # Install the service
crs start     # Start the service
crs stop      # Stop the service
crs restart   # Restart the service
crs status    # Check status
crs update    # Update the service
crs uninstall # Uninstall the service
To upgrade later, just connect to your VPS and run crs update—no need to repeat the installation process.
Accessing the Admin Panel
Open the public URL you noted earlier in your browser, enter the admin password, and you’ll see this dashboard:
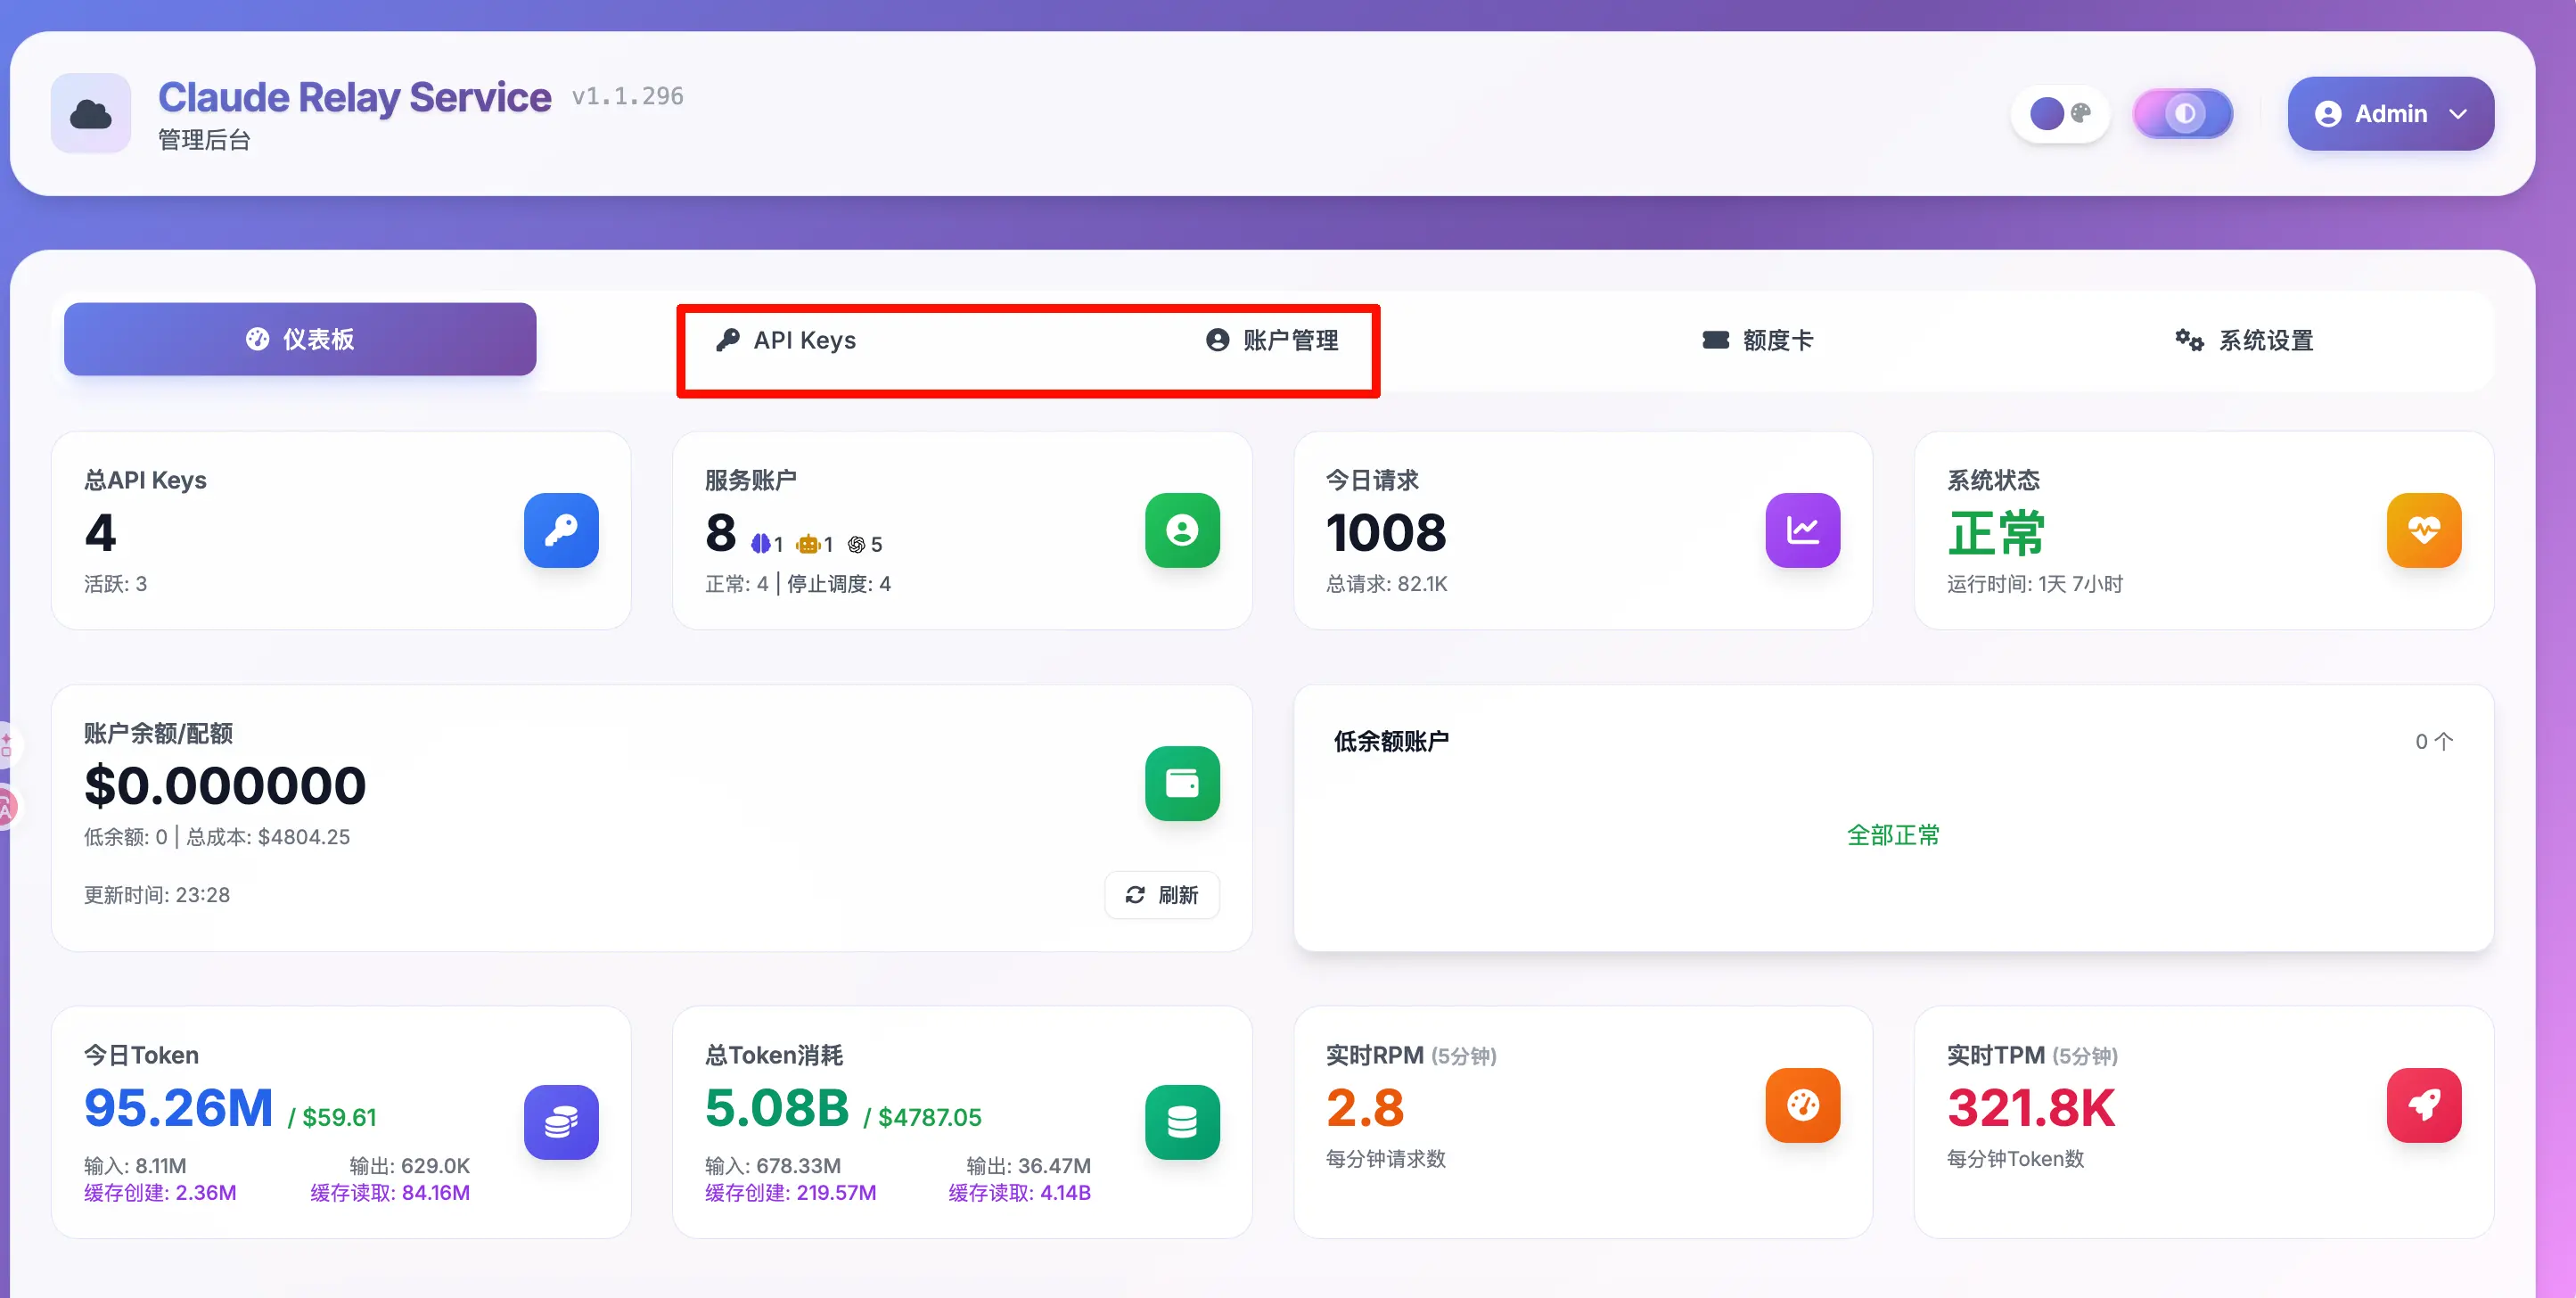
This is the system dashboard, showing current API key count, service accounts, today’s requests, token consumption, etc. The admin panel also supports viewing usage details for each API key, making it clear who used how much when sharing. Feel free to explore.
The top navigation has two core settings entries (highlighted in red in the image):
- API Keys: Create and manage API keys for users.
- Account Management: Bind your purchased Claude subscription accounts.
Next, we’ll first bind an account, then create an API key.
Step 1: Bind Your Claude Account
Click “Account Management” at the top, then click “Add Account”. A dialog for adding an account will appear.
Step 1 — Basic Information
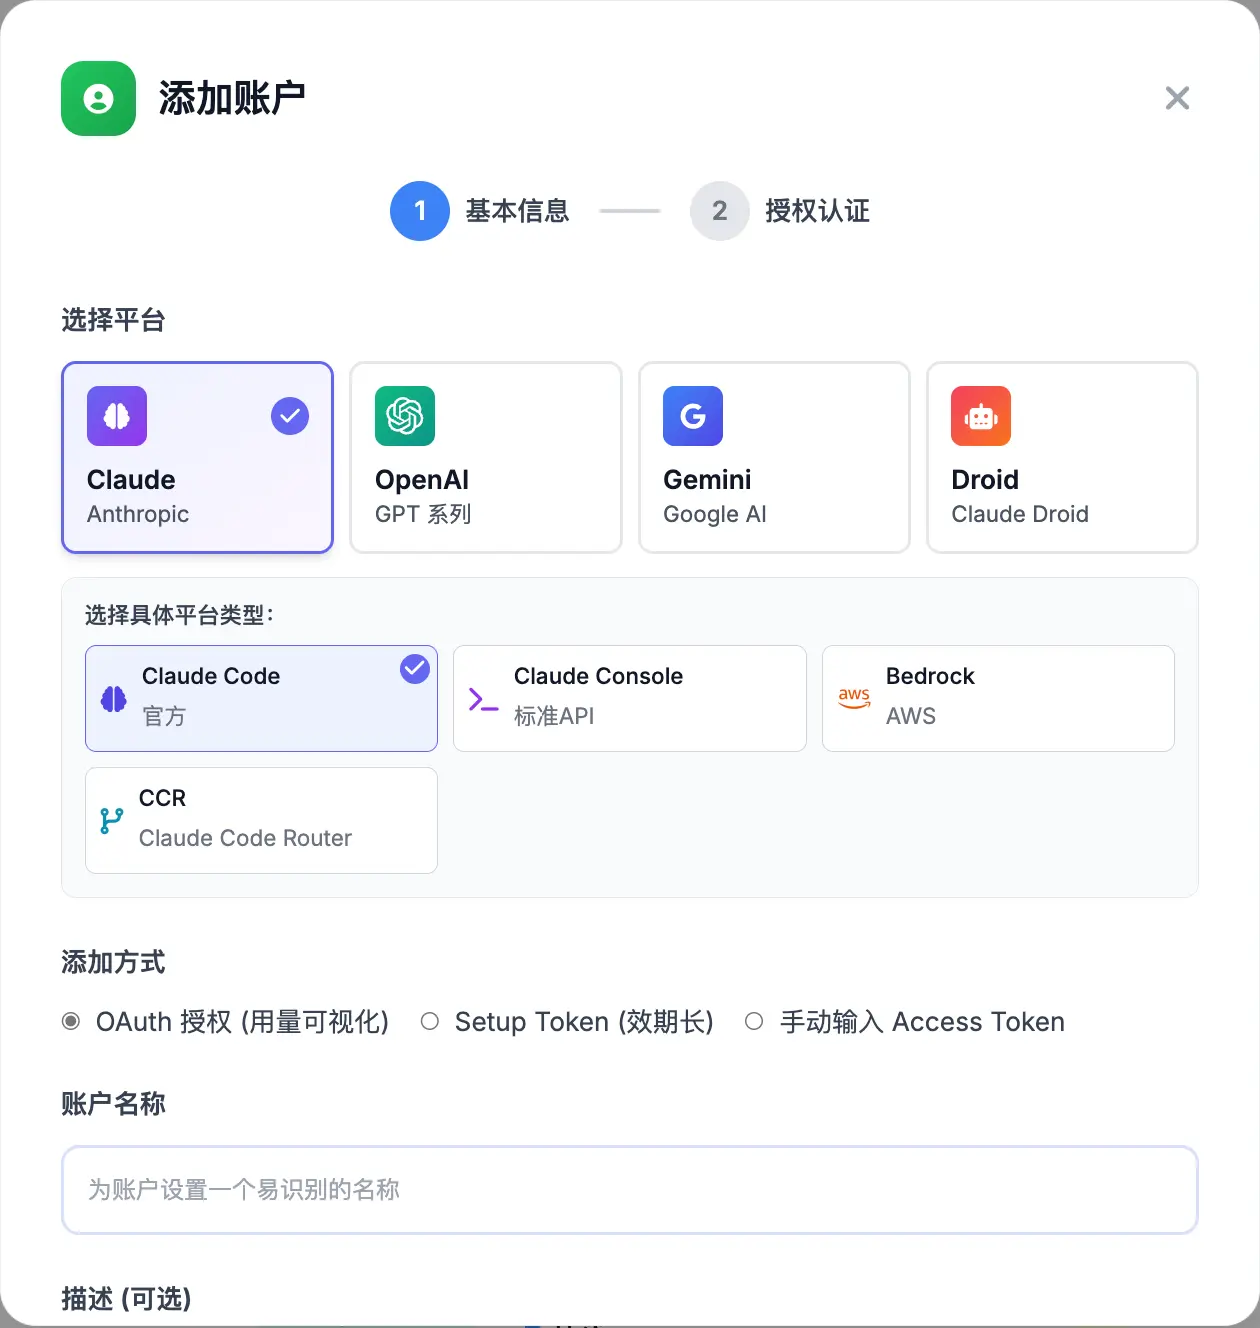
Fill in the following:
- Select Platform: Choose Claude (Anthropic). Other options include OpenAI, Gemini, etc.
- Select Specific Platform Type: Choose Claude Code (Official), which is our primary method.
- Add Method: Choose OAuth Authorization (Usage Visualization), which allows you to see detailed usage data in the admin panel.
- Account Name: Enter a name you’ll recognize, e.g., “My Max Account”.
Scroll down further for a few important options:
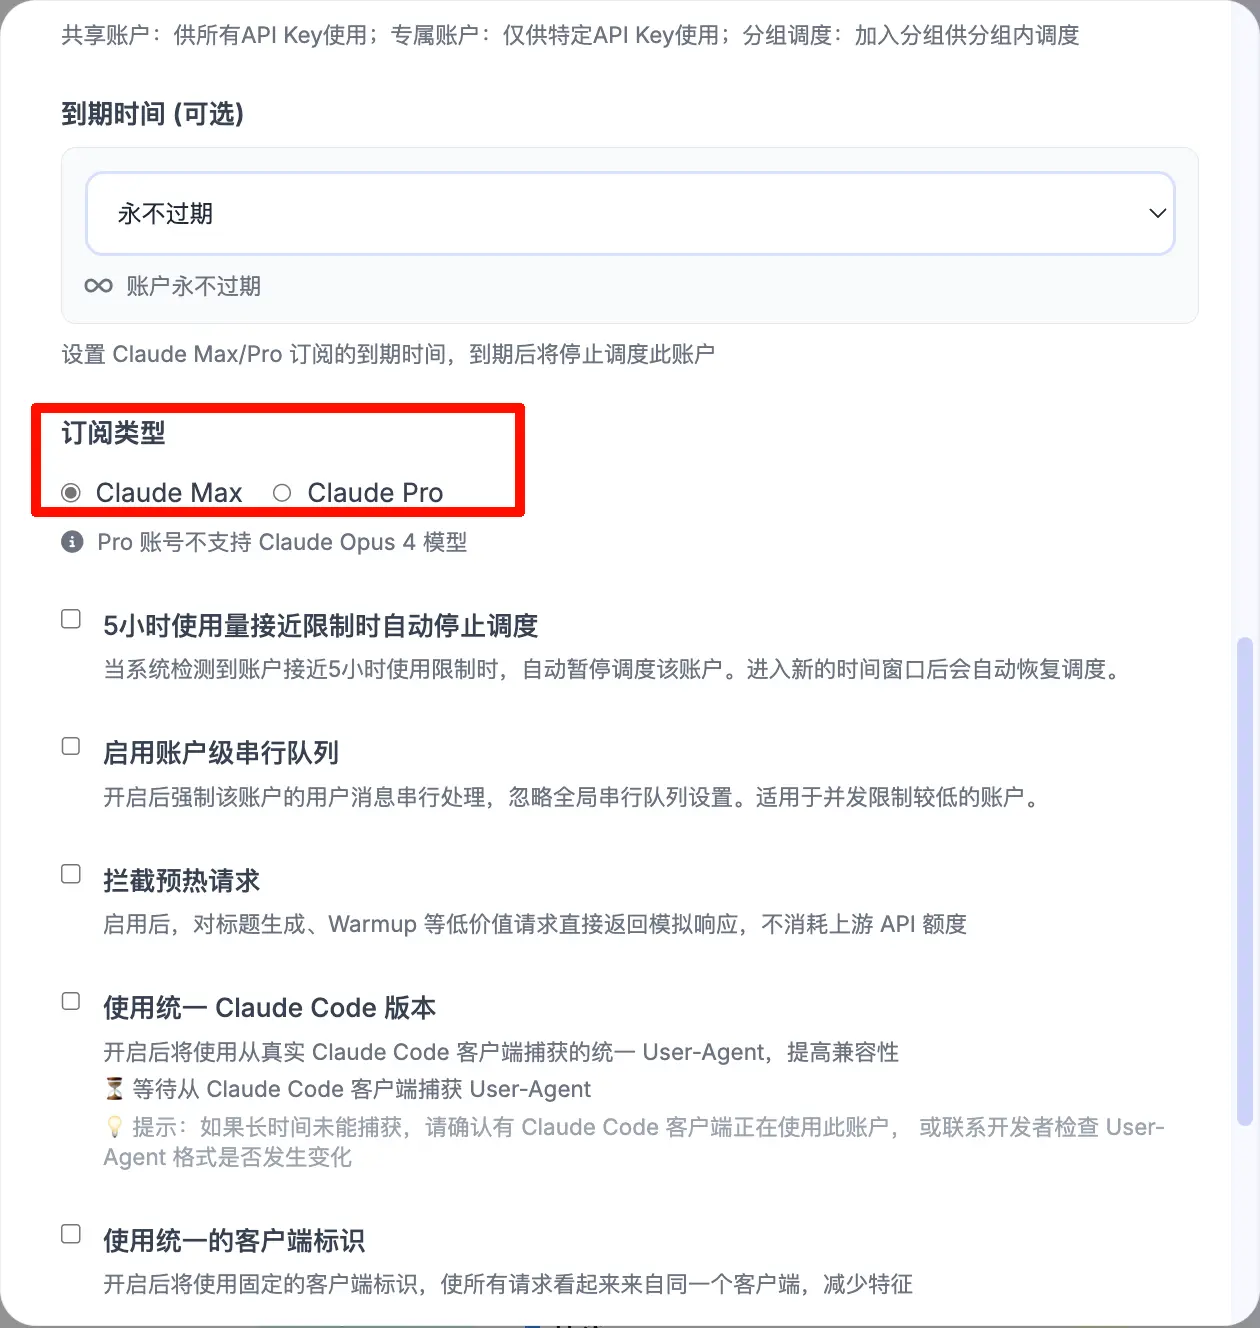
Subscription Type must be correct—select the one you actually purchased:
- Claude Max: Select this if you have a Max subscription.
- Claude Pro: Select this if you have a Pro subscription.
There are also some advanced options below, such as “Auto-stop scheduling when approaching 5-hour usage limit” and “Block warm-up requests”. Beginners can keep the defaults and adjust later as needed.
After filling in, click “Next” to proceed to authorization.
Step 2 — Authorization
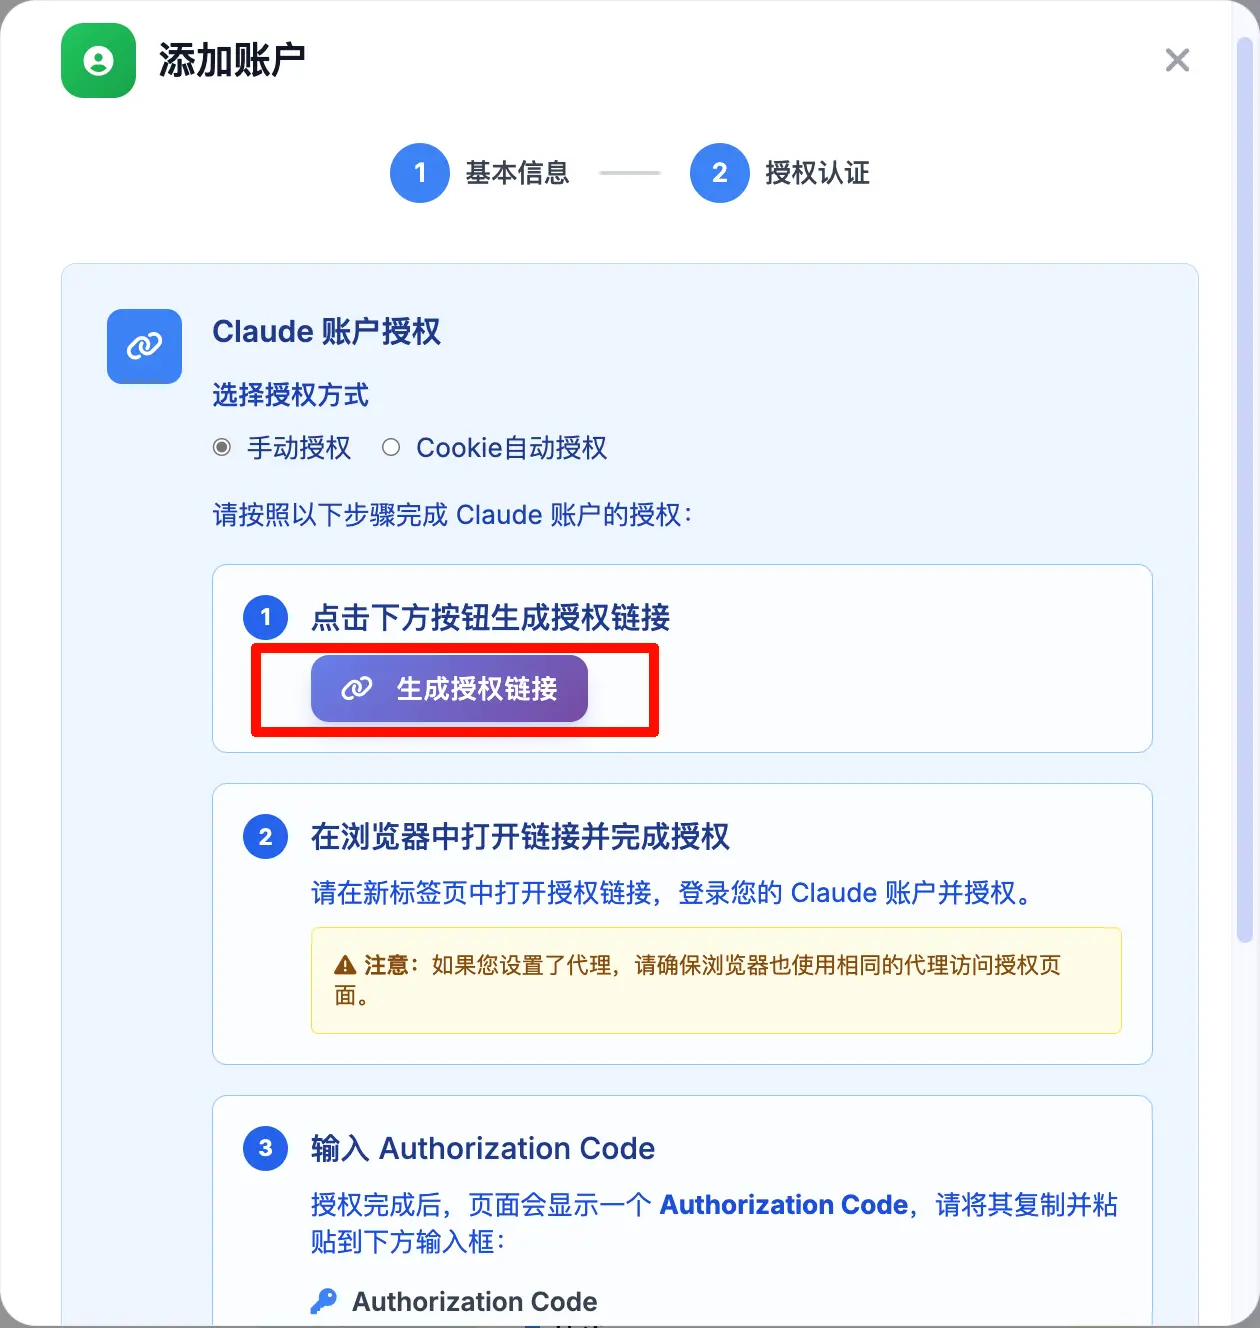
This step authorizes your Claude account to use the relay service. Click the “Generate Authorization Link” button:
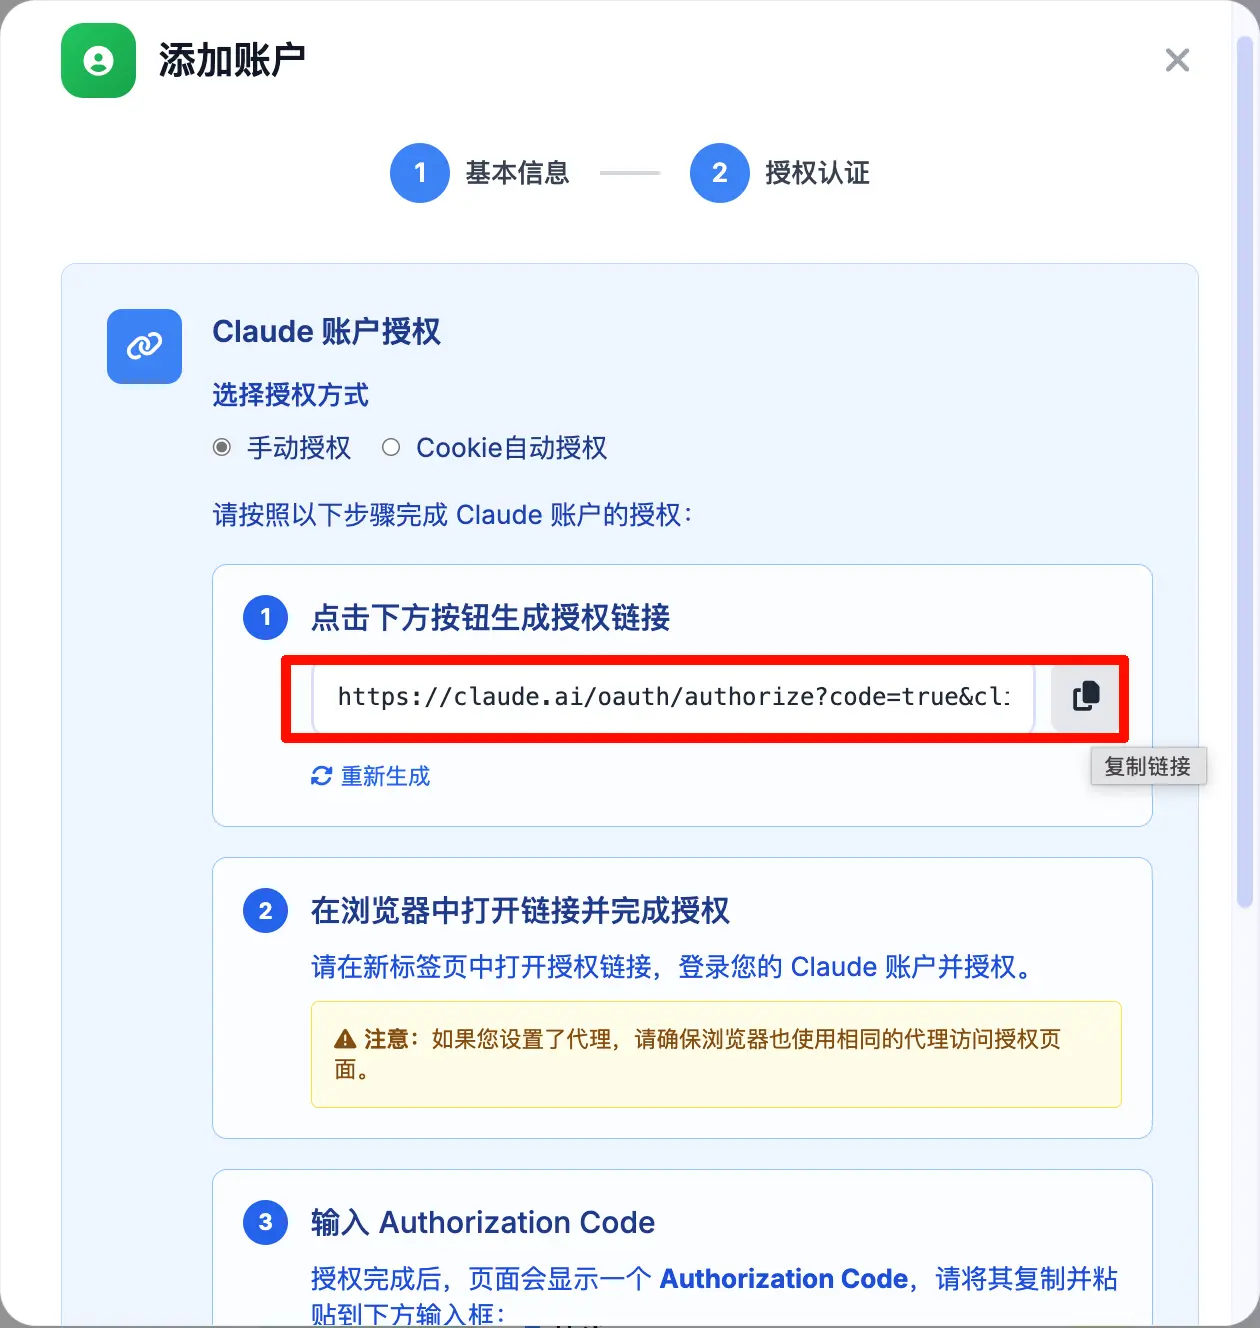
The generated link will appear in the input field, something like https://claude.ai/oauth/authorize?.... Click the copy icon on the right to copy the link.
Then open this link in your browser (remember to use a proxy):
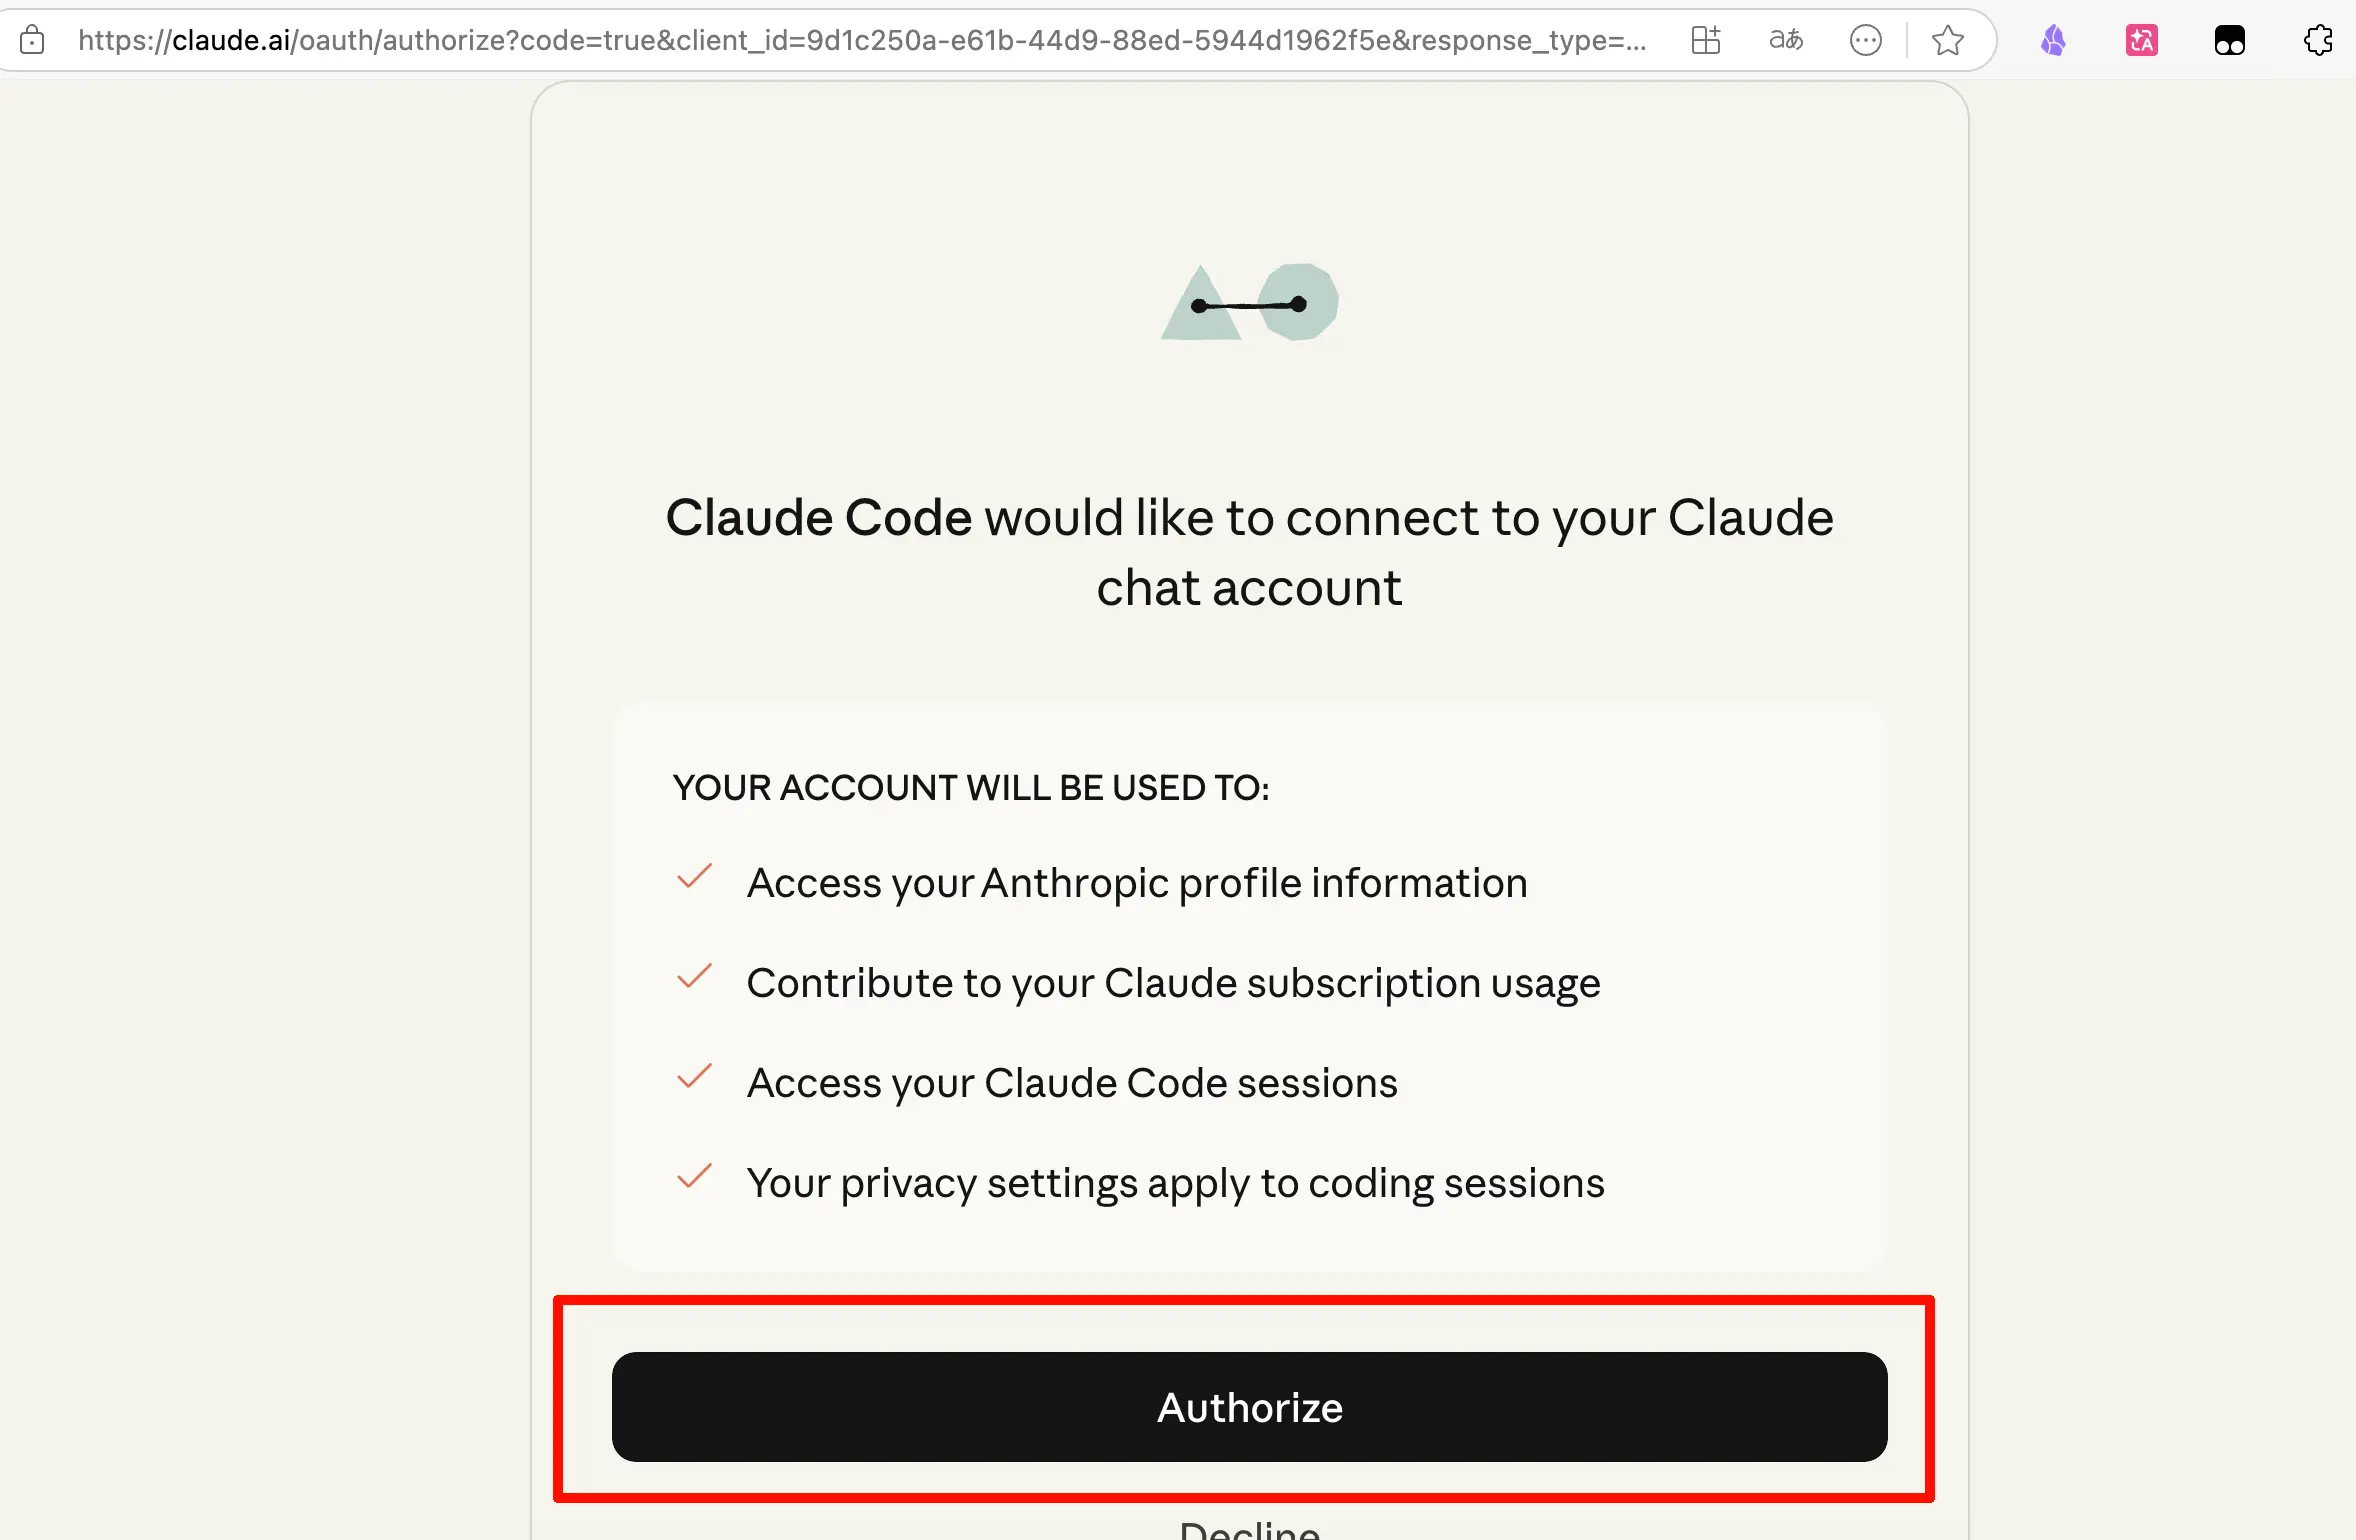
The page will display “Claude Code would like to connect to your Claude chat account”. Click the Authorize button to complete authorization.
After successful authorization, the page will give you an Authorization Code. Copy this code, paste it into the input field in the dialog, and click “Complete Authorization”.
The account is now bound.
Step 2: Create an API Key
After binding the account, click the “API Keys” tab at the top to enter API key management:
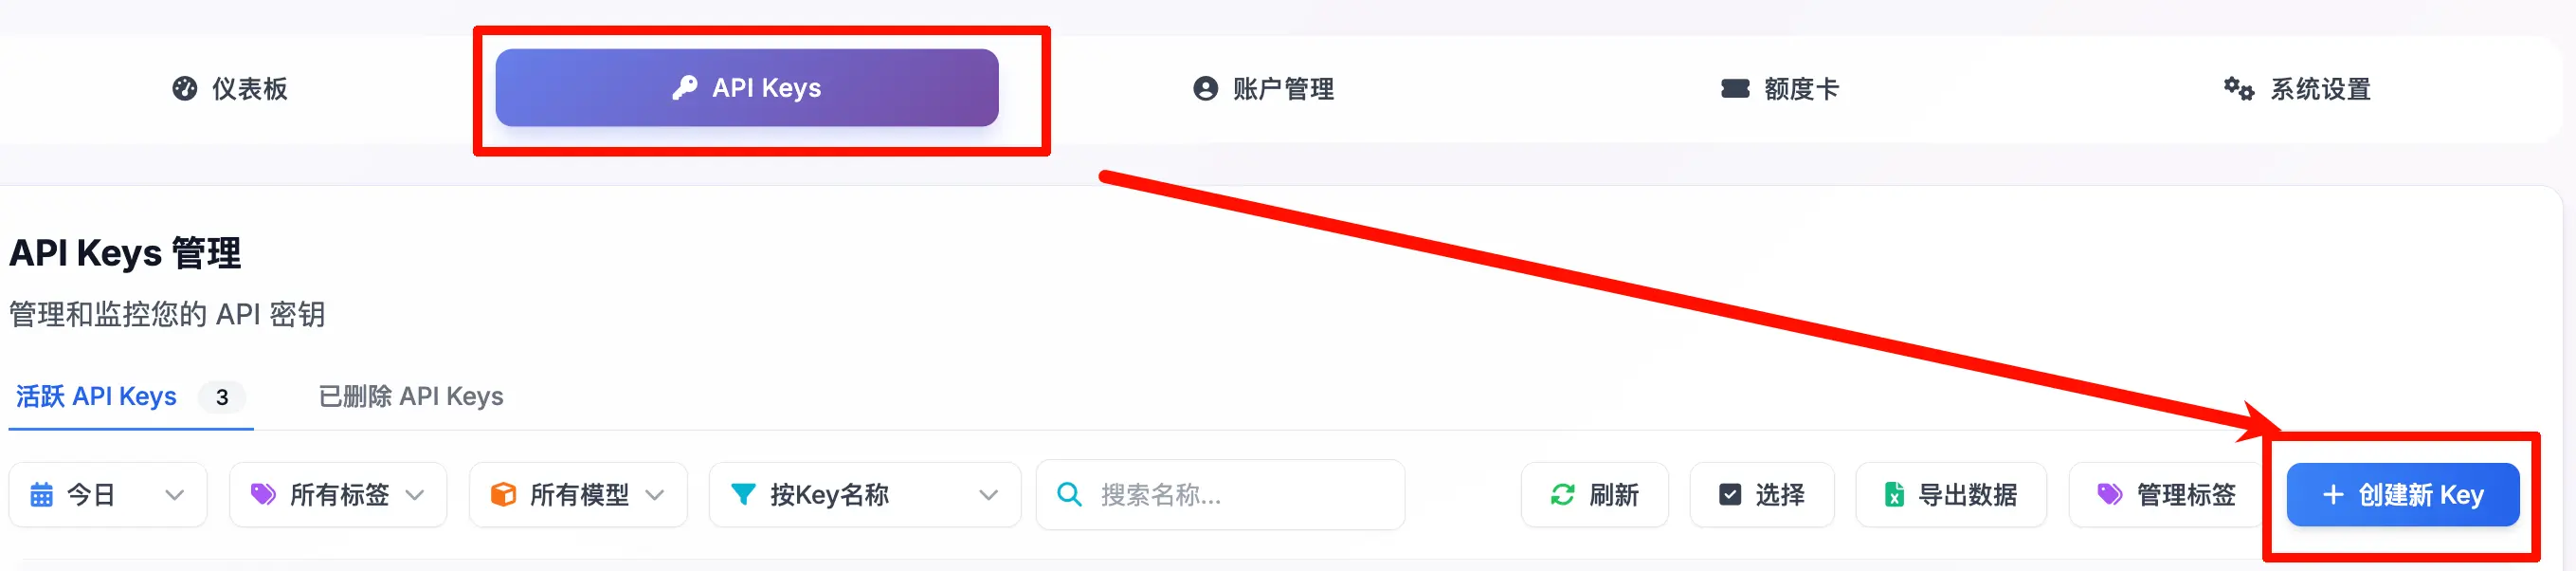
Click the “+ Create New Key” button in the top right:
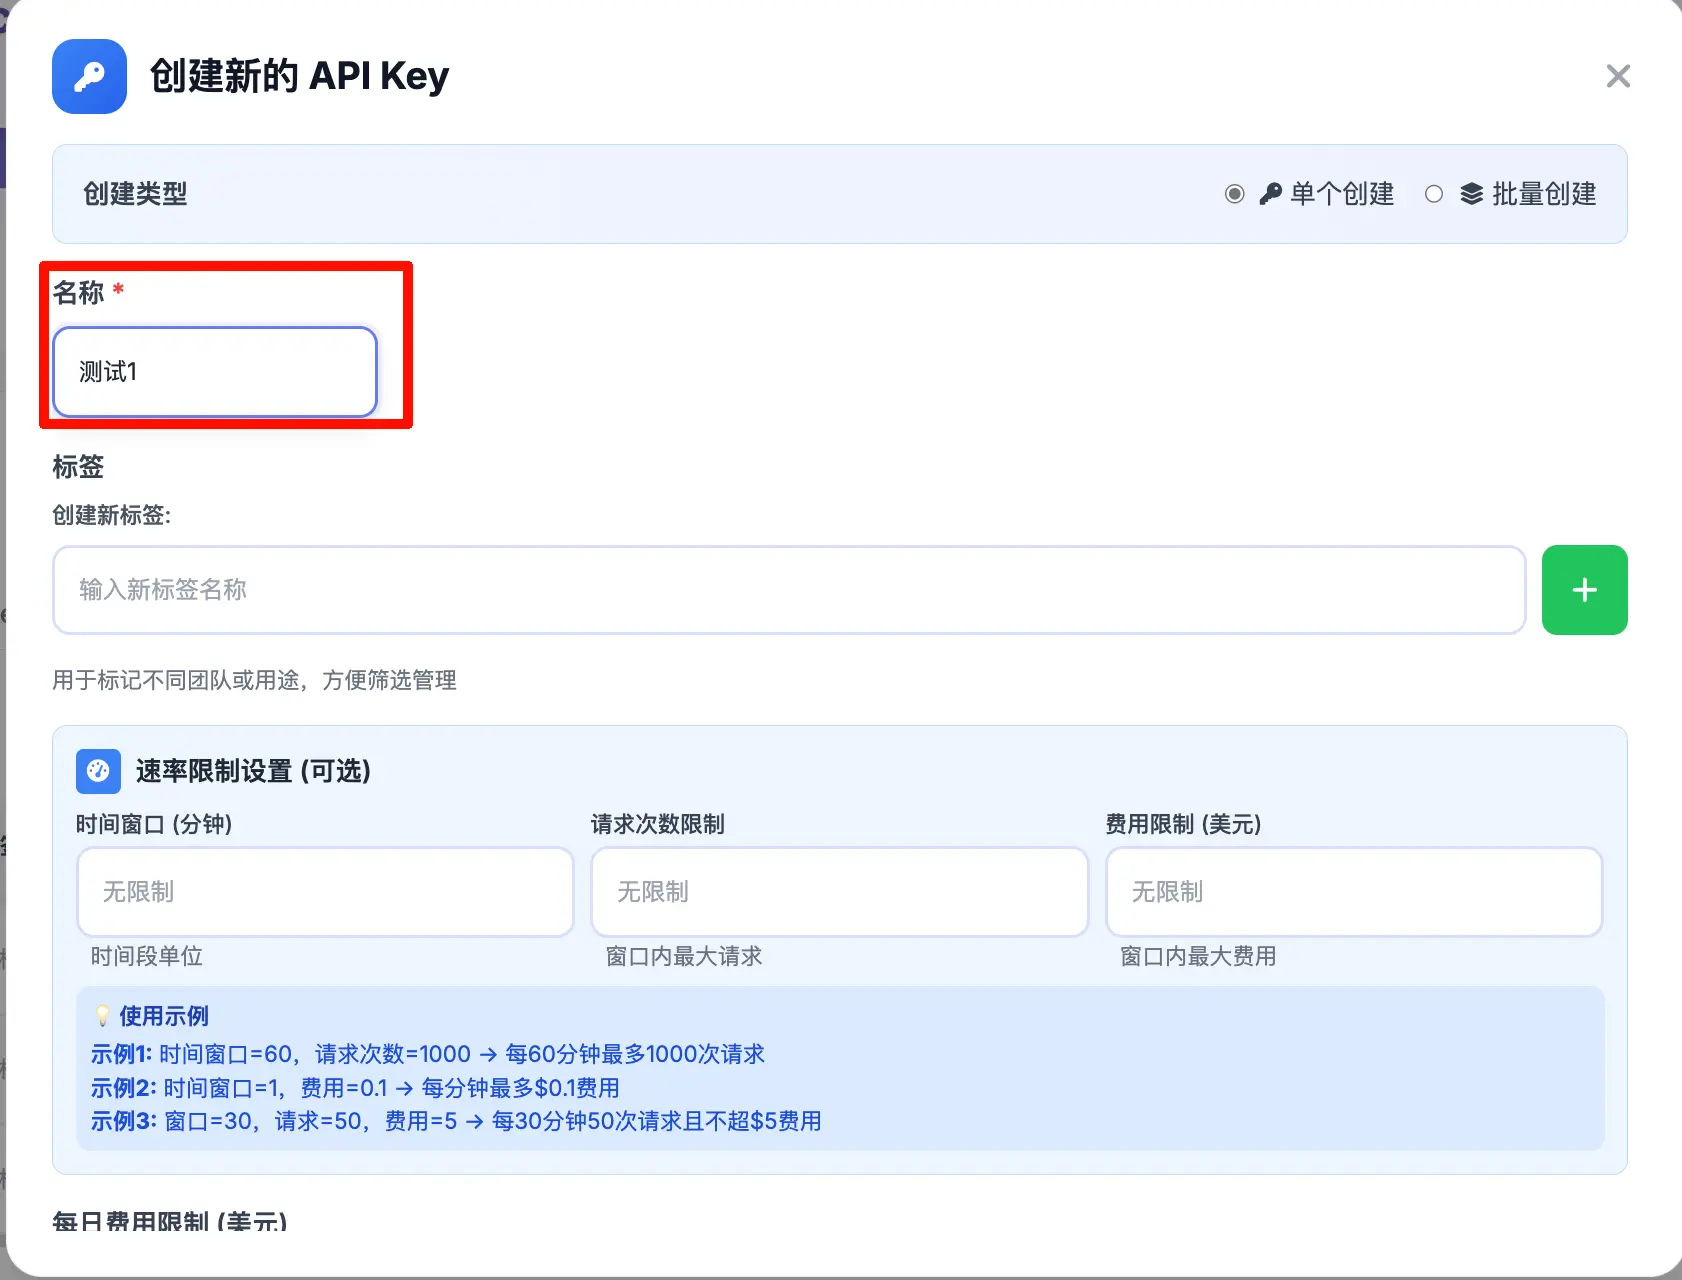
Fill in the following information:
- Name: Give this key a name, e.g., “Personal Use”, “For Family”. It’s recommended to name by person or purpose for easier management later.
- Rate Limit Settings (optional): If sharing among multiple people, you can set request frequency and cost limits for each key. Leave blank for unlimited.
After filling in, click Confirm. Upon successful creation, this dialog will appear:
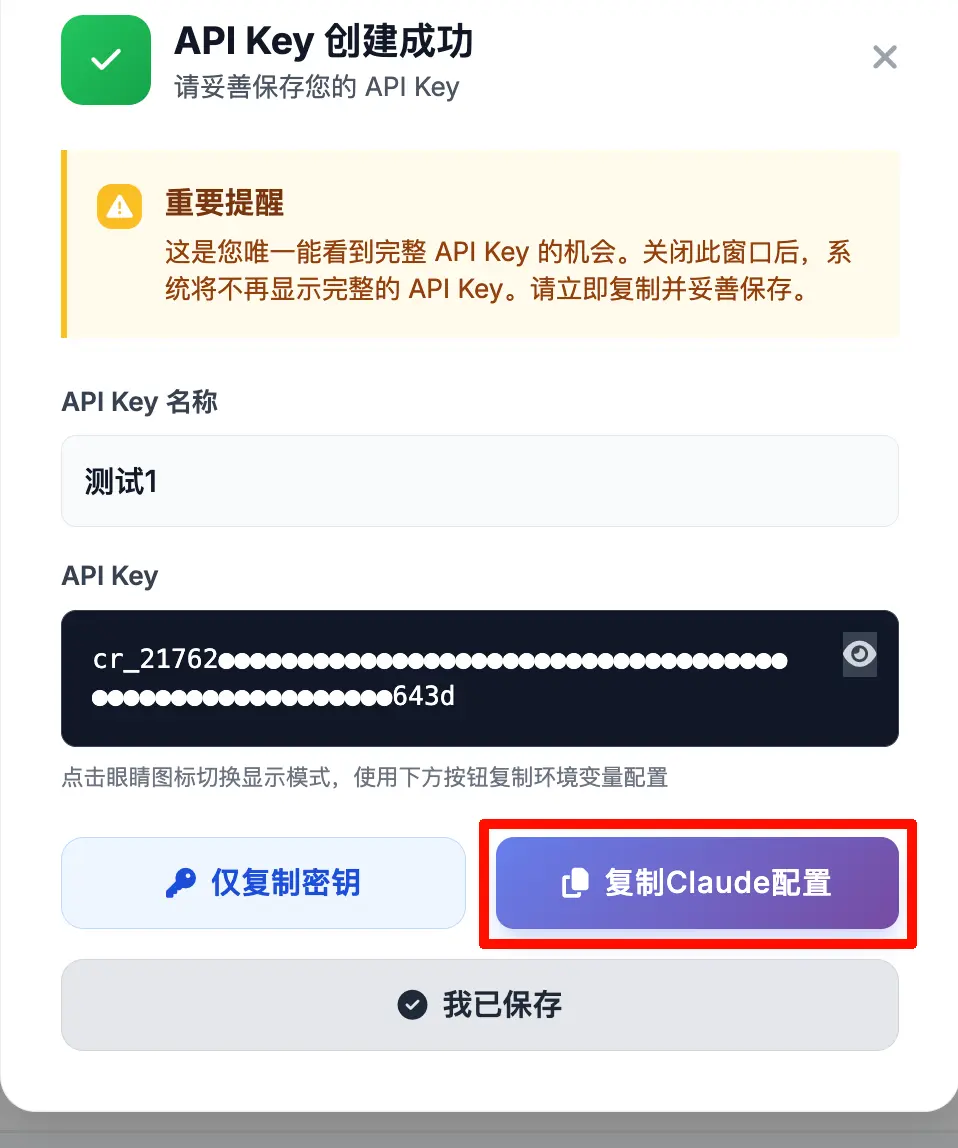
Note the important reminder: This is your only chance to see the full API key. Once you close this window, the system will not display it again.
Click “Copy Claude Configuration” to get something like:
export ANTHROPIC_BASE_URL="your_server_public_url"
export ANTHROPIC_AUTH_TOKEN="cr_217627747170e5aa5691134fab8278b0dfec1b0ac2e59345ae180dc6d5f9643d"
These are your API address and key. Save them securely.
How to Use It Next
Once you have ANTHROPIC_BASE_URL and ANTHROPIC_AUTH_TOKEN, you can use them in any API-compatible client.
For how to configure them in Claude Code, refer to the Claude Code setup guide.
I’ve been using this setup myself and haven’t had my account banned since deployment.
Summary
What you learned today:
- Why build your own relay: Fixed IP to prevent bans, multi-user sharing, and full control over data security.
- Which project to use: claude-relay-service, open-source and self-hosted.
- How to deploy: One command does it all; after installation, you get the public URL and admin password.
- Account binding process: Account Management → Add Account → Select Claude → Choose subscription type → OAuth authorization.
- API key creation process: API Keys → Create New Key → Enter name → Copy Claude configuration (shown only once!).
Key points:
- The full API key is only visible at the moment of creation—copy and save it immediately.
- Choose the correct subscription type: Max and Pro support different models; Pro does not support Opus 4.
- Remember to use a proxy during authorization; it’s best if the browser and server use the same proxy.