Now that you know what Obsidian is and why it’s recommended, let’s get started by creating your first vault.
What is a Vault?
When you open Obsidian, it asks you to select or create a Vault.
What is a vault? Simply put, it’s a folder. All your notes, attachments, and configuration are stored in this folder. A vault = an independent note space. You can think of it as separate notebooks.
If you open this folder on your computer, you’ll see a bunch of .md files and subfolders, just like any other folder. Obsidian just adds a nice interface and powerful features on top of this folder.
Why Create Multiple Vaults?
Obsidian supports creating multiple vaults. You might ask: why not put everything in one vault?
You can put everything in one vault, and for most people, one vault is enough. But there are scenarios where separate vaults make sense:
- Writing a novel: one vault per novel. That way, backlinks and tags are specific to that novel and won’t mix with other notes.
- Separating work and personal life: one vault for work notes, one for personal notes. When you change jobs, you can delete the work vault without affecting personal content.
- Shared scenarios: family shared vault, team project vault, isolated from personal notes.
Recommendation for beginners: start with one vault. Once you’re comfortable and feel the need to split, you can do it then.
I personally use a single main vault, with folders to organize different types of content: inbox, notes, templates, output, archive… one vault handles everything.
How to Create a Vault
Apple Ecosystem Users (Recommended)
If you use an iPhone/iPad and a Mac, here’s the easiest way:
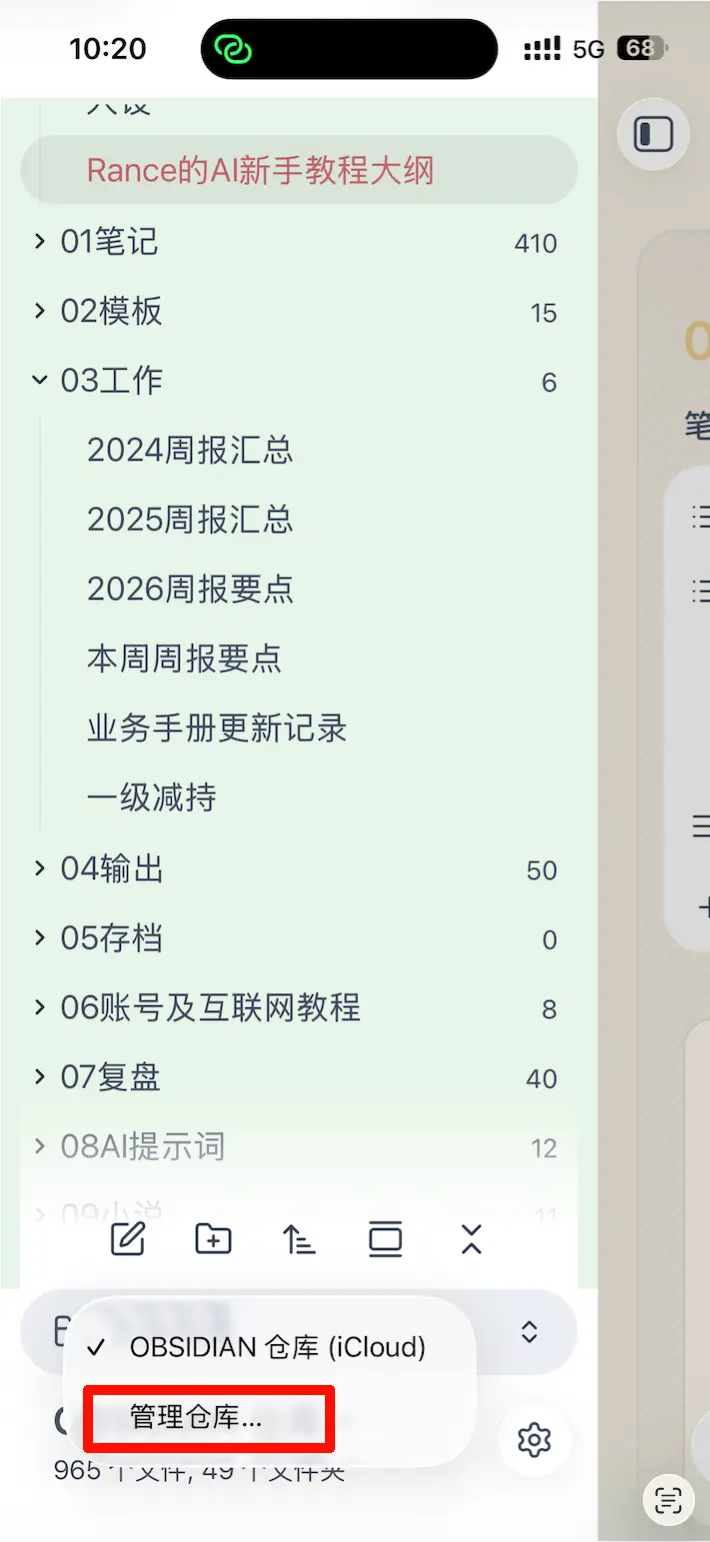
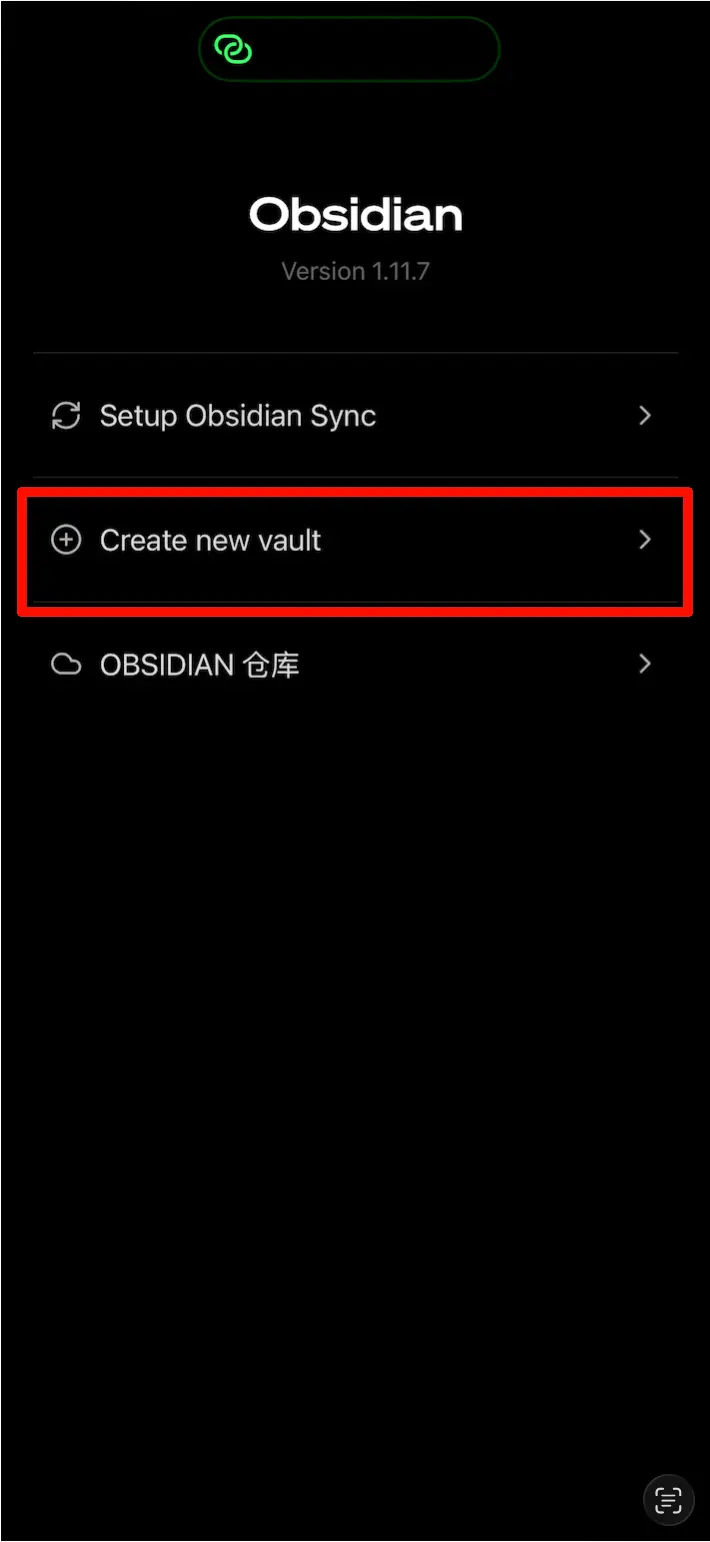
Step 1: Create the vault on your phone or iPad.
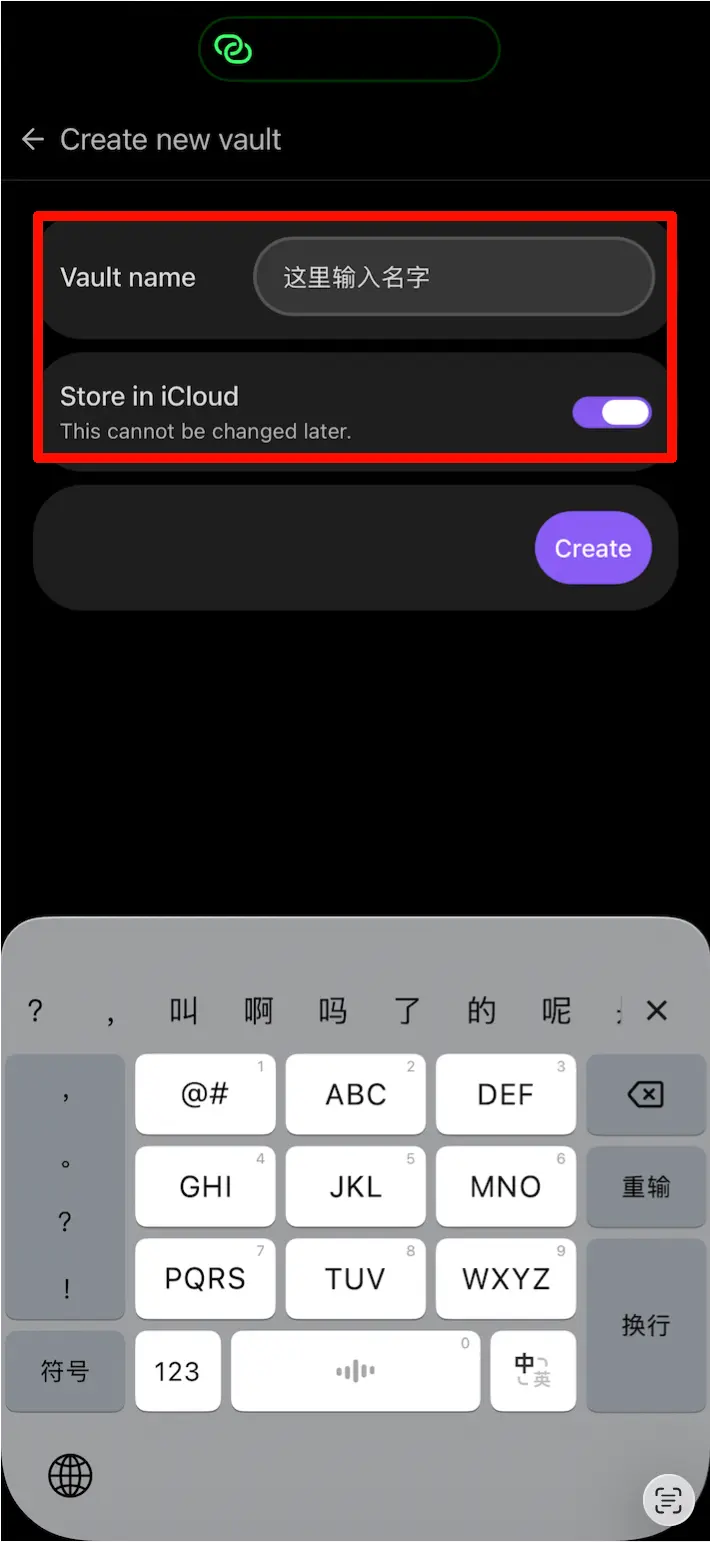
Open Obsidian on iOS, tap “Create new vault”, give it a name. The key is — choose iCloud sync by default, so your vault is automatically stored in iCloud Drive.
 Step 2: Open it on your Mac.
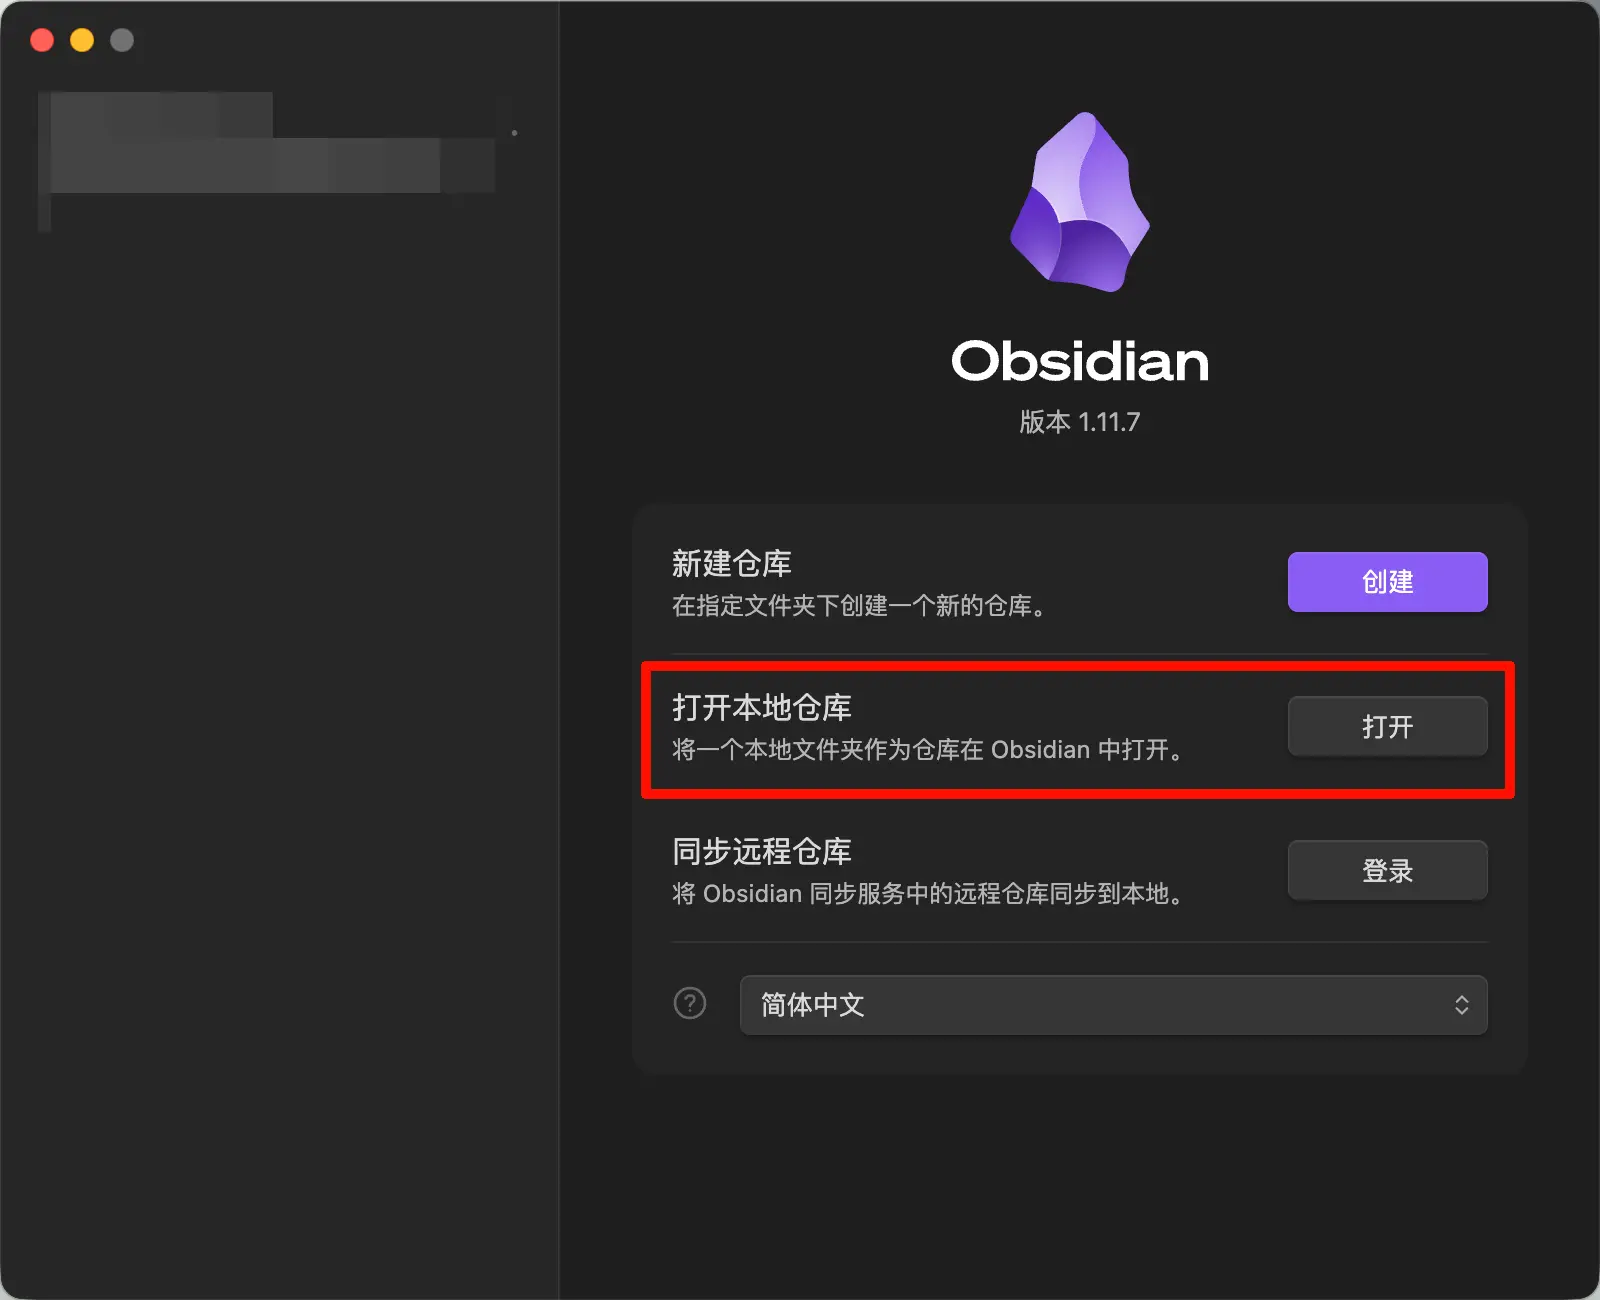
Open Obsidian on Mac, select “Open existing vault”, find the vault folder you just created in iCloud Drive, and open it.
 Why do it this way? Because a vault created on iOS is automatically placed in the Obsidian folder in iCloud Drive, and sync is enabled by default without any manual setup. If you create it on Mac first, you’d have to manually move the folder to the iCloud directory, adding an extra step.
Once set up, notes written on your phone sync instantly to your Mac, and changes made on your Mac appear immediately on your phone.
Windows / Android Users
Open Obsidian, click “Create new vault”, and choose a location you can easily find.
If you want multi-device sync, place your vault folder in a OneDrive sync directory. Same principle as iCloud — essentially, put the folder in a cloud drive directory and let the cloud drive handle the rest.
What Does the Obsidian Interface Look Like?
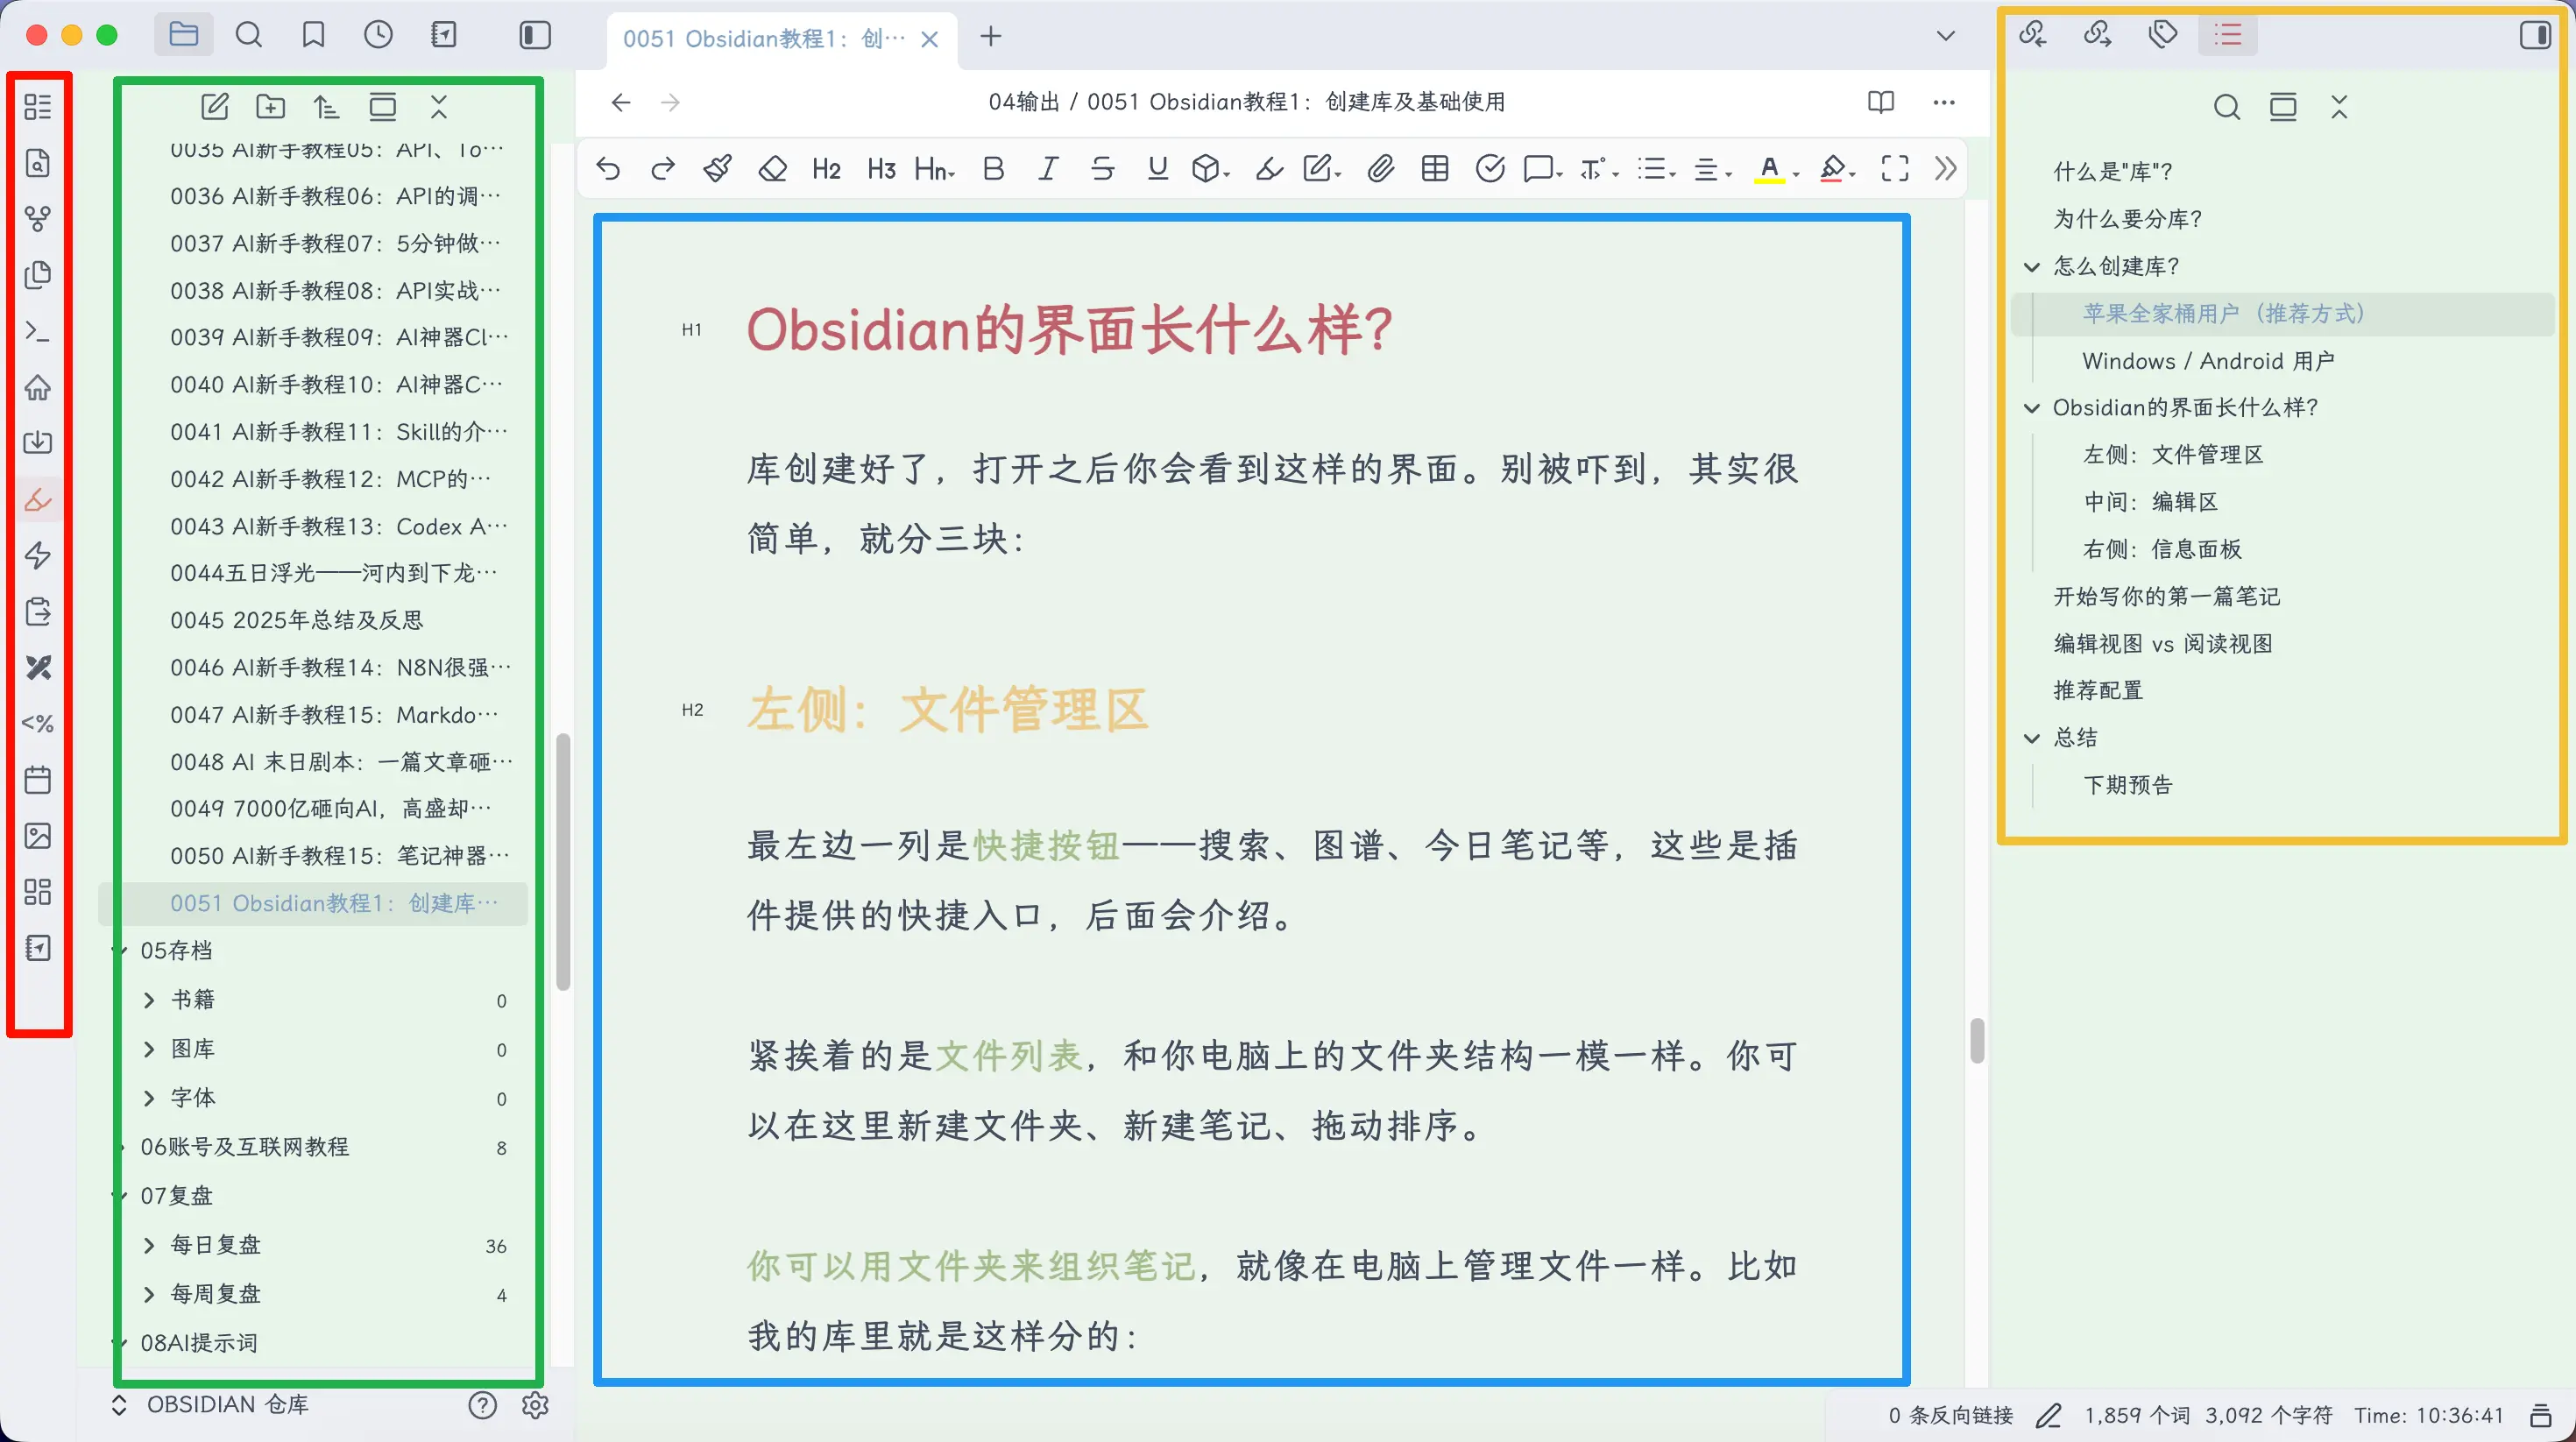
Once your vault is created, open it and you’ll see the interface. Don’t be intimidated — it’s simple, with three main areas:
Left Sidebar: File Management
The leftmost column contains shortcut buttons — search, graph view, daily note, etc. These are quick entries provided by plugins, which we’ll cover later.
Next to it is the file list, identical to the folder structure on your computer. You can create new folders, new notes, and drag to reorder.
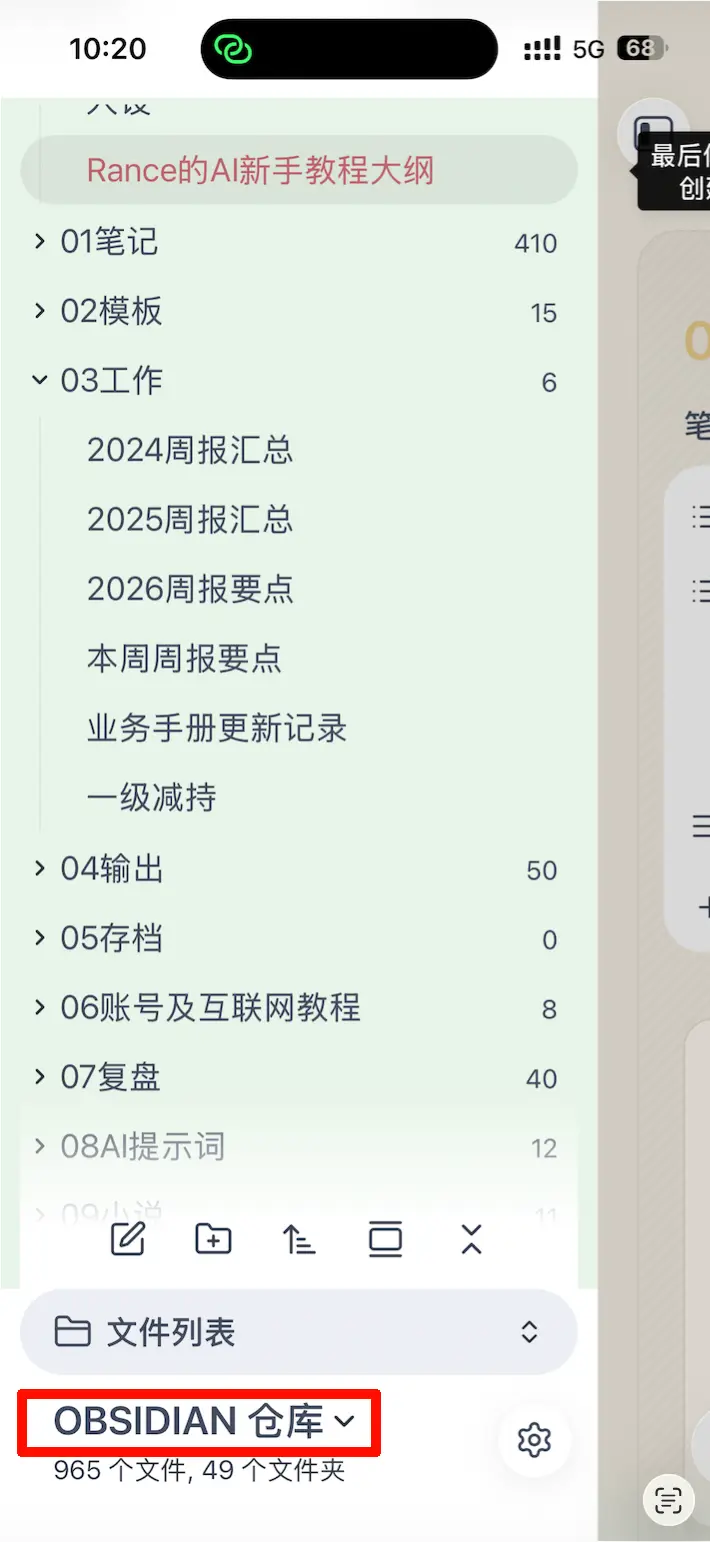
You can organize notes with folders, just like managing files on your computer. For example, my vault is divided like this:
00 Inbox— temporary material thrown in01 Notes— formal notes04 Output— finished articles05 Archive— infrequently used but kept
You don’t need to copy my structure — organize according to your own habits. The key is: don’t get hung up on categorization, just start writing.
Center: Editor Area
This is where you write notes, and where you’ll spend most of your time.
Open a note (or create a new one) and start writing directly. All the Markdown syntax you learned earlier works here — # for headings, ** for bold, - for lists, [[]] for backlinks.
Above the editor, there’s a file path showing which folder the current note is in.
Right Sidebar: Info Panel
The right sidebar is collapsed by default. When opened, you’ll see several tabs:
- Backlinks: shows which notes reference the current note (the core of backlinks)
- Tags: list of tags in the current note
- Outline: auto-generated table of contents based on heading levels, easy for navigation
You might not use the right panel much at first. That’s fine — as your notes grow and you start using backlinks, the backlinks panel will become very useful.
Write Your First Note
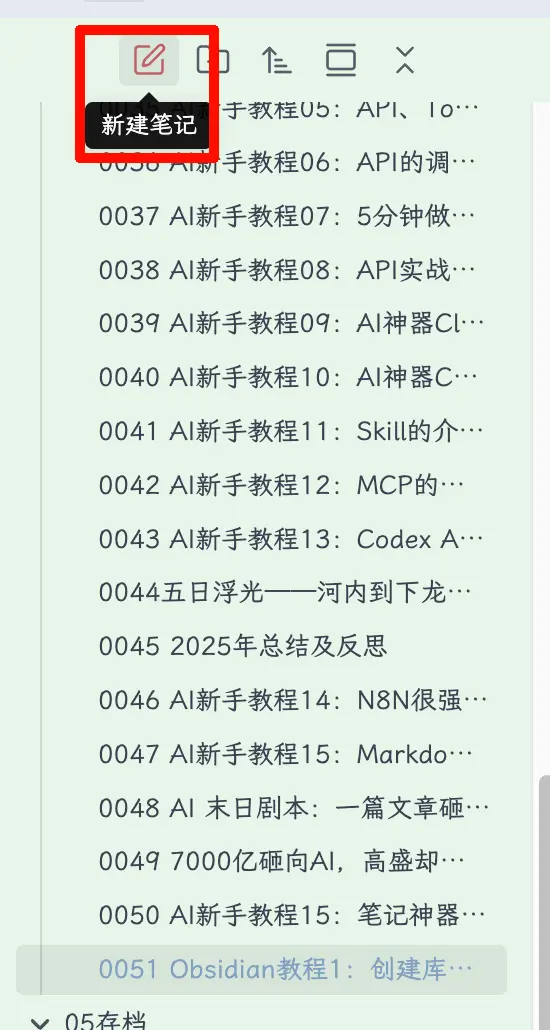
Click “New note” in the top left (or press Ctrl/Cmd + N), and a blank note appears.
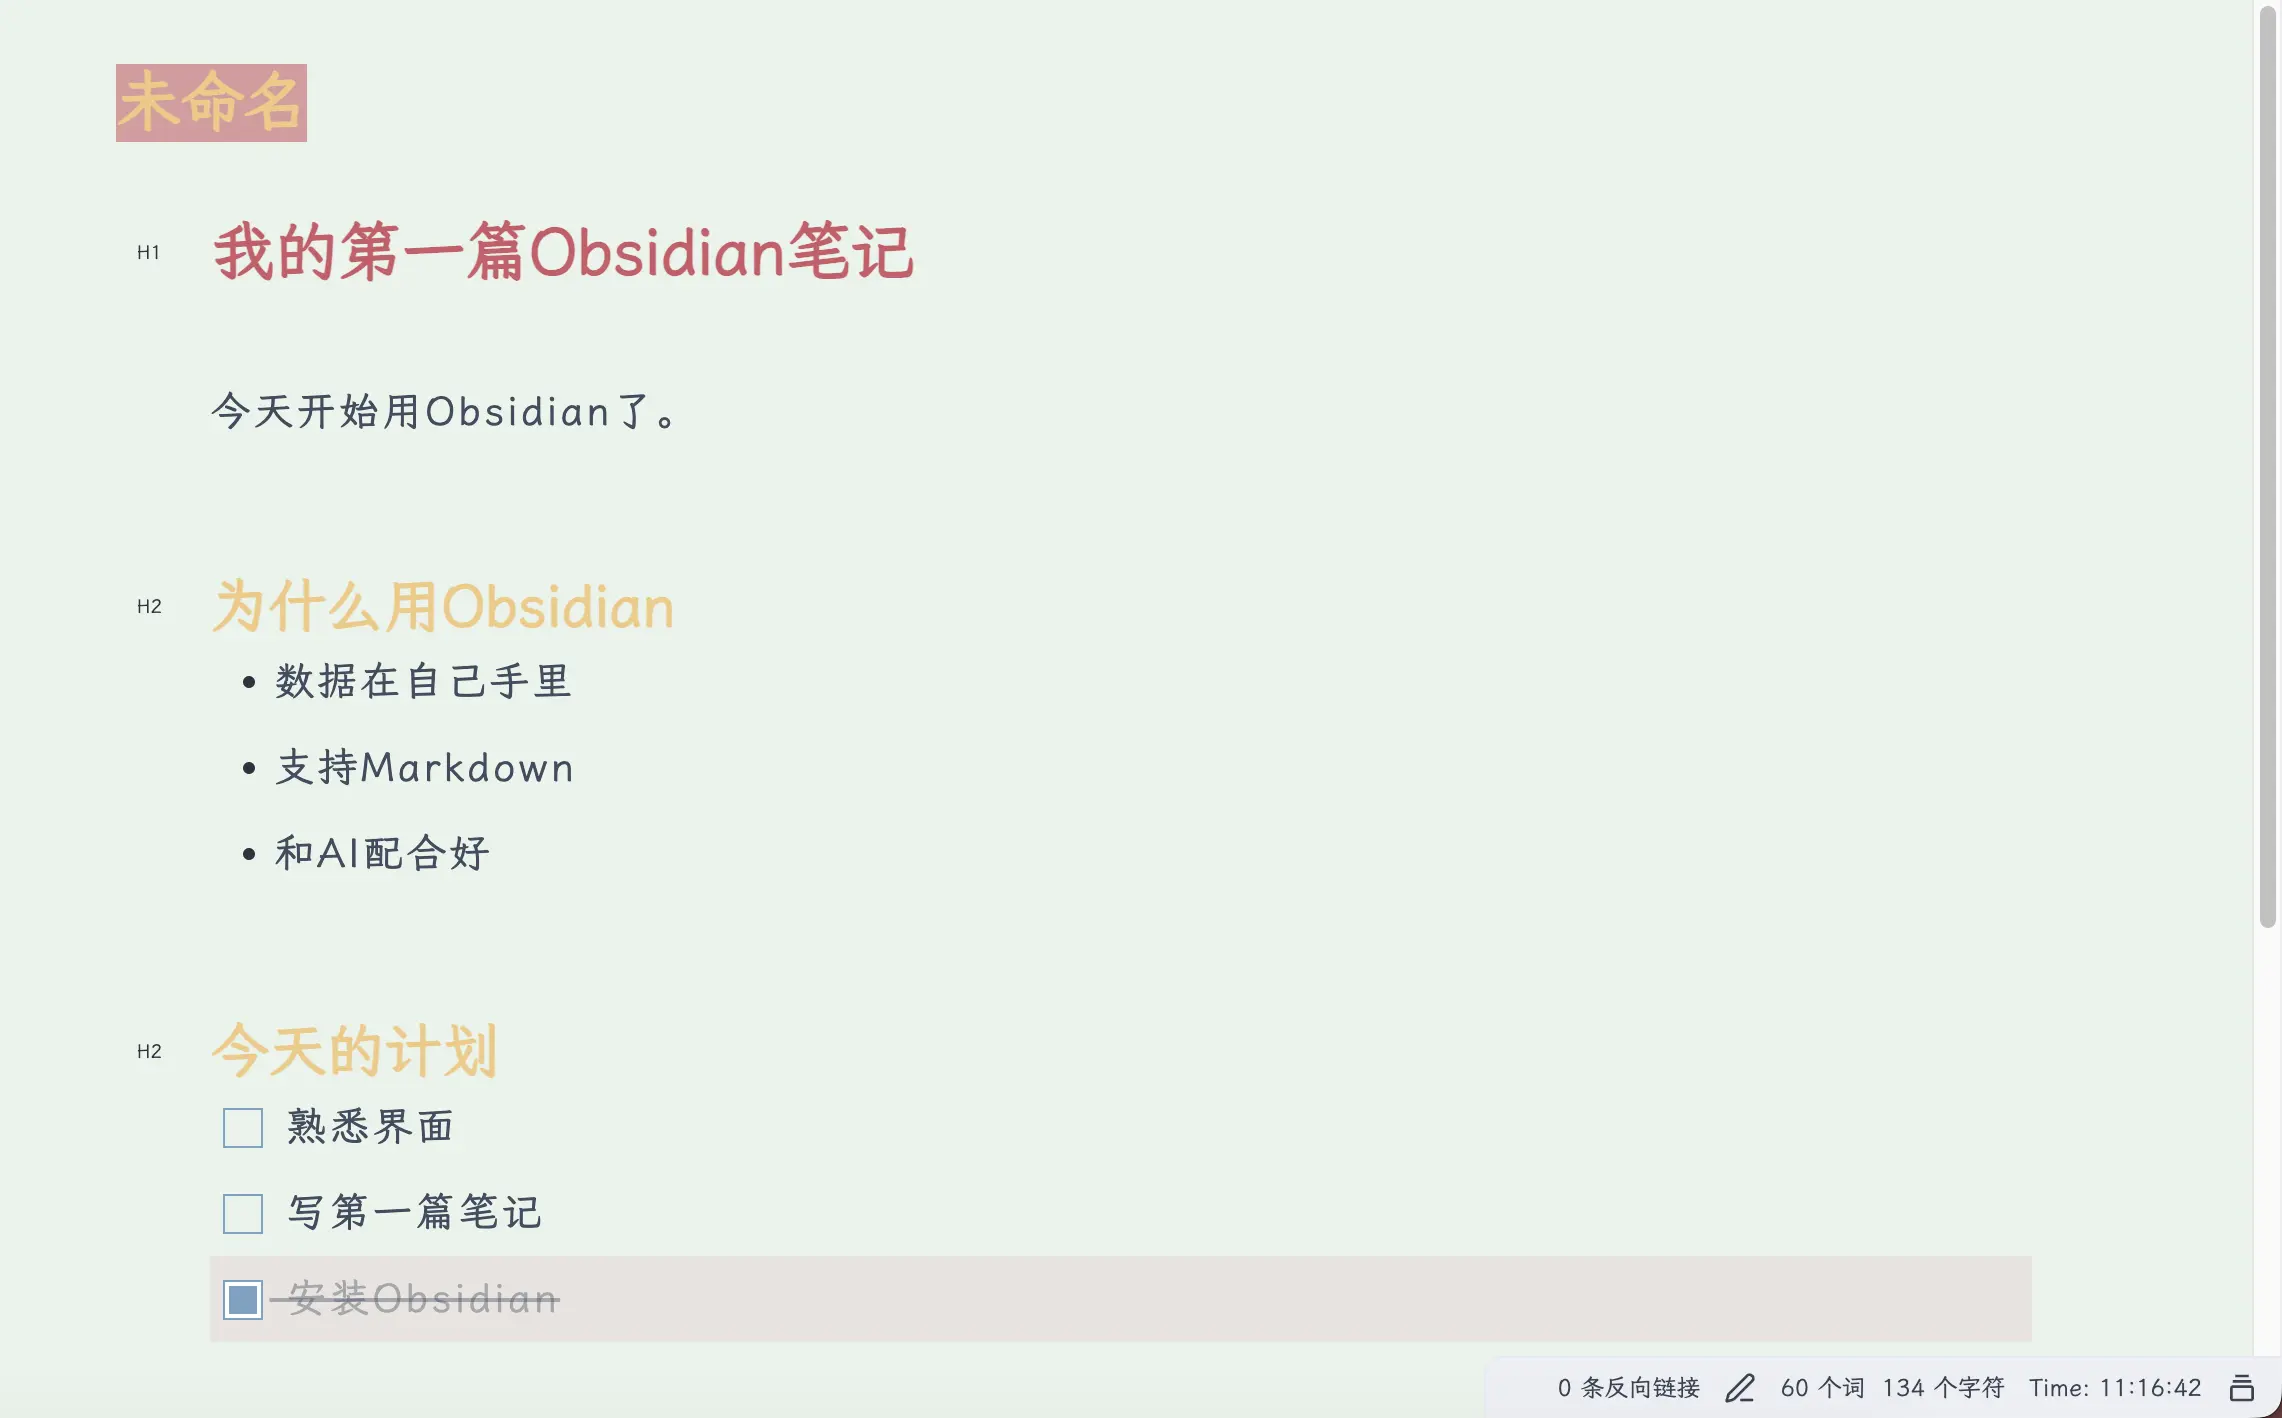
Give it a title, then start writing. For example:
# My First Obsidian Note

Started using Obsidian today.

## Why Obsidian
- Data is in my own hands
- Supports Markdown
- Works well with AI

## Today's Plan
- [ ] Familiarize with the interface
- [ ] Write the first note
- [x] Install Obsidian
After writing, the note is automatically saved — no need to press Ctrl+S, Obsidian saves in real time.
Connect Your Notes with Backlinks
We introduced the concept of backlinks earlier; now let’s see how to use them.
Link to a whole note: Type [[ and Obsidian will automatically show a list of notes to choose from. Select one and a backlink is created; click it to jump to that note.
Today I read [[Feynman Learning Method]], the core idea is to test yourself by teaching others.
Link to a specific section: If you don’t want to link the whole note, but only a section under a heading, add # after the note name and select the heading:
See [[Feynman Learning Method#Specific Steps]], the first step is to choose a concept.
Clicking this link will jump directly to the “Specific Steps” heading in the “Feynman Learning Method” note.
This is especially useful for organizing knowledge and concepts. For example, if you’re studying economics, you can create separate notes for “GDP”, “Inflation”, and “Interest Rate”, then use backlinks to reference them wherever you use these concepts. Over time, your vault becomes your own personal encyclopedia — each concept has an explanation, concepts are interconnected, and you can click to jump and review.
Edit View vs. Reading View
You may notice a toggle button (book icon) in the top right corner that switches between two views:
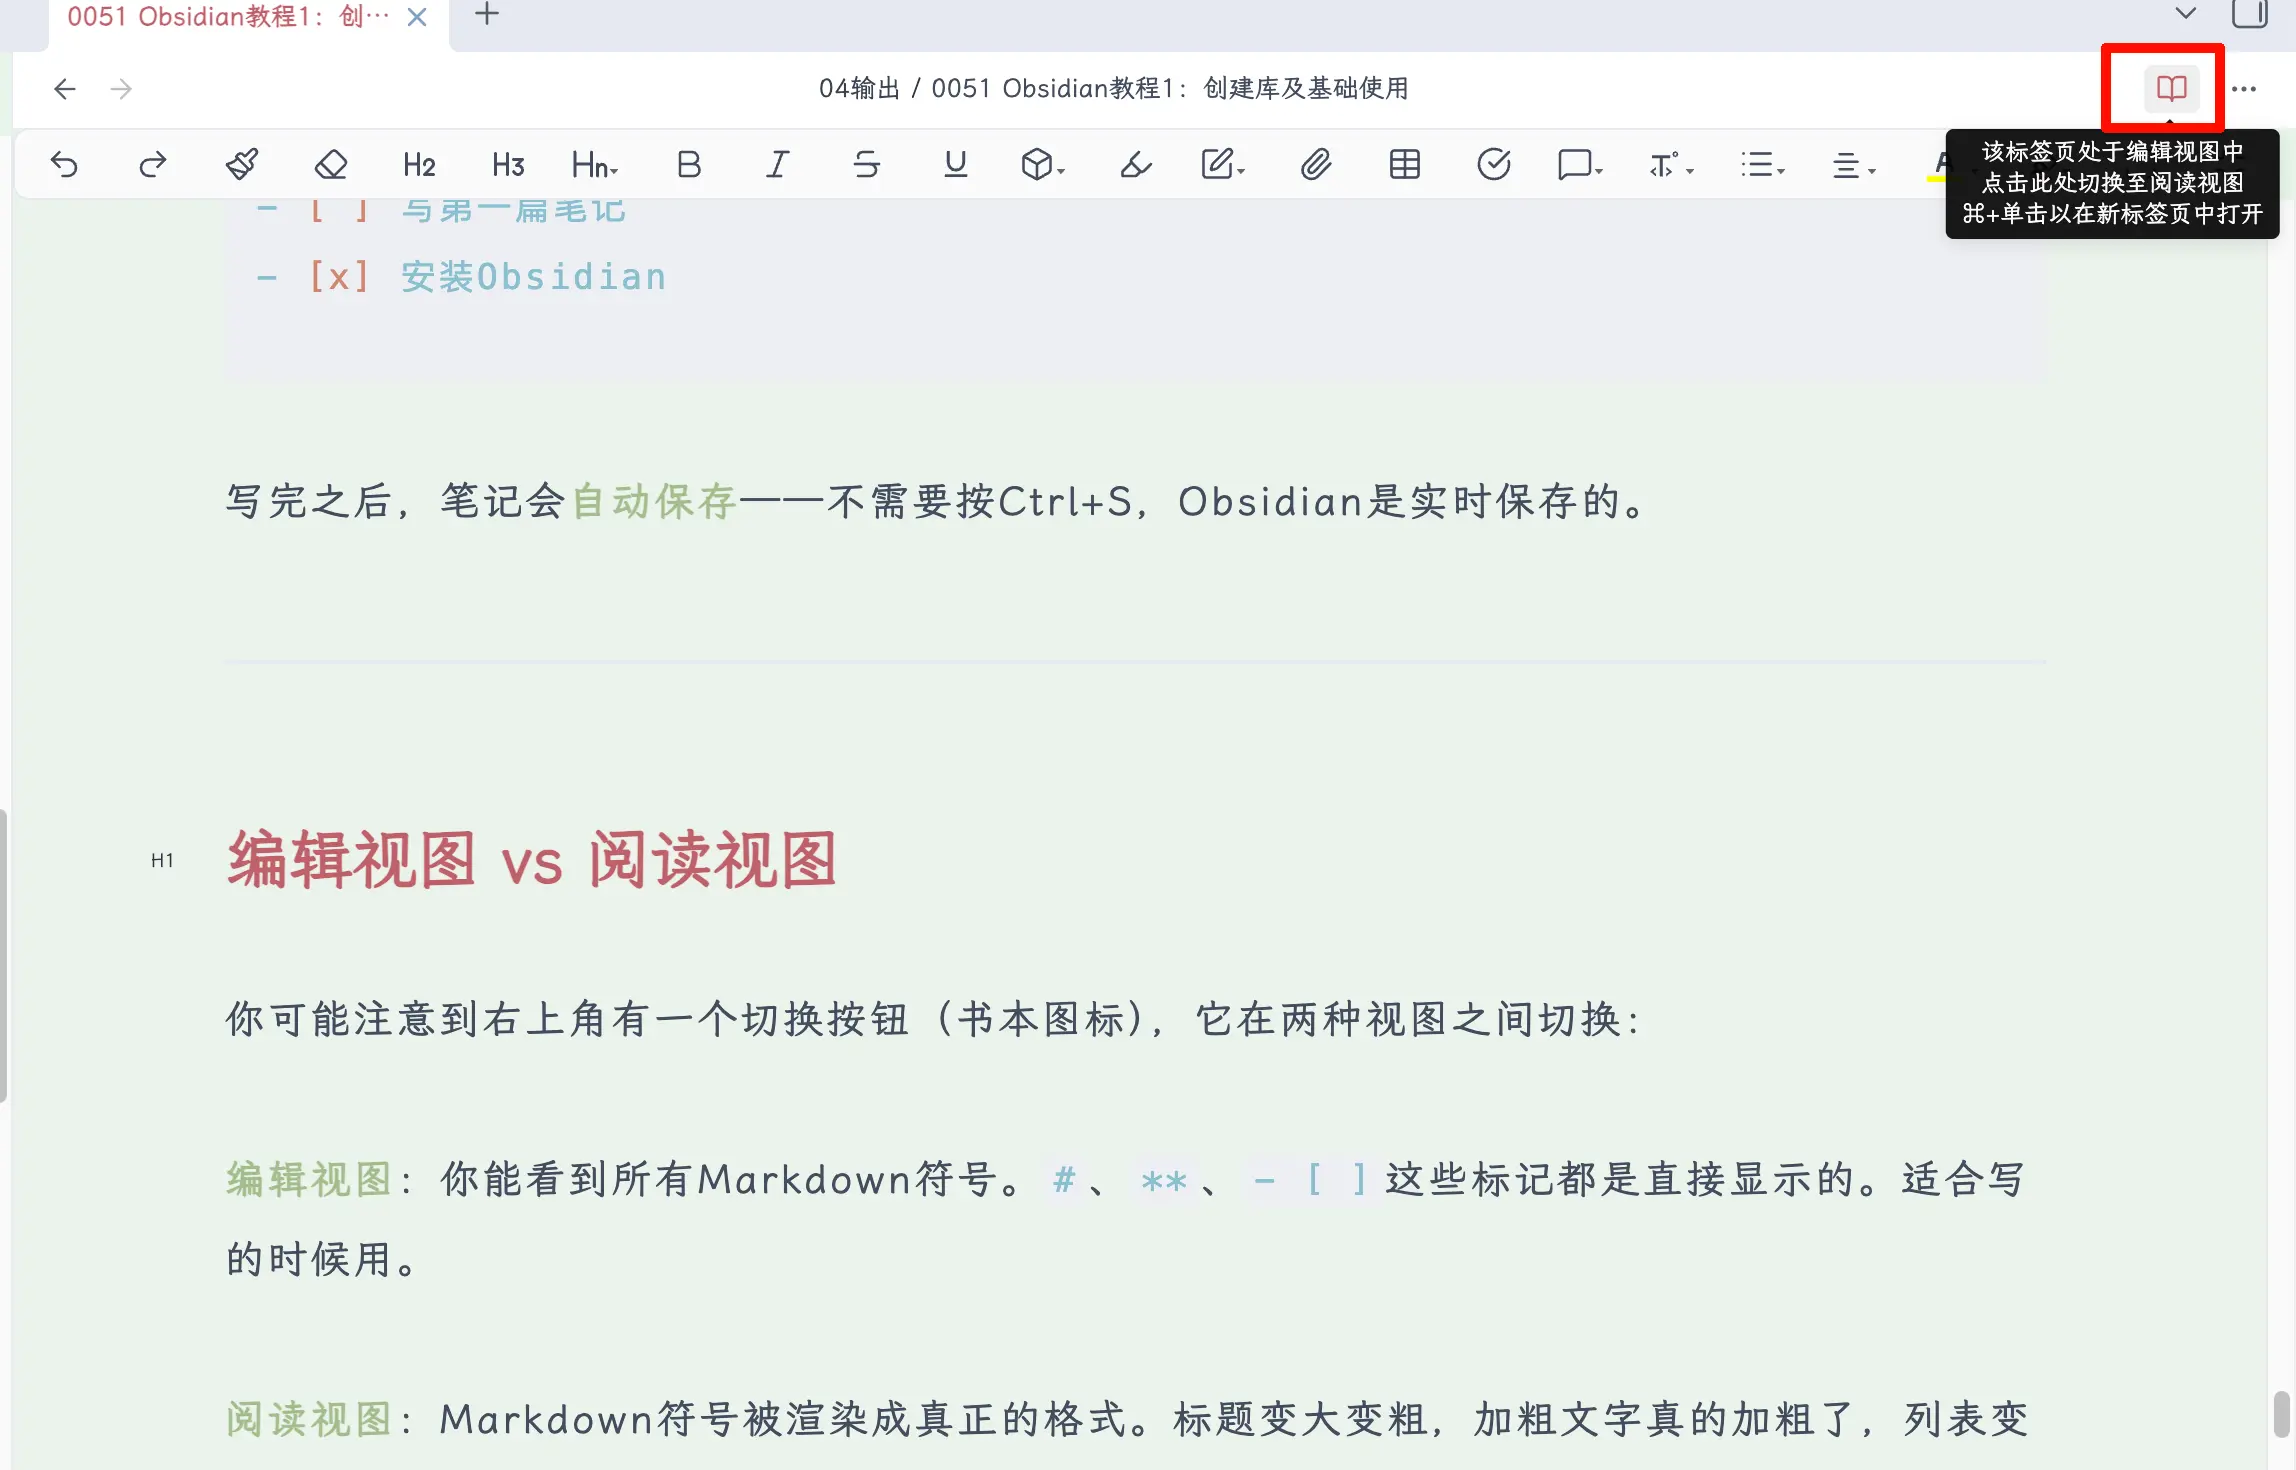
Edit View: You see all Markdown symbols. #, **, - [ ] are displayed as-is. Good for writing.
Reading View: Markdown symbols are rendered into actual formatting. Headings become larger and bold, bold text is actually bold, lists become beautiful lists. Good for reading.
There’s also an intermediate state called Live Preview — it renders as you write. The line where your cursor is shows raw Markdown, while other lines are rendered. Recommended for beginners as it balances editing and reading.
In Settings → Editor → Default editing mode, you can choose “Live Preview” or “Source mode”. I recommend selecting “Live Preview”.
How to Insert Images
Notes often need images. Inserting images in Obsidian is very simple:
Method 1: Direct paste. After taking a screenshot, press Ctrl/Cmd + V to paste into the editor, and the image is inserted.
Method 2: Drag and drop. Drag an image file from a folder directly into the editor.
After insertion, you’ll see something like this in the editor:
![[screenshot-2026-02-27.png]]
This is Obsidian’s image syntax — like backlinks, it uses ![[]] to wrap the filename. In Reading View, the image displays normally.
Where Are Images Stored?
This is a common point of confusion for beginners. When you paste an image, Obsidian automatically saves it to your specified attachment folder.
By default, images are dumped in the vault root directory, which can get messy over time. It’s recommended to set up a dedicated attachment folder to store all images, audio, PDFs, and other attachments in one place.
Recommended Attachment Settings
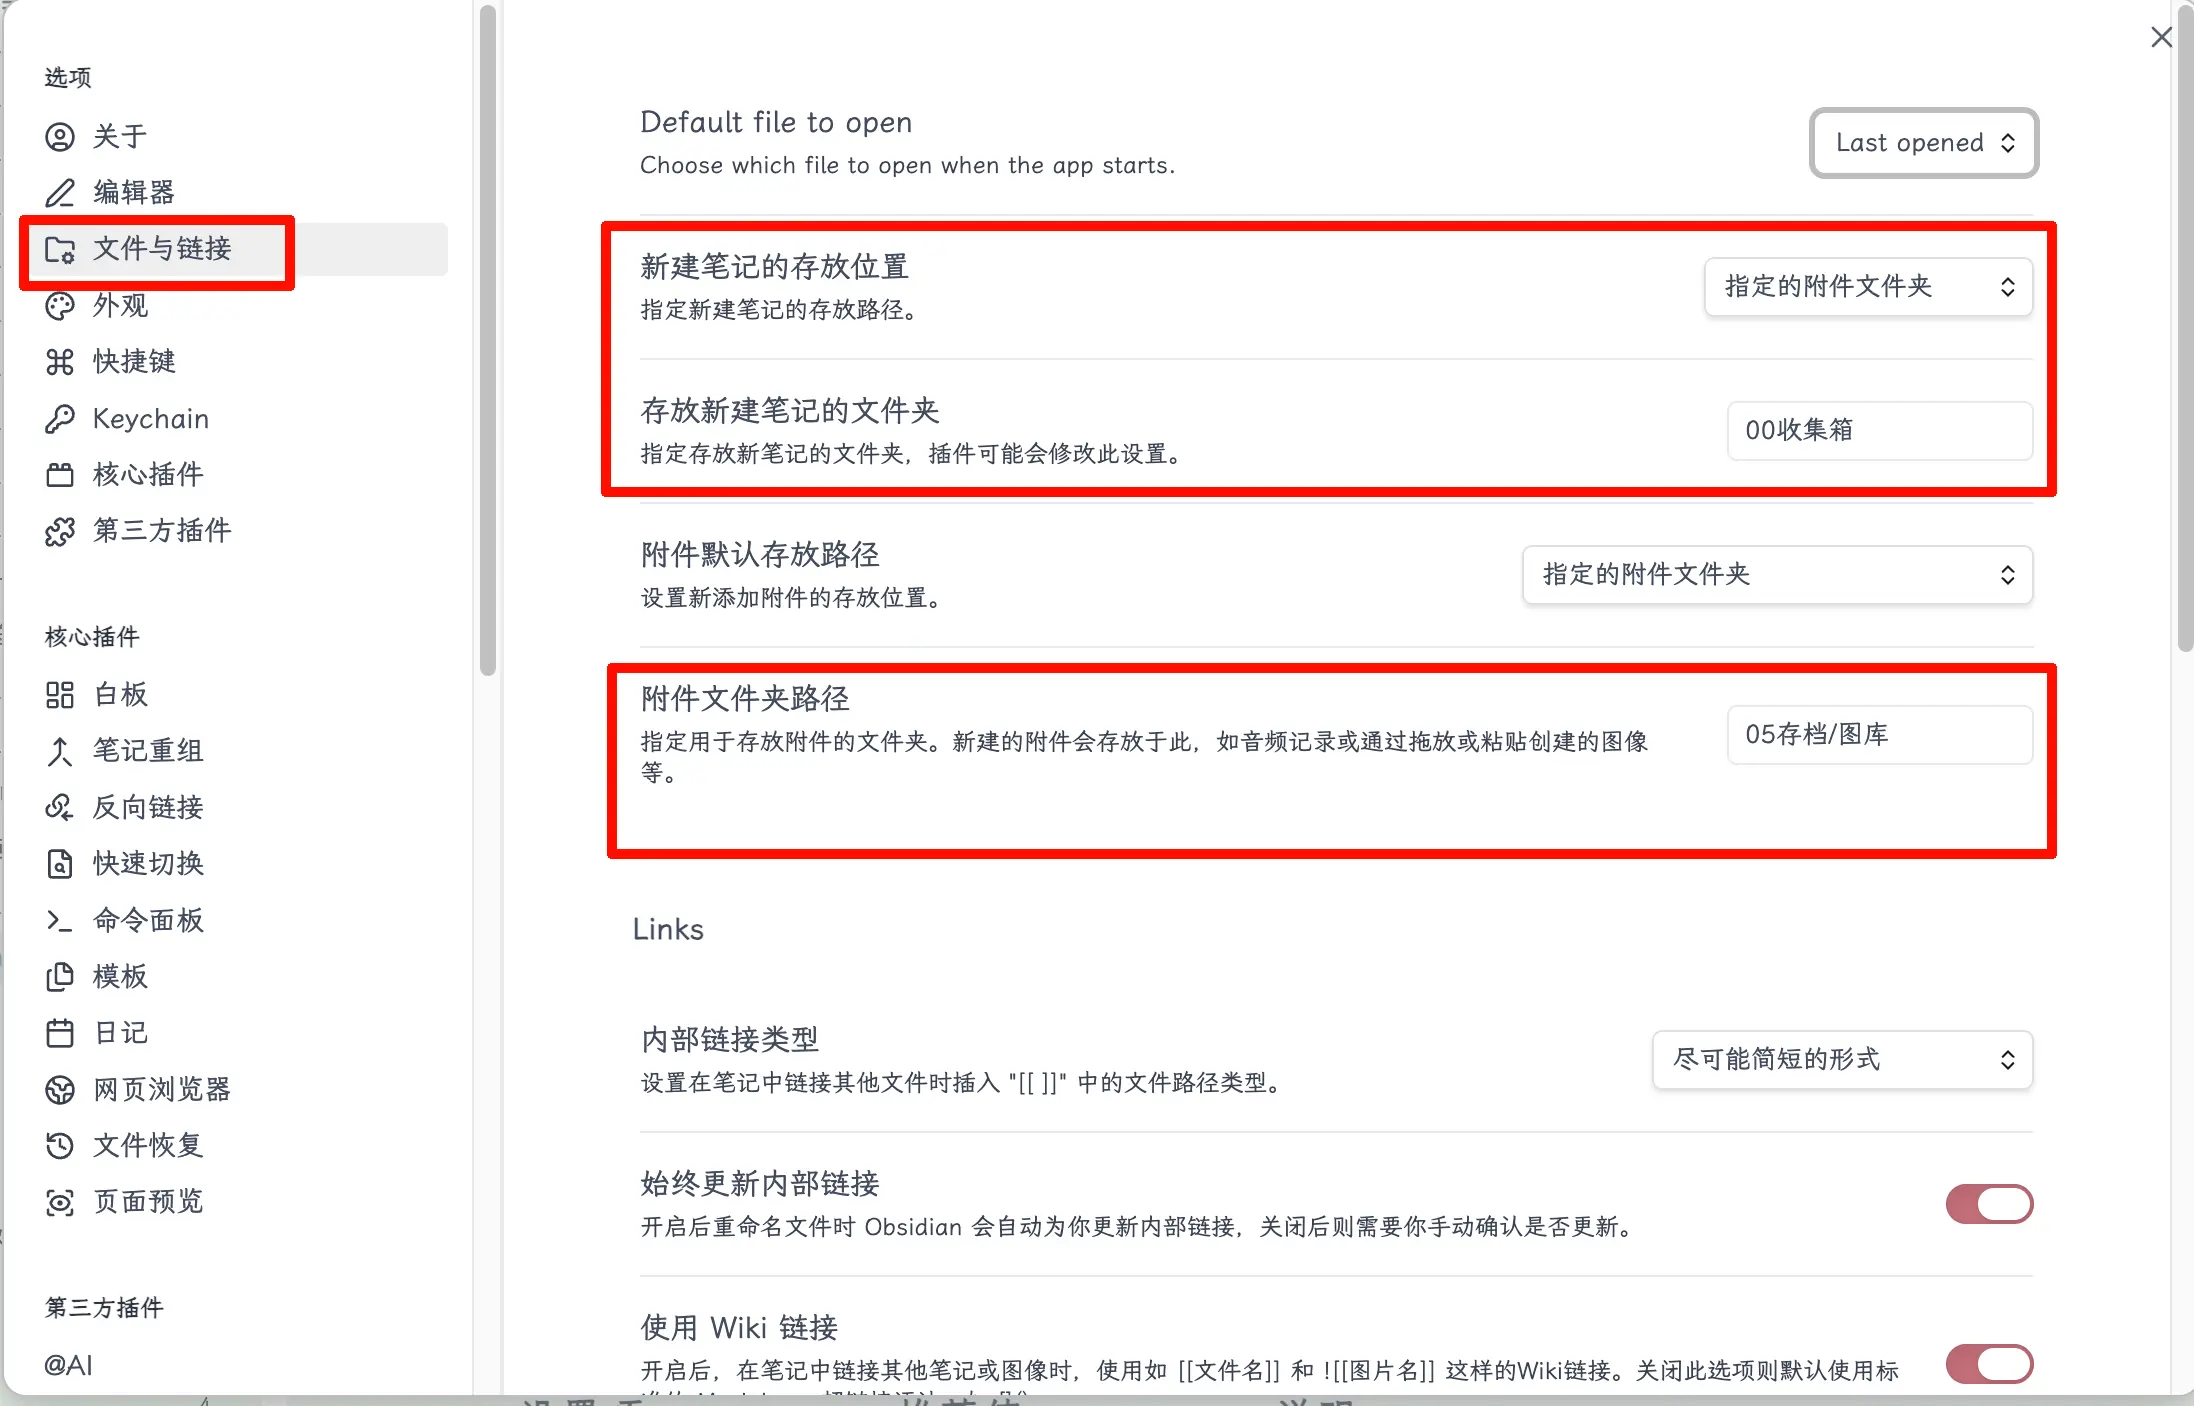
Open Settings → Files & Links, and configure as follows:
| Setting | Recommended Value | Description |
|---|---|---|
| Default location for new notes | Specified folder for attachments | New notes are placed in a designated folder |
| Folder to store new notes | 00 Inbox |
New notes go to inbox first, then categorized later |
| Default attachment path | Specified folder for attachments | Images and other attachments are managed uniformly |
| Attachment folder path | 05 Archive/Assets |
All images, audio, PDFs are stored here |
Links section:
| Setting | Recommended Value | Description |
|---|---|---|
| Internal link type | Shortest form possible | Backlink paths are more concise |
| Always update internal links | On | Automatically updates all references when renaming files, no fear of renaming |
| Use Wiki links | On | Uses [[]] syntax, more convenient than standard Markdown links |
After this setup, your vault stays tidy — notes and attachments each have their place, no mixing.
Better Solution: Image Hosting Service
But honestly, storing images in a local attachment folder is not the optimal solution.
Why? Because when you want to publish your article to WeChat public accounts, blogs, or other platforms, local images can’t be uploaded — you’d have to manually re-upload and re-insert each one. With many articles, this becomes very painful.
A better approach is to use an image hosting service — upload images to the web, get a URL, and reference that URL directly in Markdown. This way, no matter which platform you publish to, images display directly without extra processing.
<!-- Local attachment method -->
![[screenshot-2026-02-27.png]]
<!-- Image hosting method -->
Of course, using an image hosting service means your images are uploaded to the web, so be mindful of privacy — don’t upload screenshots containing sensitive information.
The specific setup and usage of image hosting services will be covered in the final chapter of this tutorial. For now, just know that it exists.
Summary
What you learned today:
- What a vault is: it’s a folder where all your notes are stored.
- Why create multiple vaults: most people only need one; split for novels, work, or shared scenarios.
- How to create a vault: Apple users recommended to create on iPhone (auto iCloud sync); others place in a cloud drive directory.
- Three interface areas: left sidebar for file management, center editor, right sidebar for info.
- First note: Ctrl/Cmd+N to create, write in Markdown, auto-save.
- Two views: Edit View shows symbols, Reading View shows rendered output; Live Preview recommended.
- Insert images: paste or drag-and-drop; set up an attachment folder to keep your vault tidy.
Key takeaways:
- Don’t get hung up on categorization, just start writing.
- One vault is enough, split when needed.
- Recommended: Live Preview mode, good for both writing and reading.