We’ve covered note properties—adding title, date, categories to each note. But you’ll quickly notice a problem: every time you create a new note, you have to manually fill in these properties and set up the format again. Templates are designed to solve this repetitive work.
Why Do You Need Templates?
You might think: manually filling in a few lines of properties isn’t a big deal. But let’s do the math. Every blog post needs title, date, categories. Every book note also needs author, publisher, my rating. One or two notes, you don’t feel it. But when you have dozens or hundreds of notes, having to type out these fixed fields from scratch every time becomes annoying. More importantly, manual typing is error-prone—wrong date format, inconsistent category names, leading to mismatched search results later.
Templates solve this problem: Write your note format in advance, save it, and apply it with one click when needed—no manual typing required.
Step 1: Enable the Templates Core Plugin
Templates is a core plugin in Obsidian. It is not enabled by default, so you need to turn it on manually. Go to Settings → Core Plugins → find “Templates” → toggle the switch on the right.
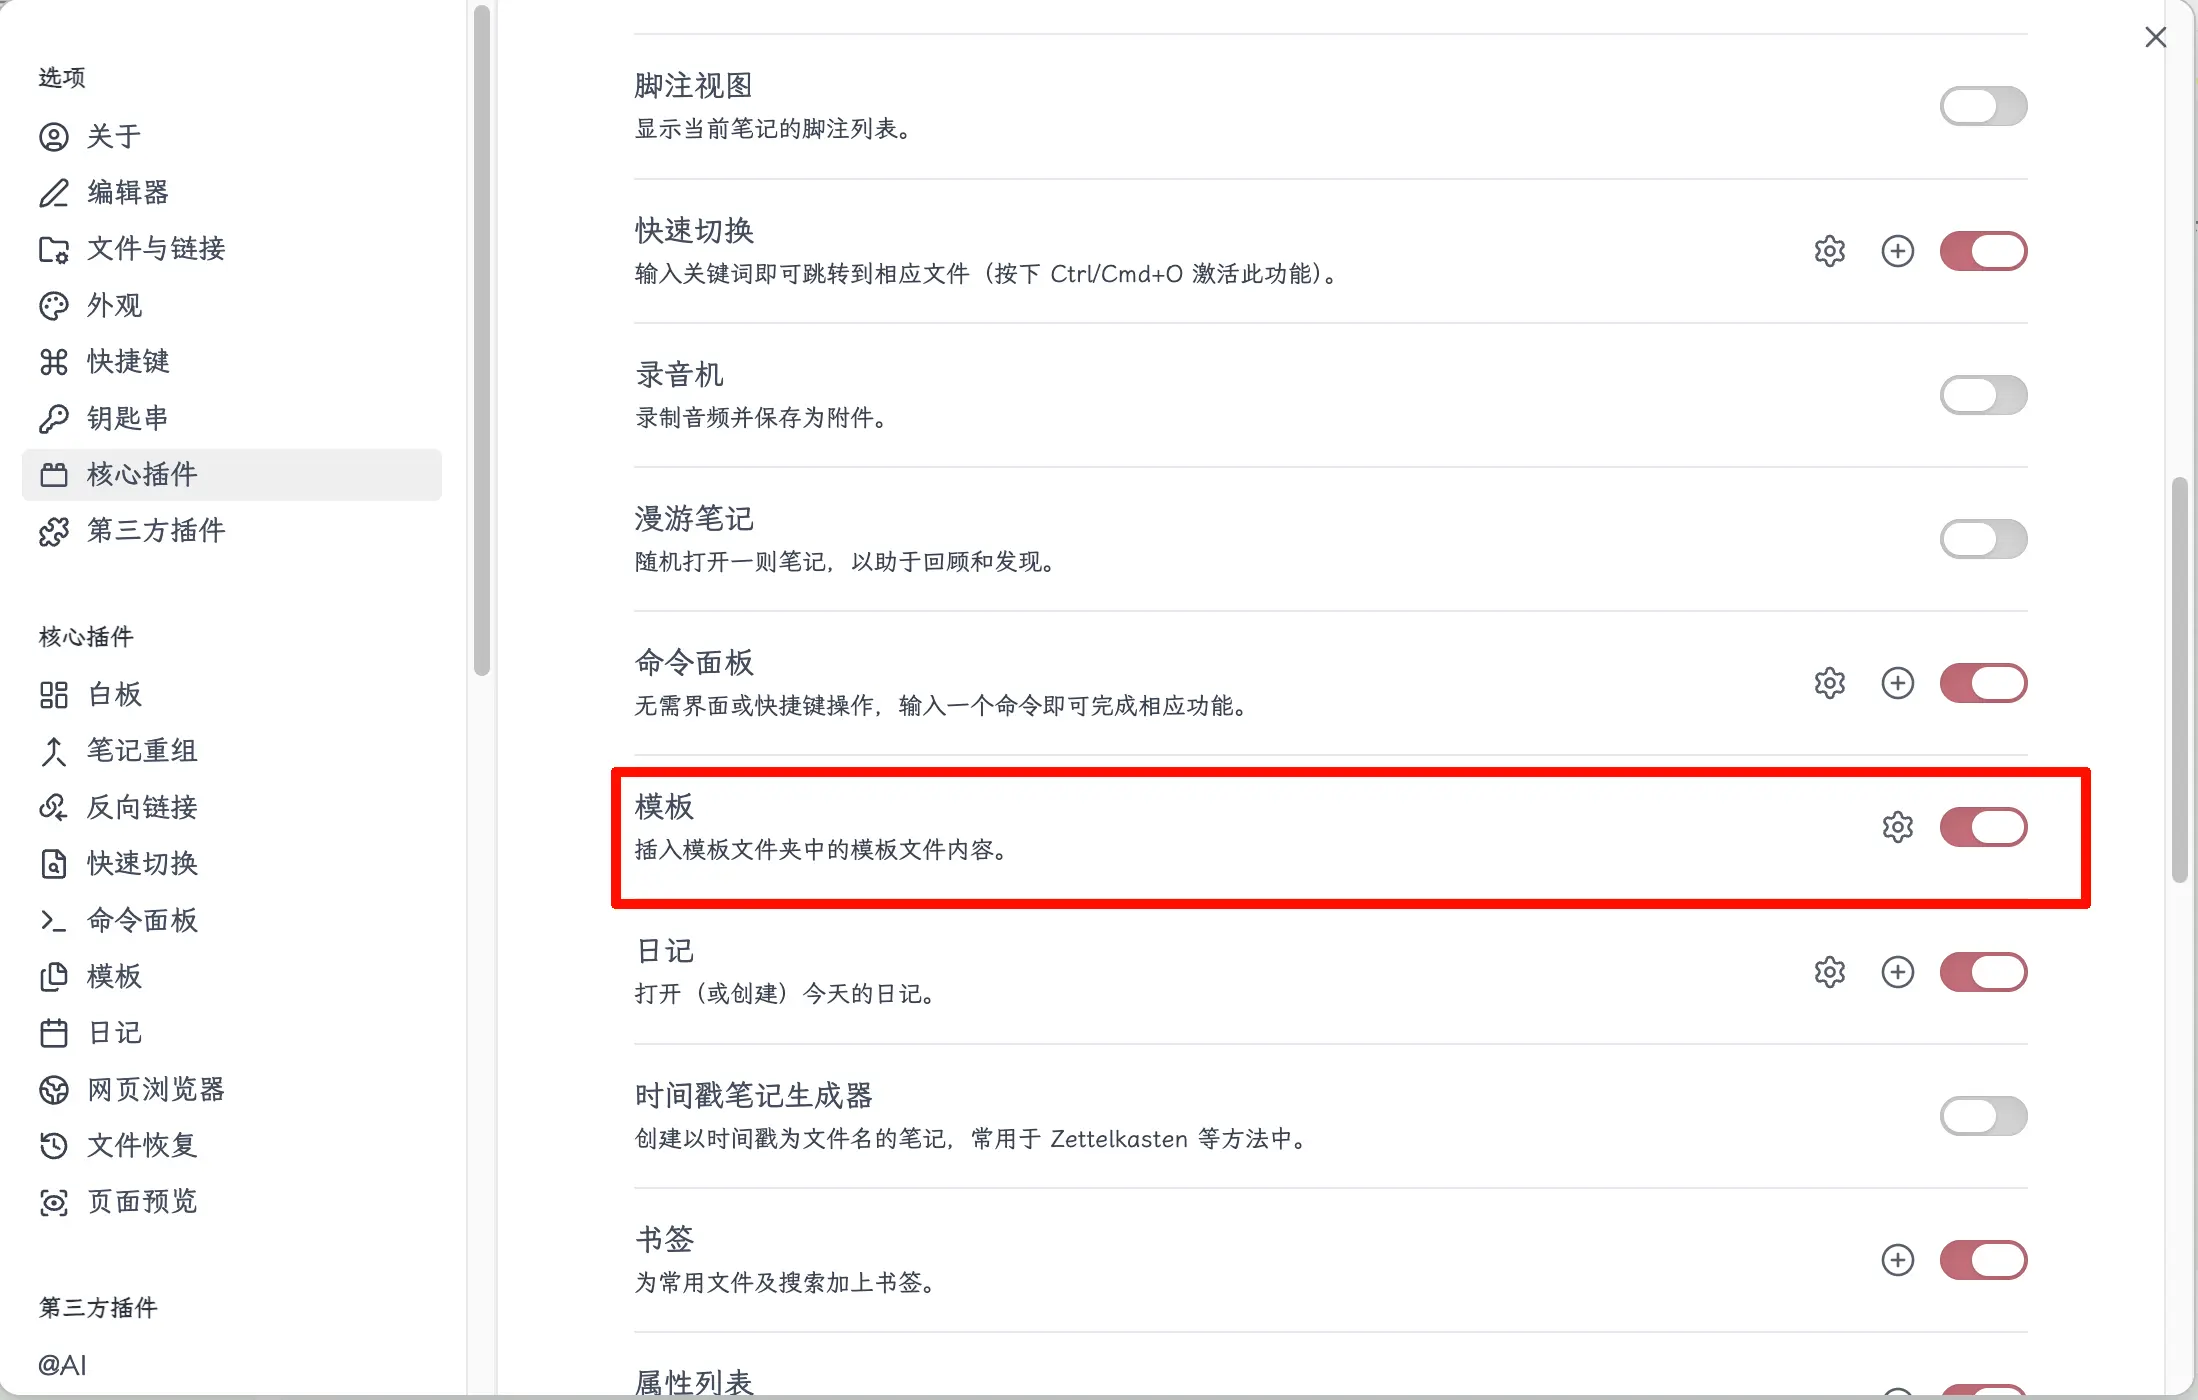
After enabling it, a small gear icon will appear on the right of the “Templates” row in the Core Plugins list. Click it to configure.
Step 2: Set the Template Folder Location
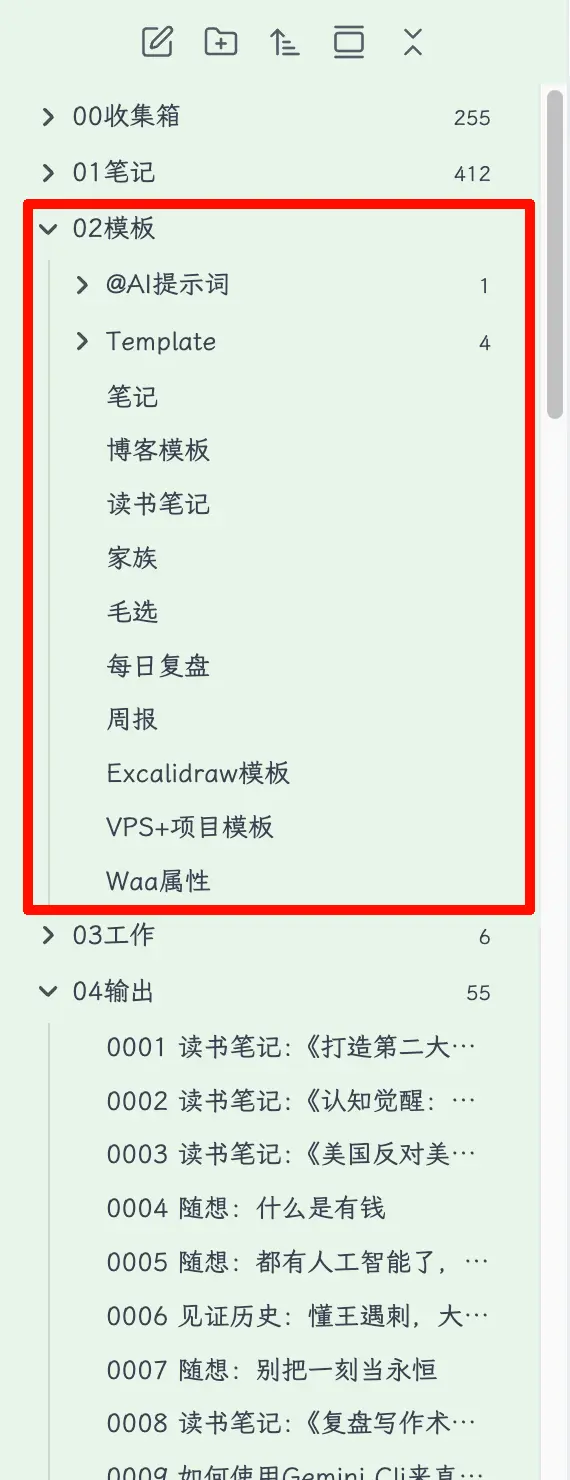
Open the Templates plugin settings. The most important setting is the Template folder location. Enter the name of the folder where you store your template files. For example, in my vault, I use a folder called 02-Templates, so I enter that. All files in this folder will be recognized as templates. When you invoke a template, Obsidian will list all files from this folder for you to choose from.

If you don’t have this folder yet, create one first, then come back to fill in the path.
Step 3: Create Your First Template
Create a Template File
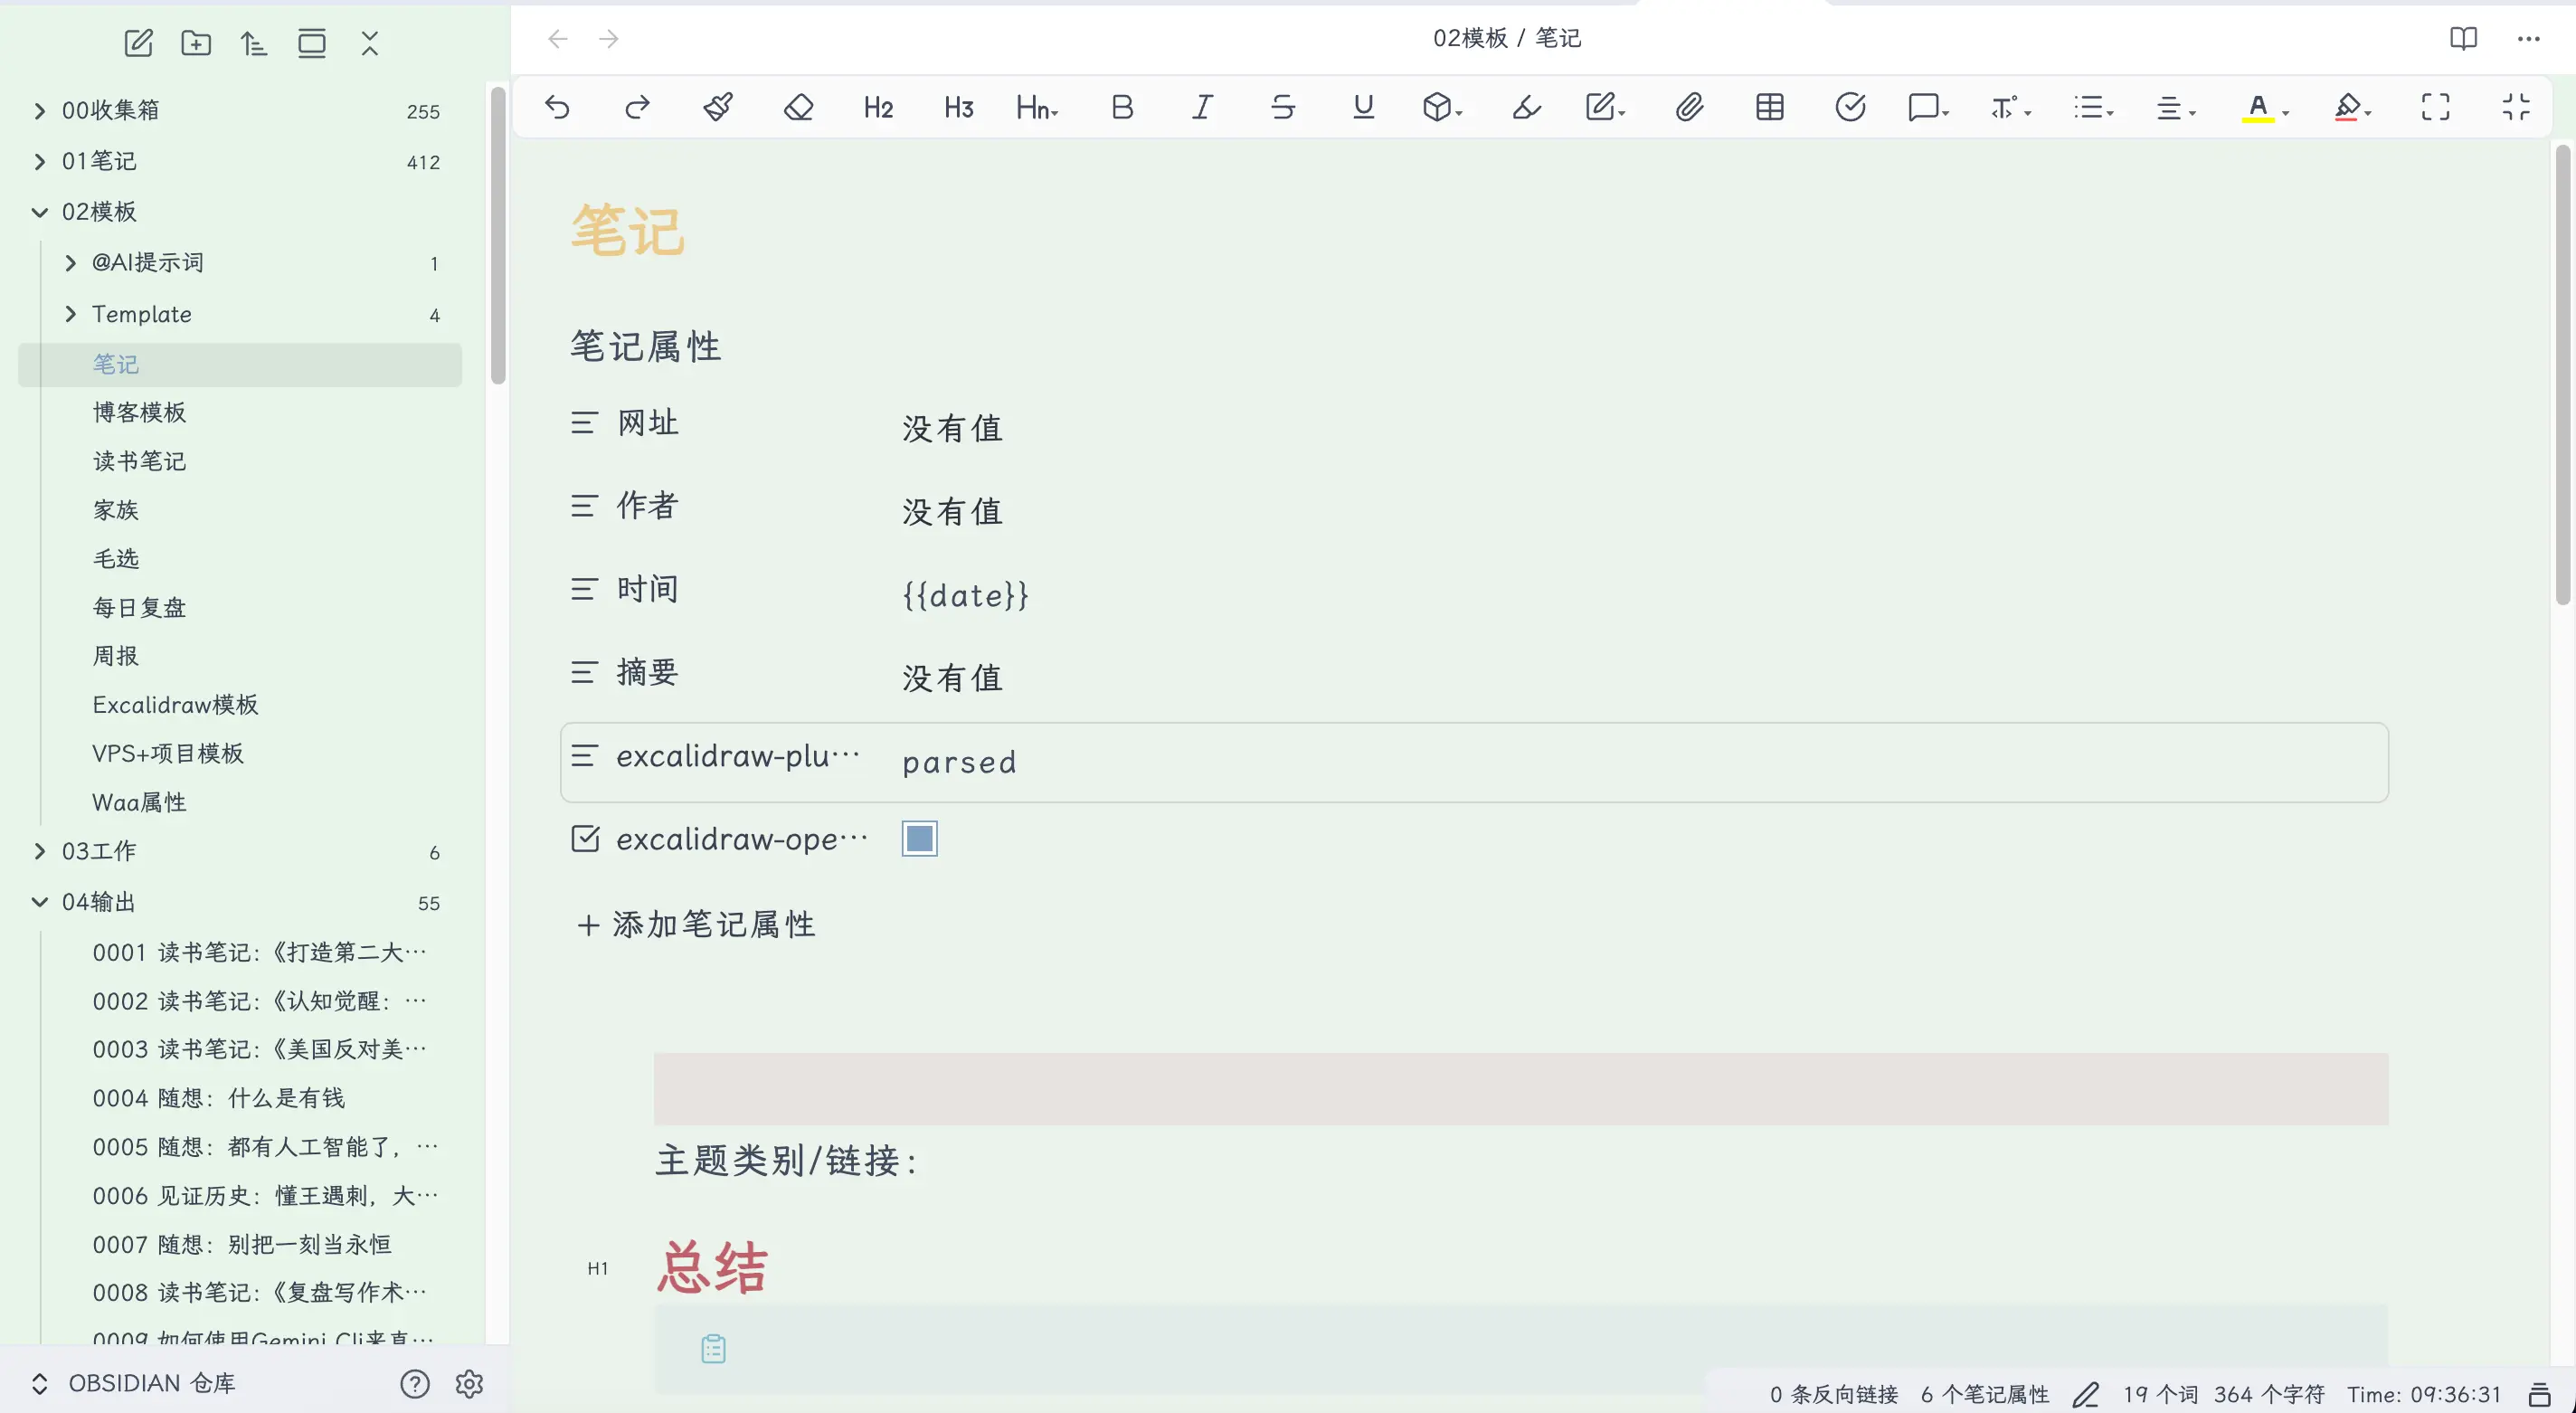
In your designated template folder (e.g., 02-Templates), create a new file—use the shortcut Cmd+N, or right-click the folder and select “New file”. This file is exactly like a normal note; just write the content as usual. Once saved, it becomes your template.
Template Variables
The most crucial part of templates is variables. As mentioned earlier, writing {{date}} in properties automatically fills in the date. Let’s detail the three built-in variables:
| Variable | Description | Example |
|---|---|---|
{{date}} |
Date when template is inserted | 2026-03-04 |
{{time}} |
Time when template is inserted | 14:30 |
{{title}} |
File name of the current note | My Book Note |
Focus on {{date}}.
This variable is dynamic—every time you use the template, it is replaced with the current date. Compare the two approaches:
- Writing
date: 2026-03-04(hardcoded) → all notes created with this template will have the date 2026-03-04, forever. - Writing
date: {{date}}→ use it today, it fills in today; use it tomorrow, it fills in tomorrow.
So, always use {{date}} for the date property instead of hardcoding it. This is the trick I hinted at earlier.
Step 4: Using Templates
Insert a Template After Creating a Note
First create a new note, then insert the template.
After creating a blank note, there are two ways to insert a template:
Method 1: Command Palette (Recommended)
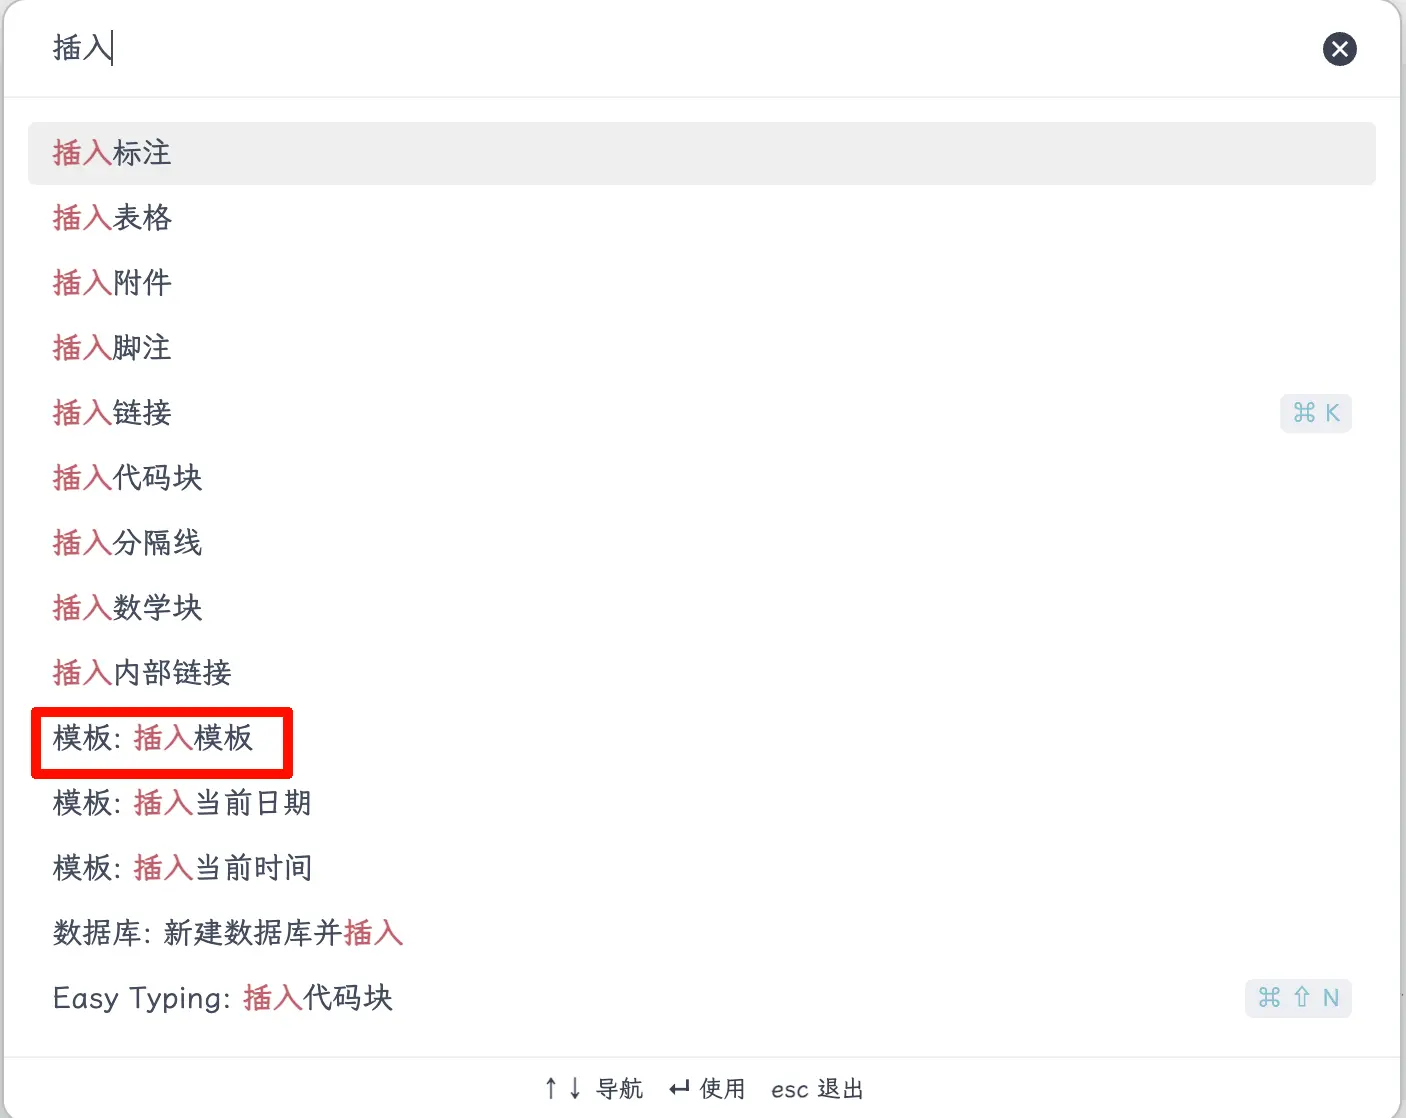
Press Cmd+P to open the Command Palette, type “Insert template”, press Enter, and select the template you want from the list.

Method 2: Sidebar Button
If you enabled the template button in settings, a template icon will appear in the left toolbar. Click it to select a template directly.
Both methods work; use whichever feels more comfortable. The advantage of the Command Palette is that you don’t need to remember where the button is—just press Cmd+P and search.

Practical Template Examples
Now that we’ve covered the theory, let’s look at some actual templates.
Blog Post Template (consistent with this book’s format):
---
title: {{title}}
date: {{date}}
categories:
  -
---
Book Note Template:
---
title: {{title}}
date: {{date}}
categories:
  - Reading Notes
---
Publisher:
Date finished: {{date}}

# Core Ideas

# Memorable Passages

# My Review
Diary Template:
---
date: {{date}}
---

## What I Did Today

## Problems I Ran Into

## Plan for Tomorrow
These three templates cover the most common scenarios. You can use them directly or modify them to your liking. Start with a few commonly used ones, and add new templates when you encounter repetitive formats. Don’t try to think of all possible cases from the start—overthinking often leads to not using them at all.
Summary
What you learned today:
- Enable the “Templates” core plugin (Settings → Core Plugins → toggle on)
- Set the template folder (all files in this folder are recognized as templates)
- Three built-in variables:
{{date}}/{{time}}/{{title}} - Insert a template: Cmd+P, search “Insert template”, select the desired template
Key takeaways:
- Use
{{date}}for the date property instead of hardcoding it—it automatically fills in the current date each time you use the template. - Templates are just normal notes—place them in the designated folder, no special setup needed.
- Start with a few commonly used templates, just enough for your needs—don’t overdesign.