We’ve covered templates—using variables to auto-fill dates and titles, and applying formats with one click when creating new notes. Now let’s take it a step further.
Taking notes isn’t enough. Every day you browse Twitter, read WeChat articles, and scroll Reddit. When you find something good, how do you save it? Screenshot? It becomes an image, unsearchable. Copy-paste? The formatting is a mess, and you have to manually add the title and link. Throw it into browser bookmarks? That’s the eternal resting place for bookmarks: stuff goes in but never comes out, and you never look at them again.
This chapter solves that problem: how to quickly and cleanly save web content into Obsidian. The tool is Obsidian’s official browser extension—Web Clipper.
Why Use Web Clipper
Before Web Clipper, I went through roughly three stages of saving web articles:
First stage: screenshot. One click, throw it into notes. Problem: screenshots aren’t searchable. Three months later, you have no idea what you captured, let alone find it.
Second stage: copy-paste. Copy the text into Obsidian, then manually add the title and source link. Problem: formatting is mostly messed up—headings become body text, bold disappears, code blocks become plain text. It takes minutes to clean up each time.
Third stage: bookmarks. Click the star in the browser, easiest. The cost: you’ll never open those links again.
Web Clipper’s logic: one-click save, clean formatting, automatic metadata, directly into Obsidian. Title, original link, save date—all auto-filled. Content is in Markdown format, images are preserved. With the AI Interpreter, you can even have AI summarize the content while clipping.
Installation
Web Clipper is a browser extension. It currently supports Chrome, Edge, Firefox, and Safari (some features may differ).
Important: WeChat articles need to be opened in a browser first; you can’t use them directly in the WeChat client. The WeChat client is a separate environment that browser extensions can’t access. You need to copy the link, open it in Chrome or Edge, then clip.
Installation Steps
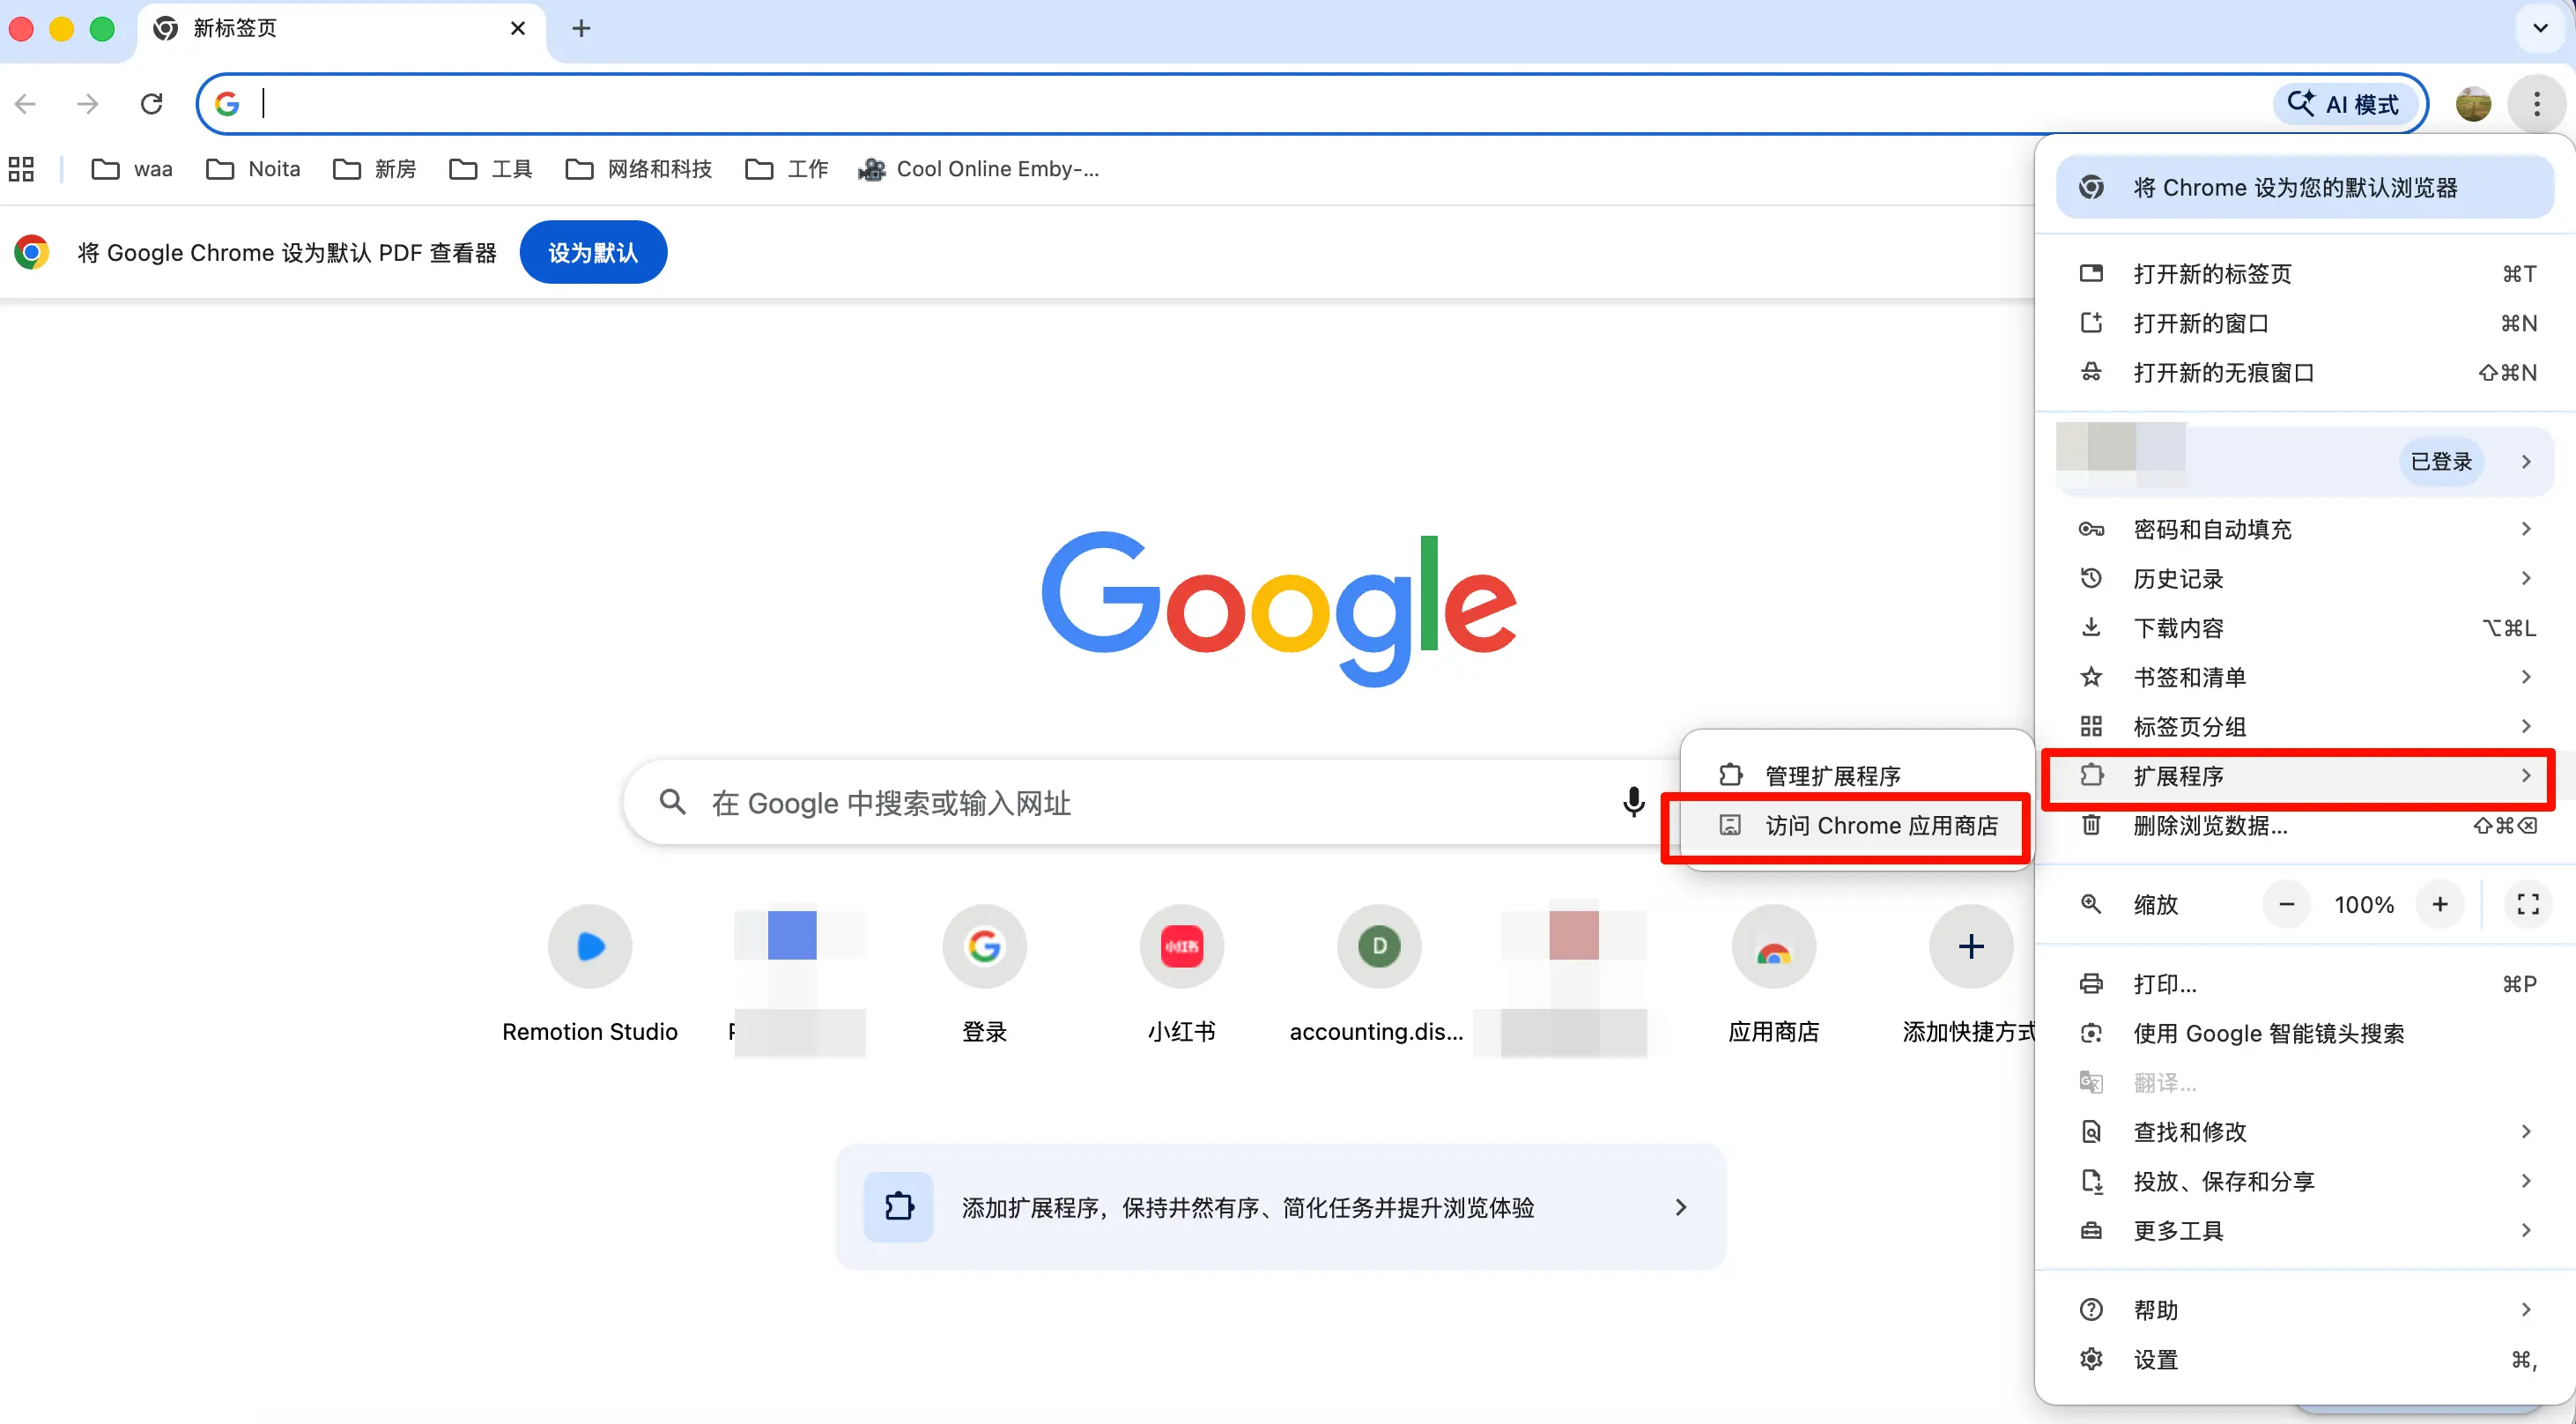
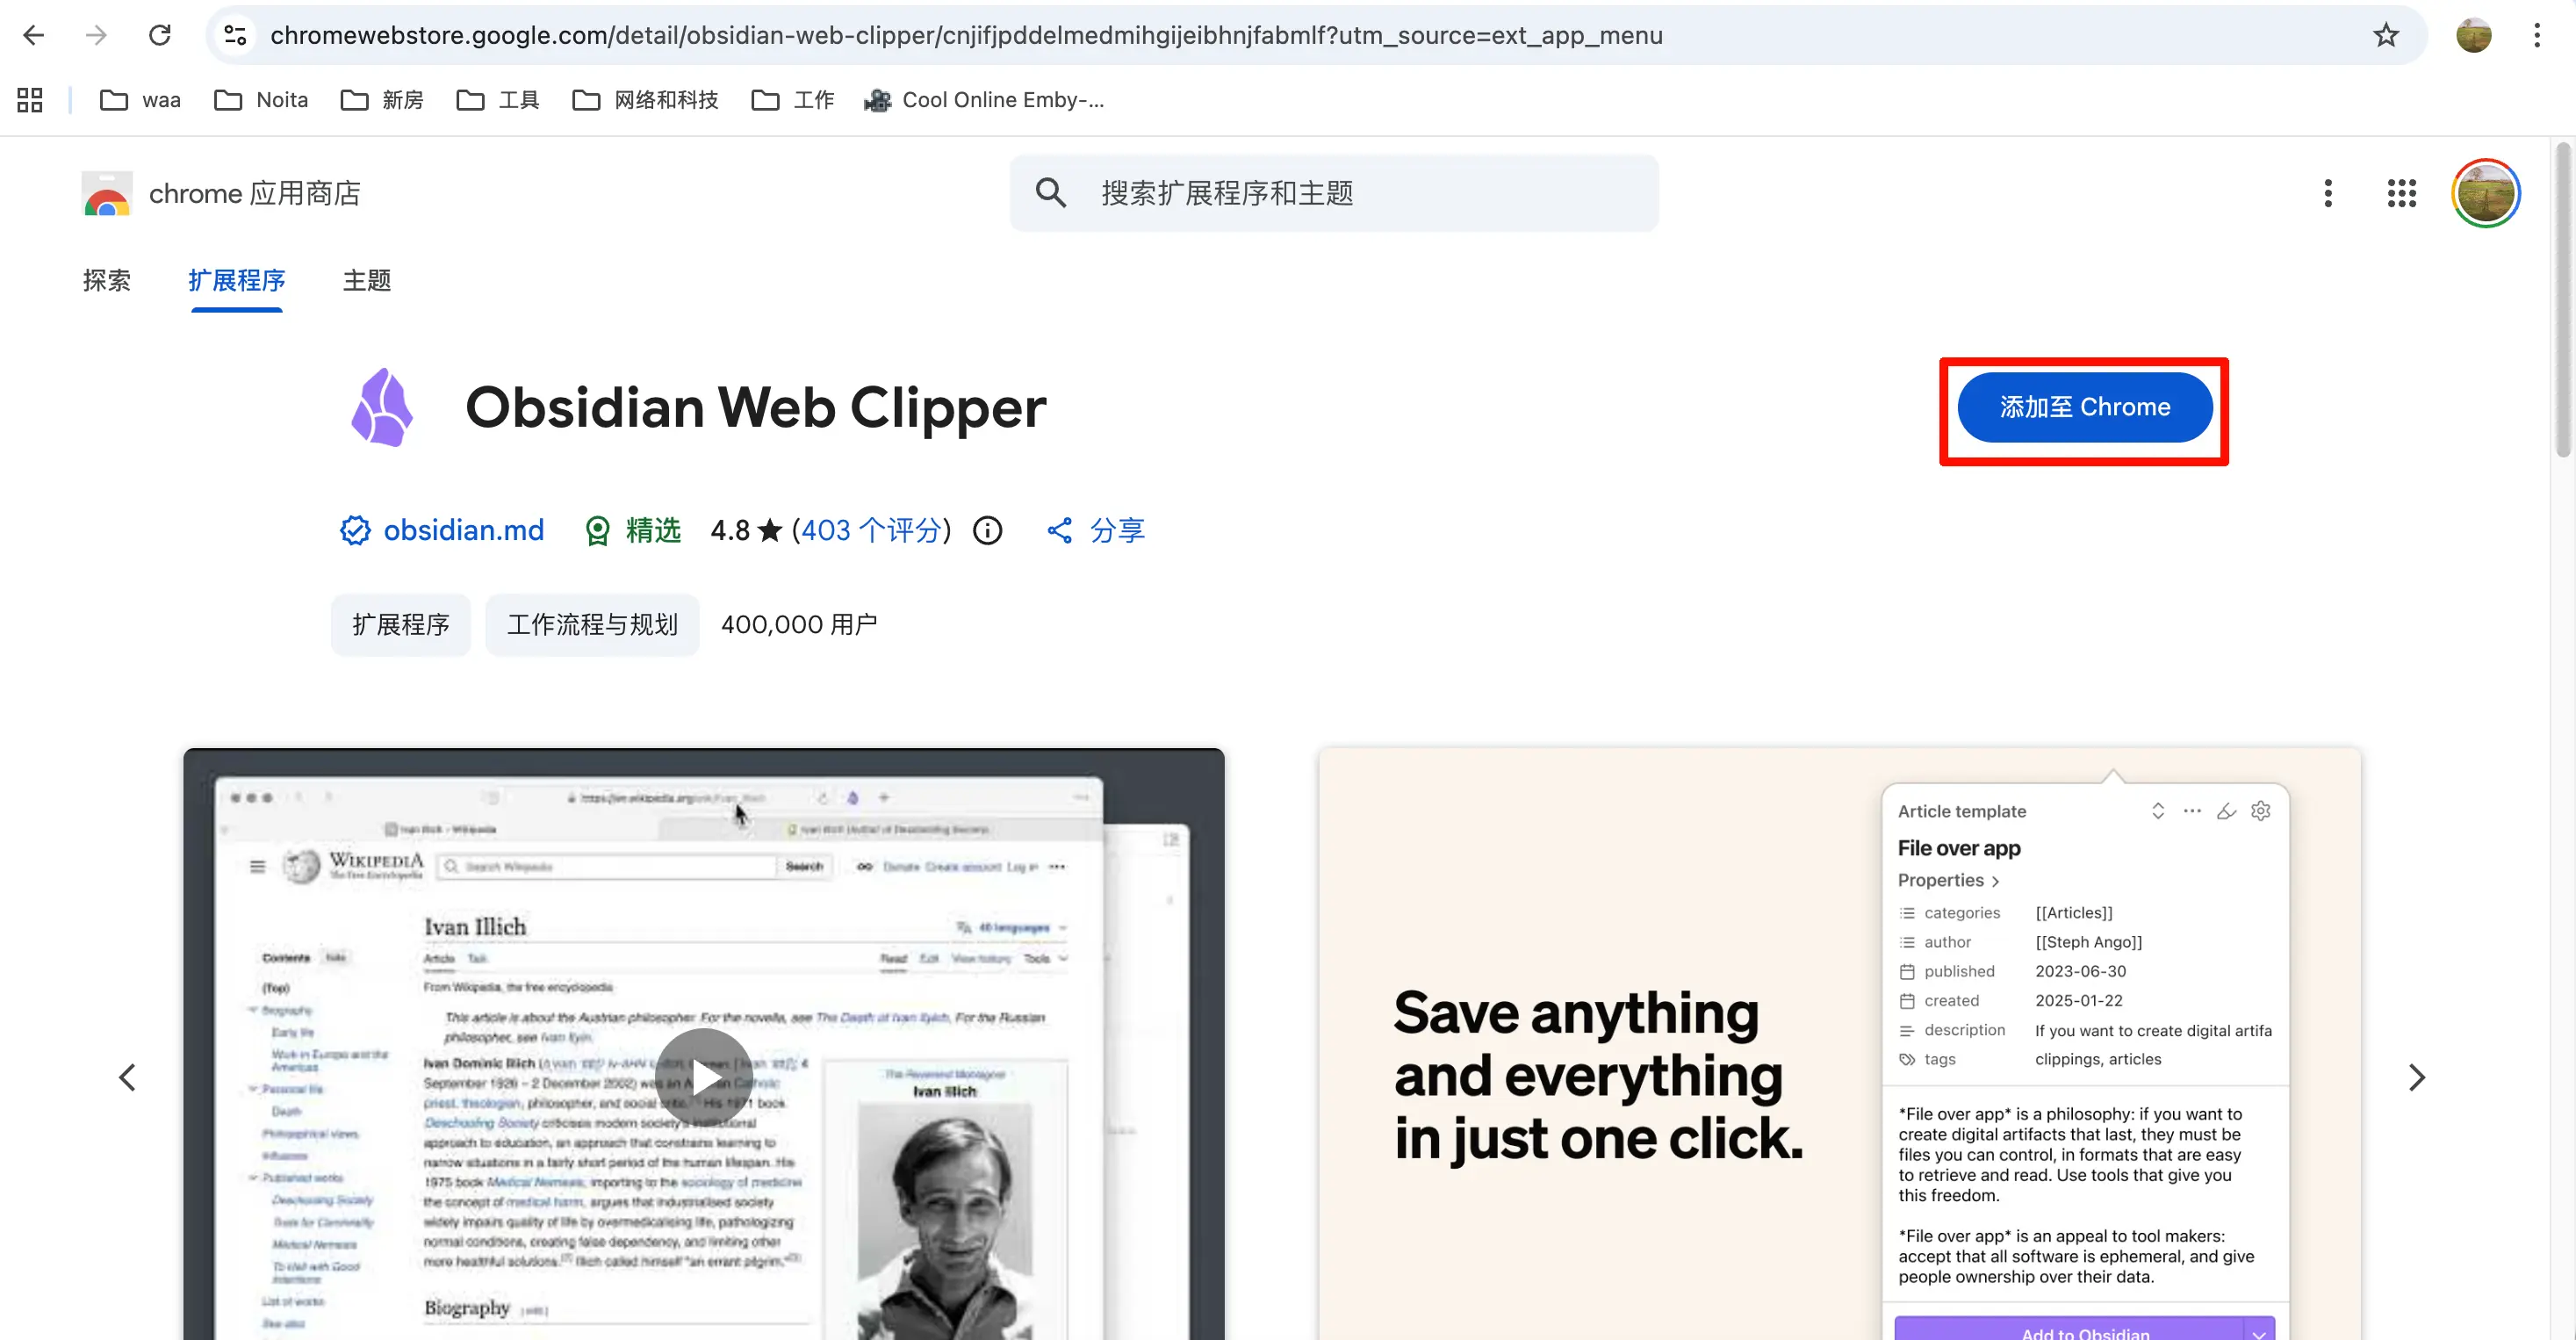
Step 1: Chrome users open the Chrome Web Store, search for “Obsidian Web Clipper”, find the official extension (icon same as Obsidian, the gem pattern), click “Add to Chrome”.
Step 2: Edge users similarly open the Edge Add-ons store, search for “Obsidian Web Clipper”, install. Edge can also use the version from Chrome Web Store, either works.
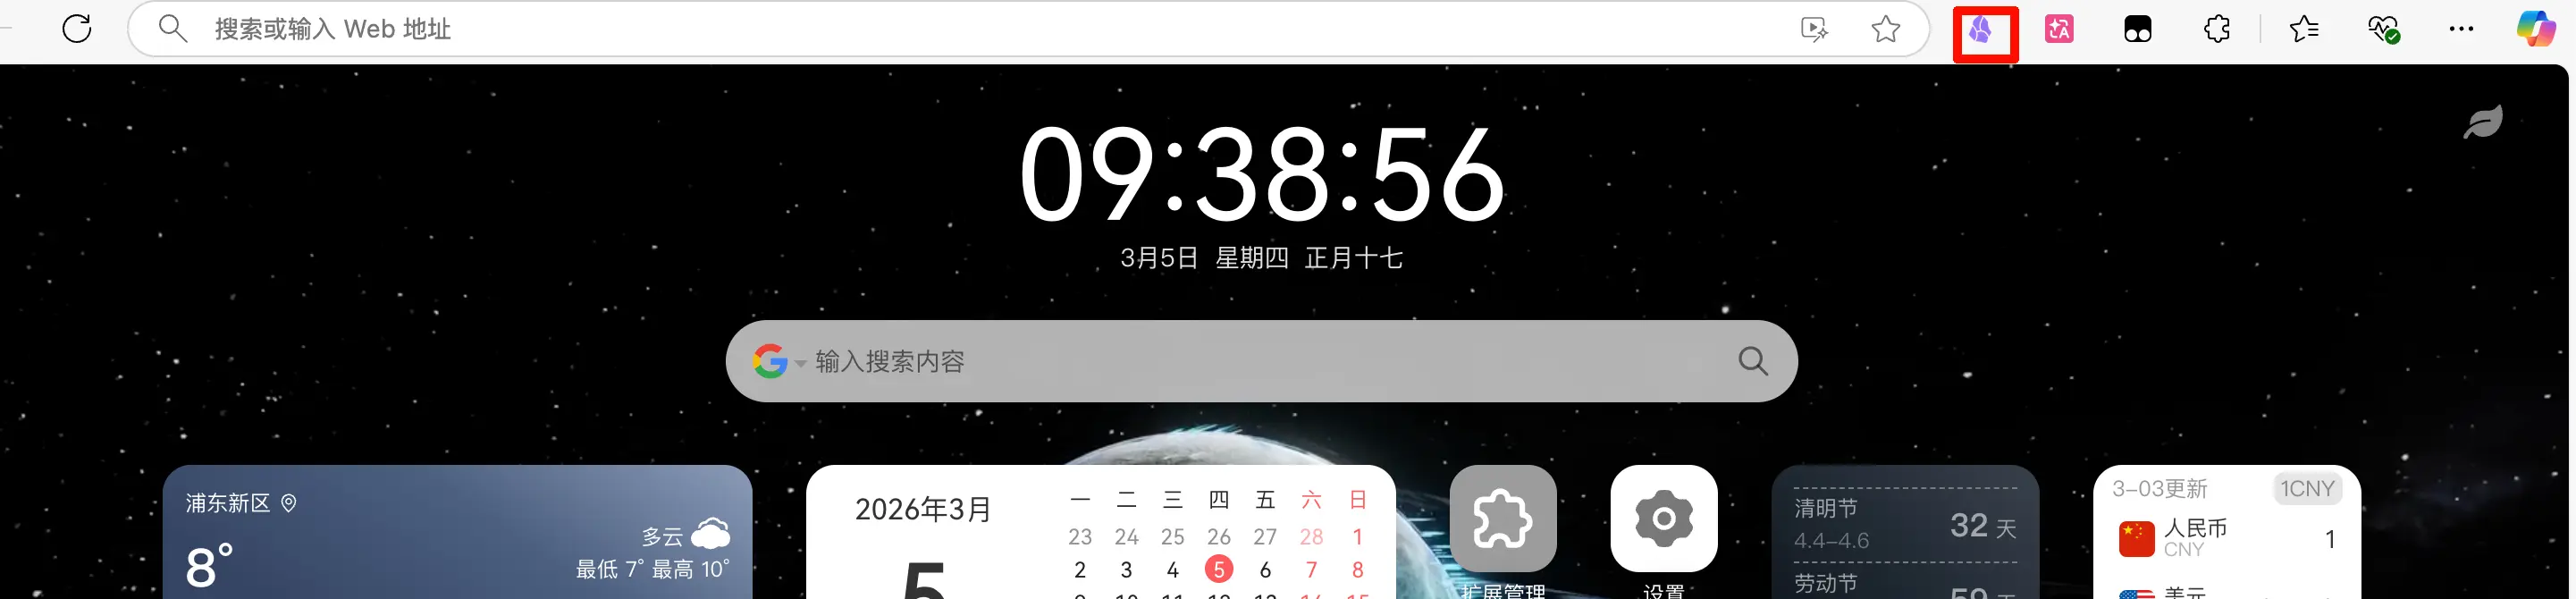
Step 3: After installation, the extension icon appears in the top-right toolbar. If not visible, click the puzzle piece icon (Extensions) on the far right of the toolbar, find Obsidian Web Clipper, and pin it to the toolbar.
That’s it for installation.
Basic Settings
Click the extension icon in the toolbar to open the clipping panel. There’s a small gear icon in the bottom right—that’s the settings entry. Go into settings and configure the basics.
Connect Your Obsidian Vault
First thing in settings is to connect your Vault. In the “Vaults” section, click “Add vault”, enter your vault name—the one displayed in the bottom-left corner of Obsidian. For example, my vault is called “Obsidian Vault”, so I enter that.
Note: On first connection, Obsidian will pop up an authorization window asking if you allow Web Clipper to access it. Select “Allow”—this is a normal security prompt.
Set Default Storage Folder
After connecting the vault, set the Default location.
It’s recommended to create a dedicated inbox folder, like 00-Inbox or Inbox, specifically for clipped content. Don’t dump it directly into the vault root—over time the root will become messy, and you won’t know which notes are organized and which are unprocessed web archives.
Interface Overview
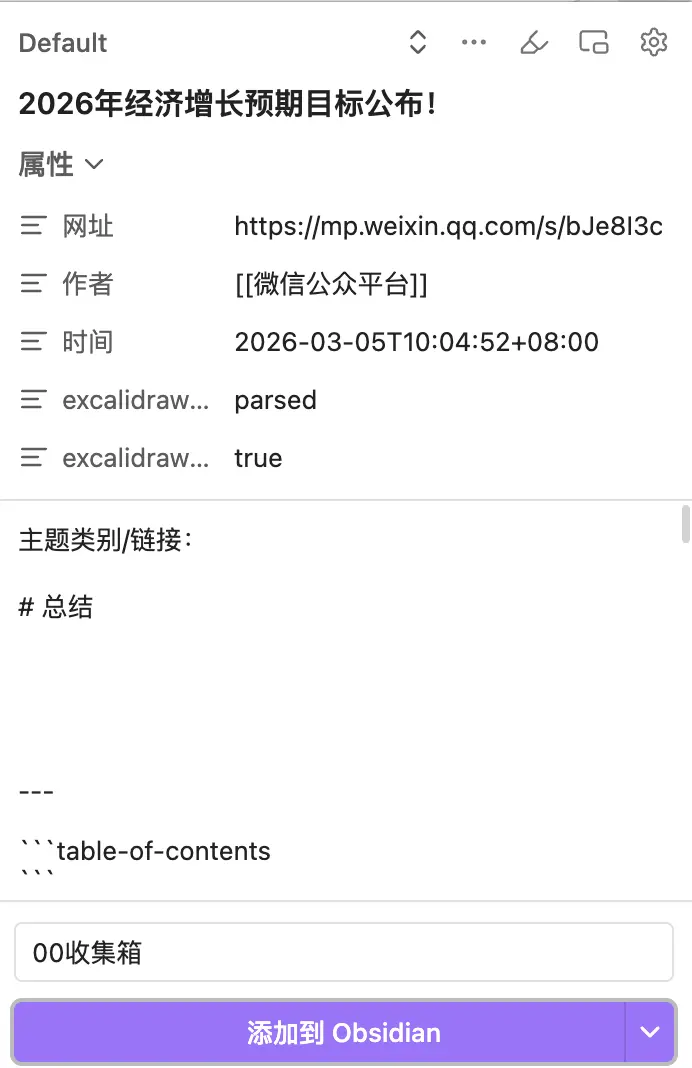
After setup, each time you open the extension, you’ll see three main areas:
- Top: Properties area—automatically identifies the current page’s title, URL, author (if available)
- Middle: Content preview area—the body has been converted to Markdown
- Bottom: Action area—choose which vault and folder to save to, select a template, then click “Clip” to save
AI Interpreter
This is the feature worth spending the most time configuring in Web Clipper.
What It Is
The AI Interpreter lets you write instructions in a template, and when clipping, click the “Add to Obsidian” button, and AI will process the specified content. For example: summarize the full text, extract keywords, translate… What it can do depends on how you write the prompt.
This feature requires an API Key. If you already have an API key from OpenAI, DeepSeek, or Anthropic, you can use it directly; if not, register on the respective platform.
Configuration
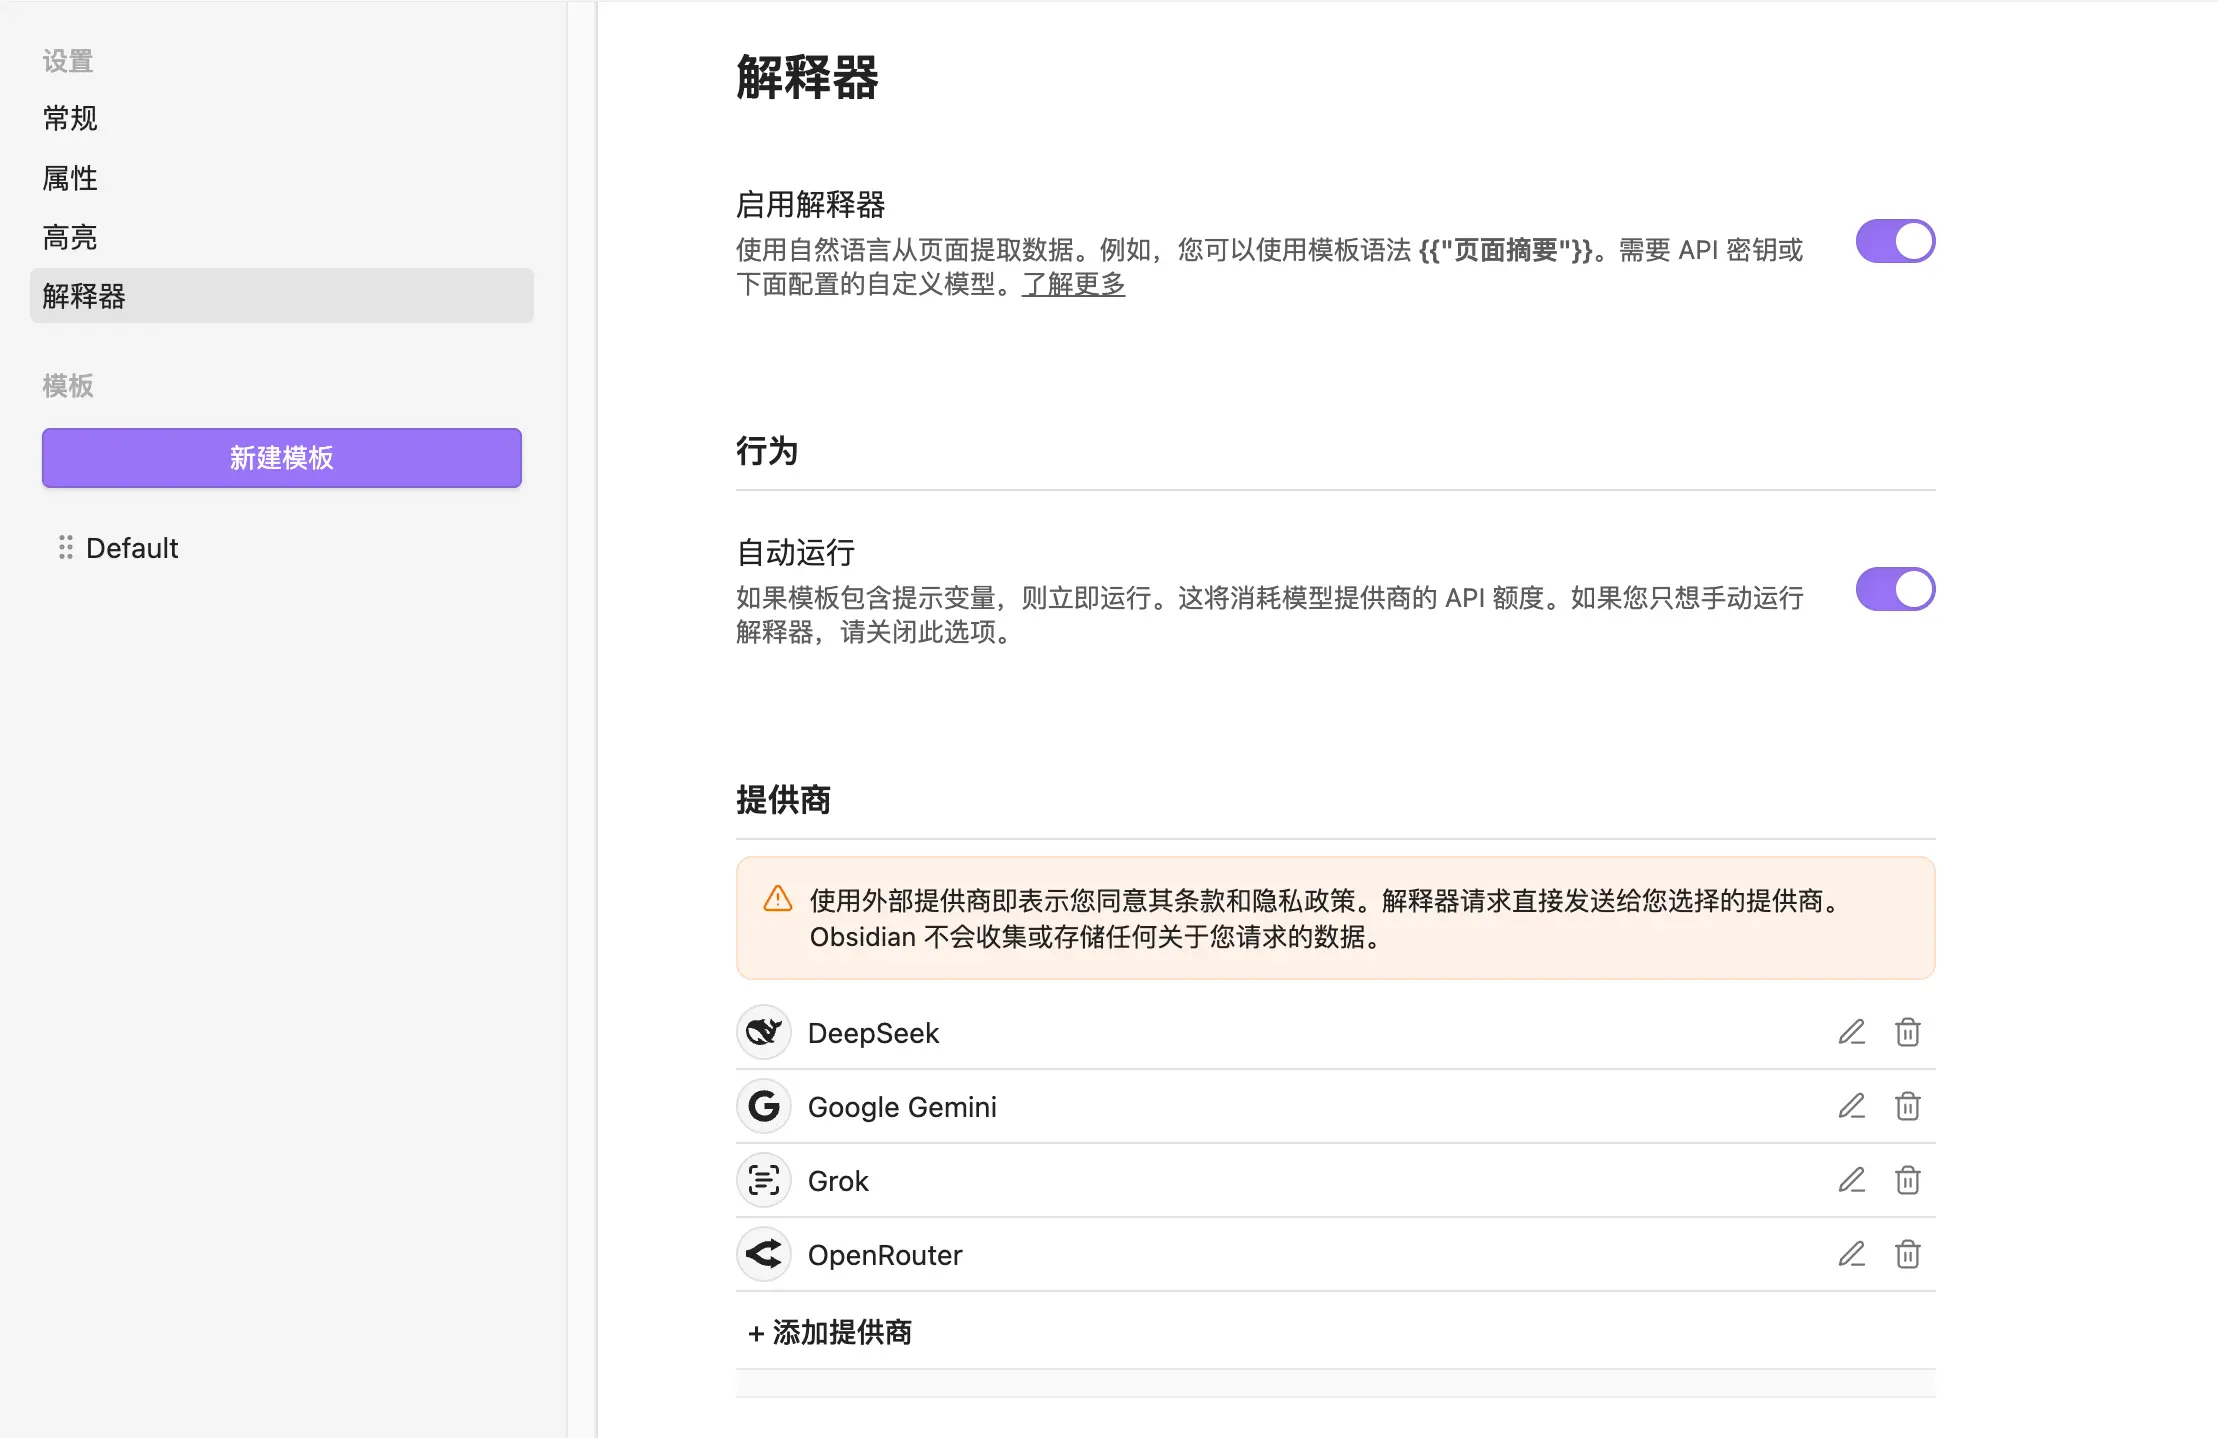
Go to settings, find the “Interpreter” tab.
Step 1: Select your model source and enter the corresponding API Key. Supports OpenAI, Anthropic (Claude), Ollama (local models), and more. I use DeepSeek—I find it best for summarizing articles.
Step 2: Enable “Enable Interpreter”, turn this switch on.
After that, write prompt variables in your template, and when clipping, an interpreter area will appear in the extension window—click to trigger it.
Create Custom Templates
Web Clipper comes with a default template—it works, but it’s not great. Spend a few minutes creating your own template, and every clip will be much more comfortable.
Why Customize Templates
Different types of content require different information:
- Technical articles: you want title, link, AI summary, body
- WeChat articles: you want title, author, publication date, AI summary
- Product pages: you want title, price, link, no need for full text
One template can’t cover all scenarios. Create a few templates based on content type, and select the appropriate one when clipping—very convenient.
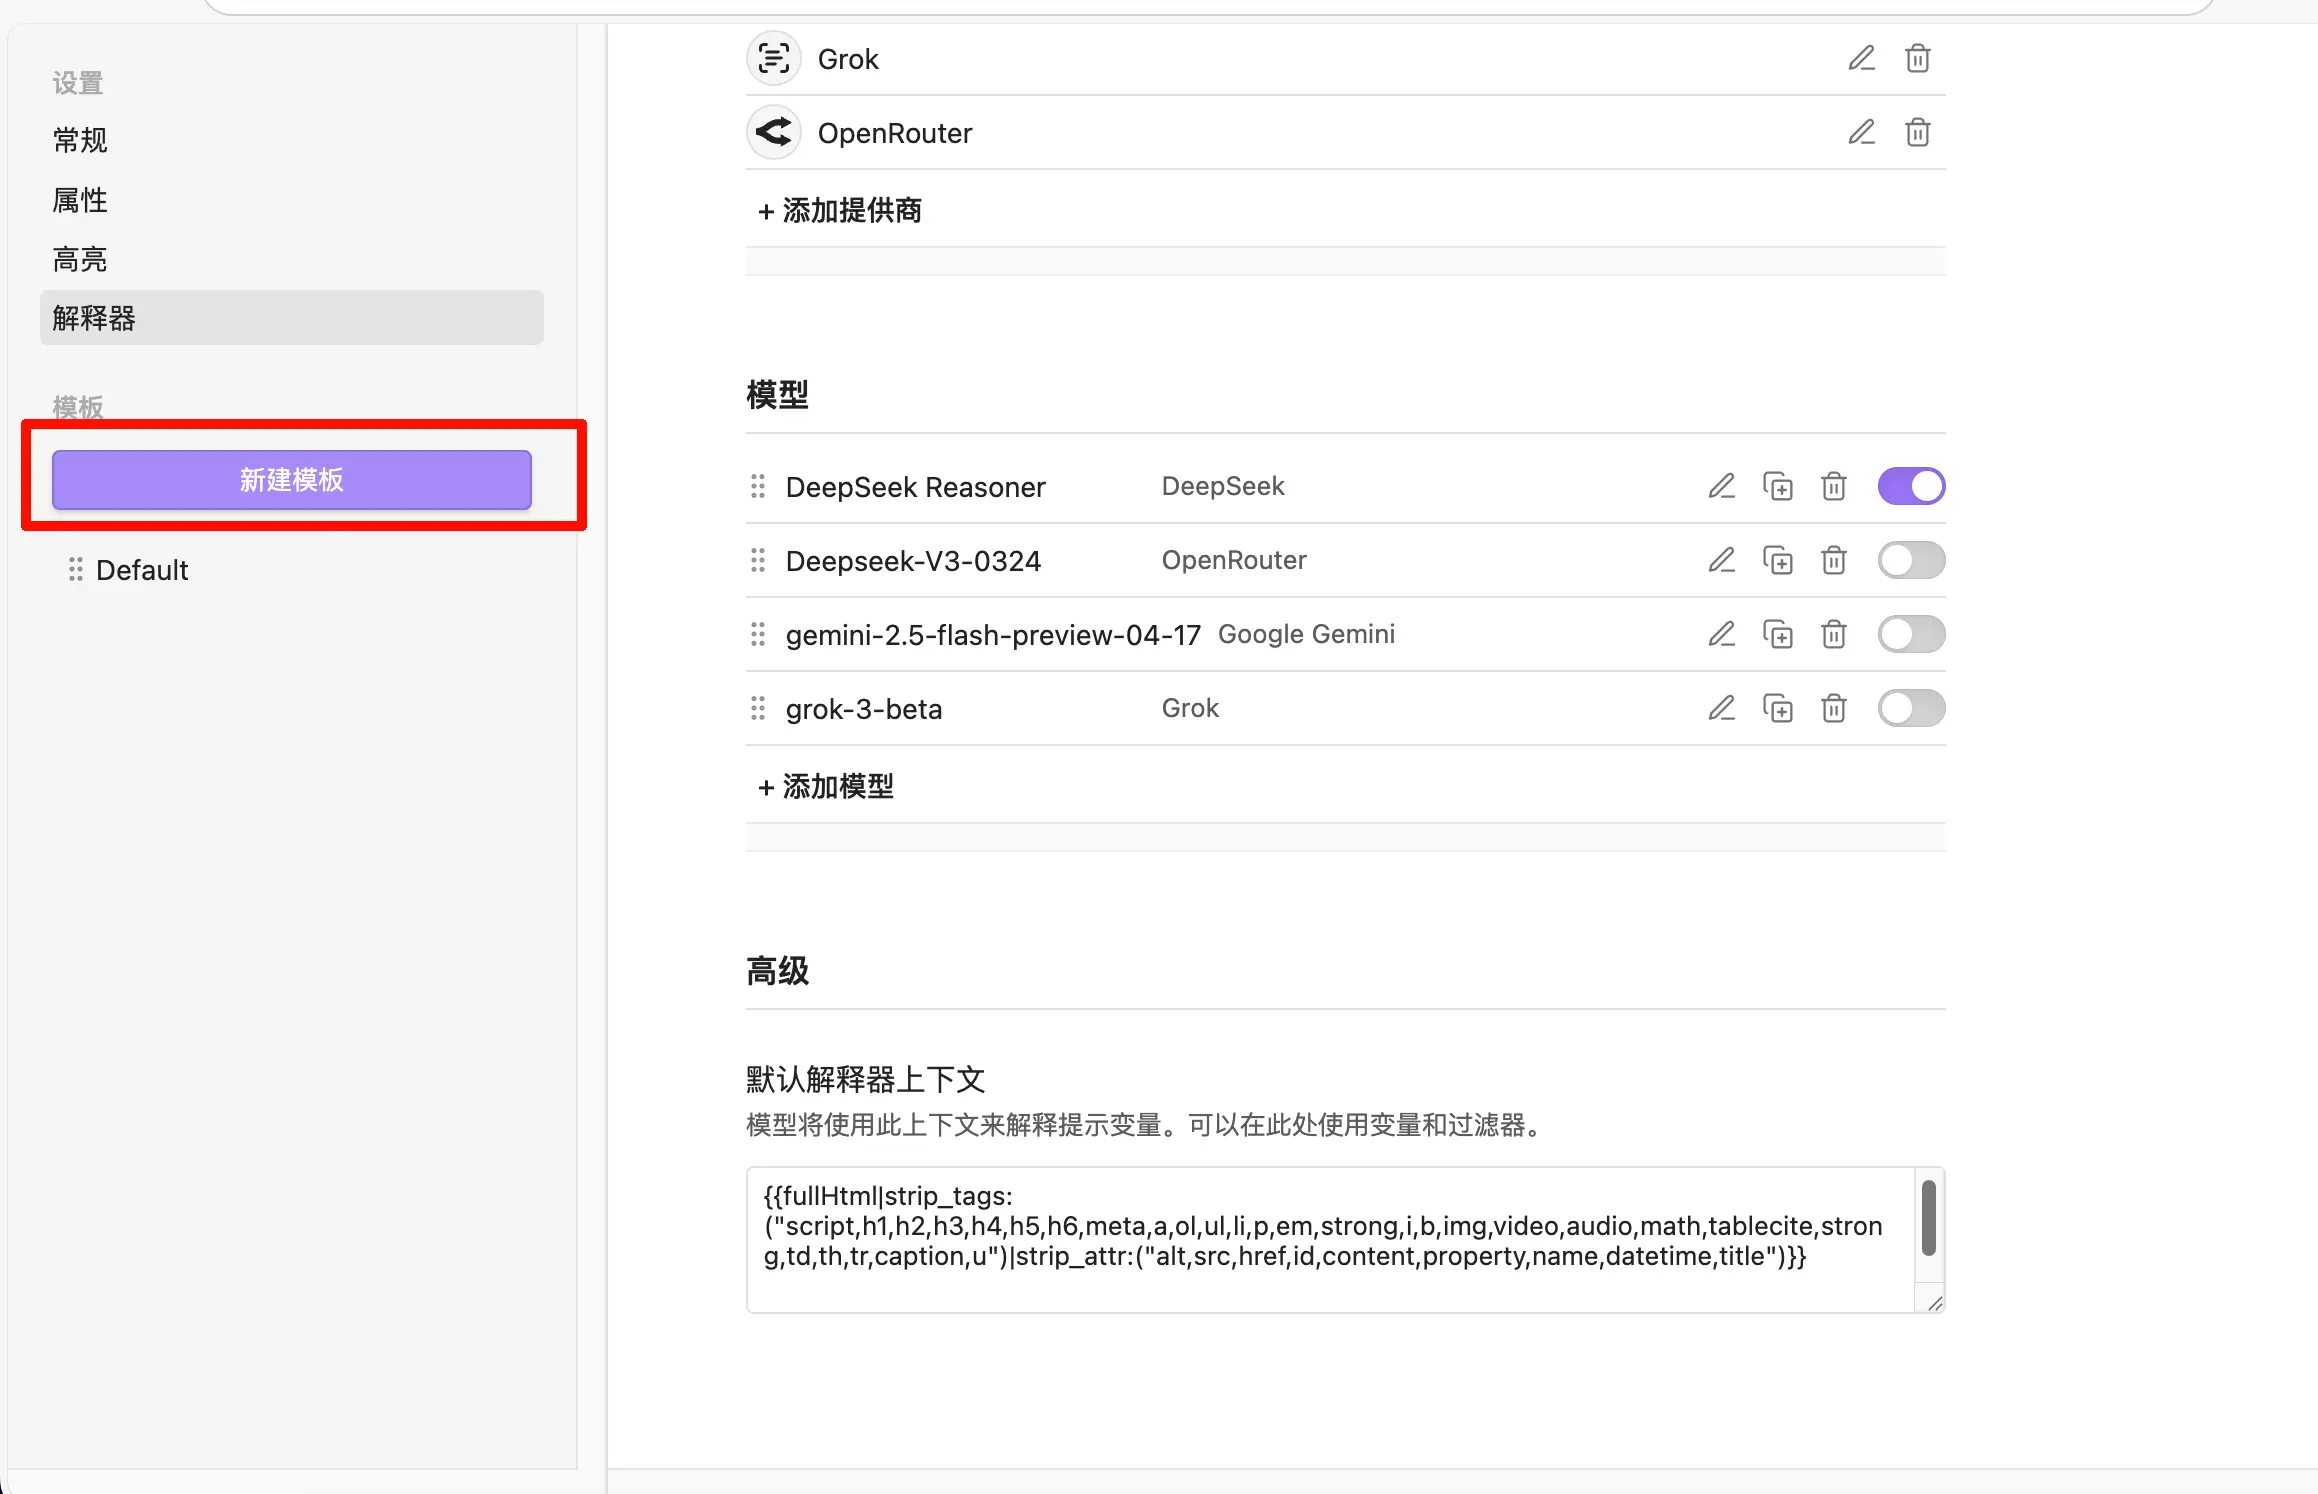
Access Template Settings
In Web Clipper settings, click “New Template” on the left to create a new one. I’m lazy so I only use one.
Give the template a name, like “Article Collection”, then start writing the content.
Template Variables
Web Clipper supports two types of variables:
Page variables—automatically extracted from the current webpage:
| Variable | Description |
|---|---|
{{title}} |
Page title |
{{url}} |
Current page URL |
{{author}} |
Article author (if recognized) |
{{date}} |
Today’s date |
{{content}} |
Body content (Markdown format) |
Interpreter variables—call AI in properties or content:
The interpreter syntax is straightforward: put the instruction you want to give AI in double quotes, wrapped in double curly braces, like this:
{{"Summarize the full article without using an H1 heading"}}
The inner text is your instruction to AI; the outer {{" "}} format should not be changed. Web Clipper recognizes this syntax and knows to call AI for processing when clipping.
Both properties and content can use it. If you want a property field to be auto-filled by AI, write this format in the property value; if you want to insert an AI summary in the content, write it there as well.
Complete Template Example
Here’s the template I use:
Template Properties:
URL: {{url}}
Saved: {{date}}
Template Content:
# Summary
There’s one thing worth mentioning: the author line uses {{author|split:", "|wikilink|join}}, not the plain {{author}}. This is a variable + filter combination—first split the author field by comma (some articles recognize multiple authors), then convert each name into Obsidian wiki-link format [[Author Name]], and finally join them back. This way, after clipping, clicking the author name jumps to the corresponding note. You don’t have to use this; {{author}} outputting plain text is perfectly fine, depending on your preference.
For the content area, I only left two empty lines: Topic Category/Link for manually adding related information, and # Summary as a heading placeholder—if you have the interpreter enabled, you can add {{"Summarize the full article without using an H1 heading"}} below it to let AI auto-fill the content; if not, you can write a couple of sentences manually after clipping.
Practice: Clipping an Article
All settings are done, let’s actually use it.
Suppose you see a WeChat article you like and want to save it.
Step 1: Copy the link and open it in a browser. In the WeChat article, tap the top-right menu and select “Open in default browser”.

Step 2: Click the Web Clipper icon. The gem icon in the top-right toolbar, click it to open the clipping panel.
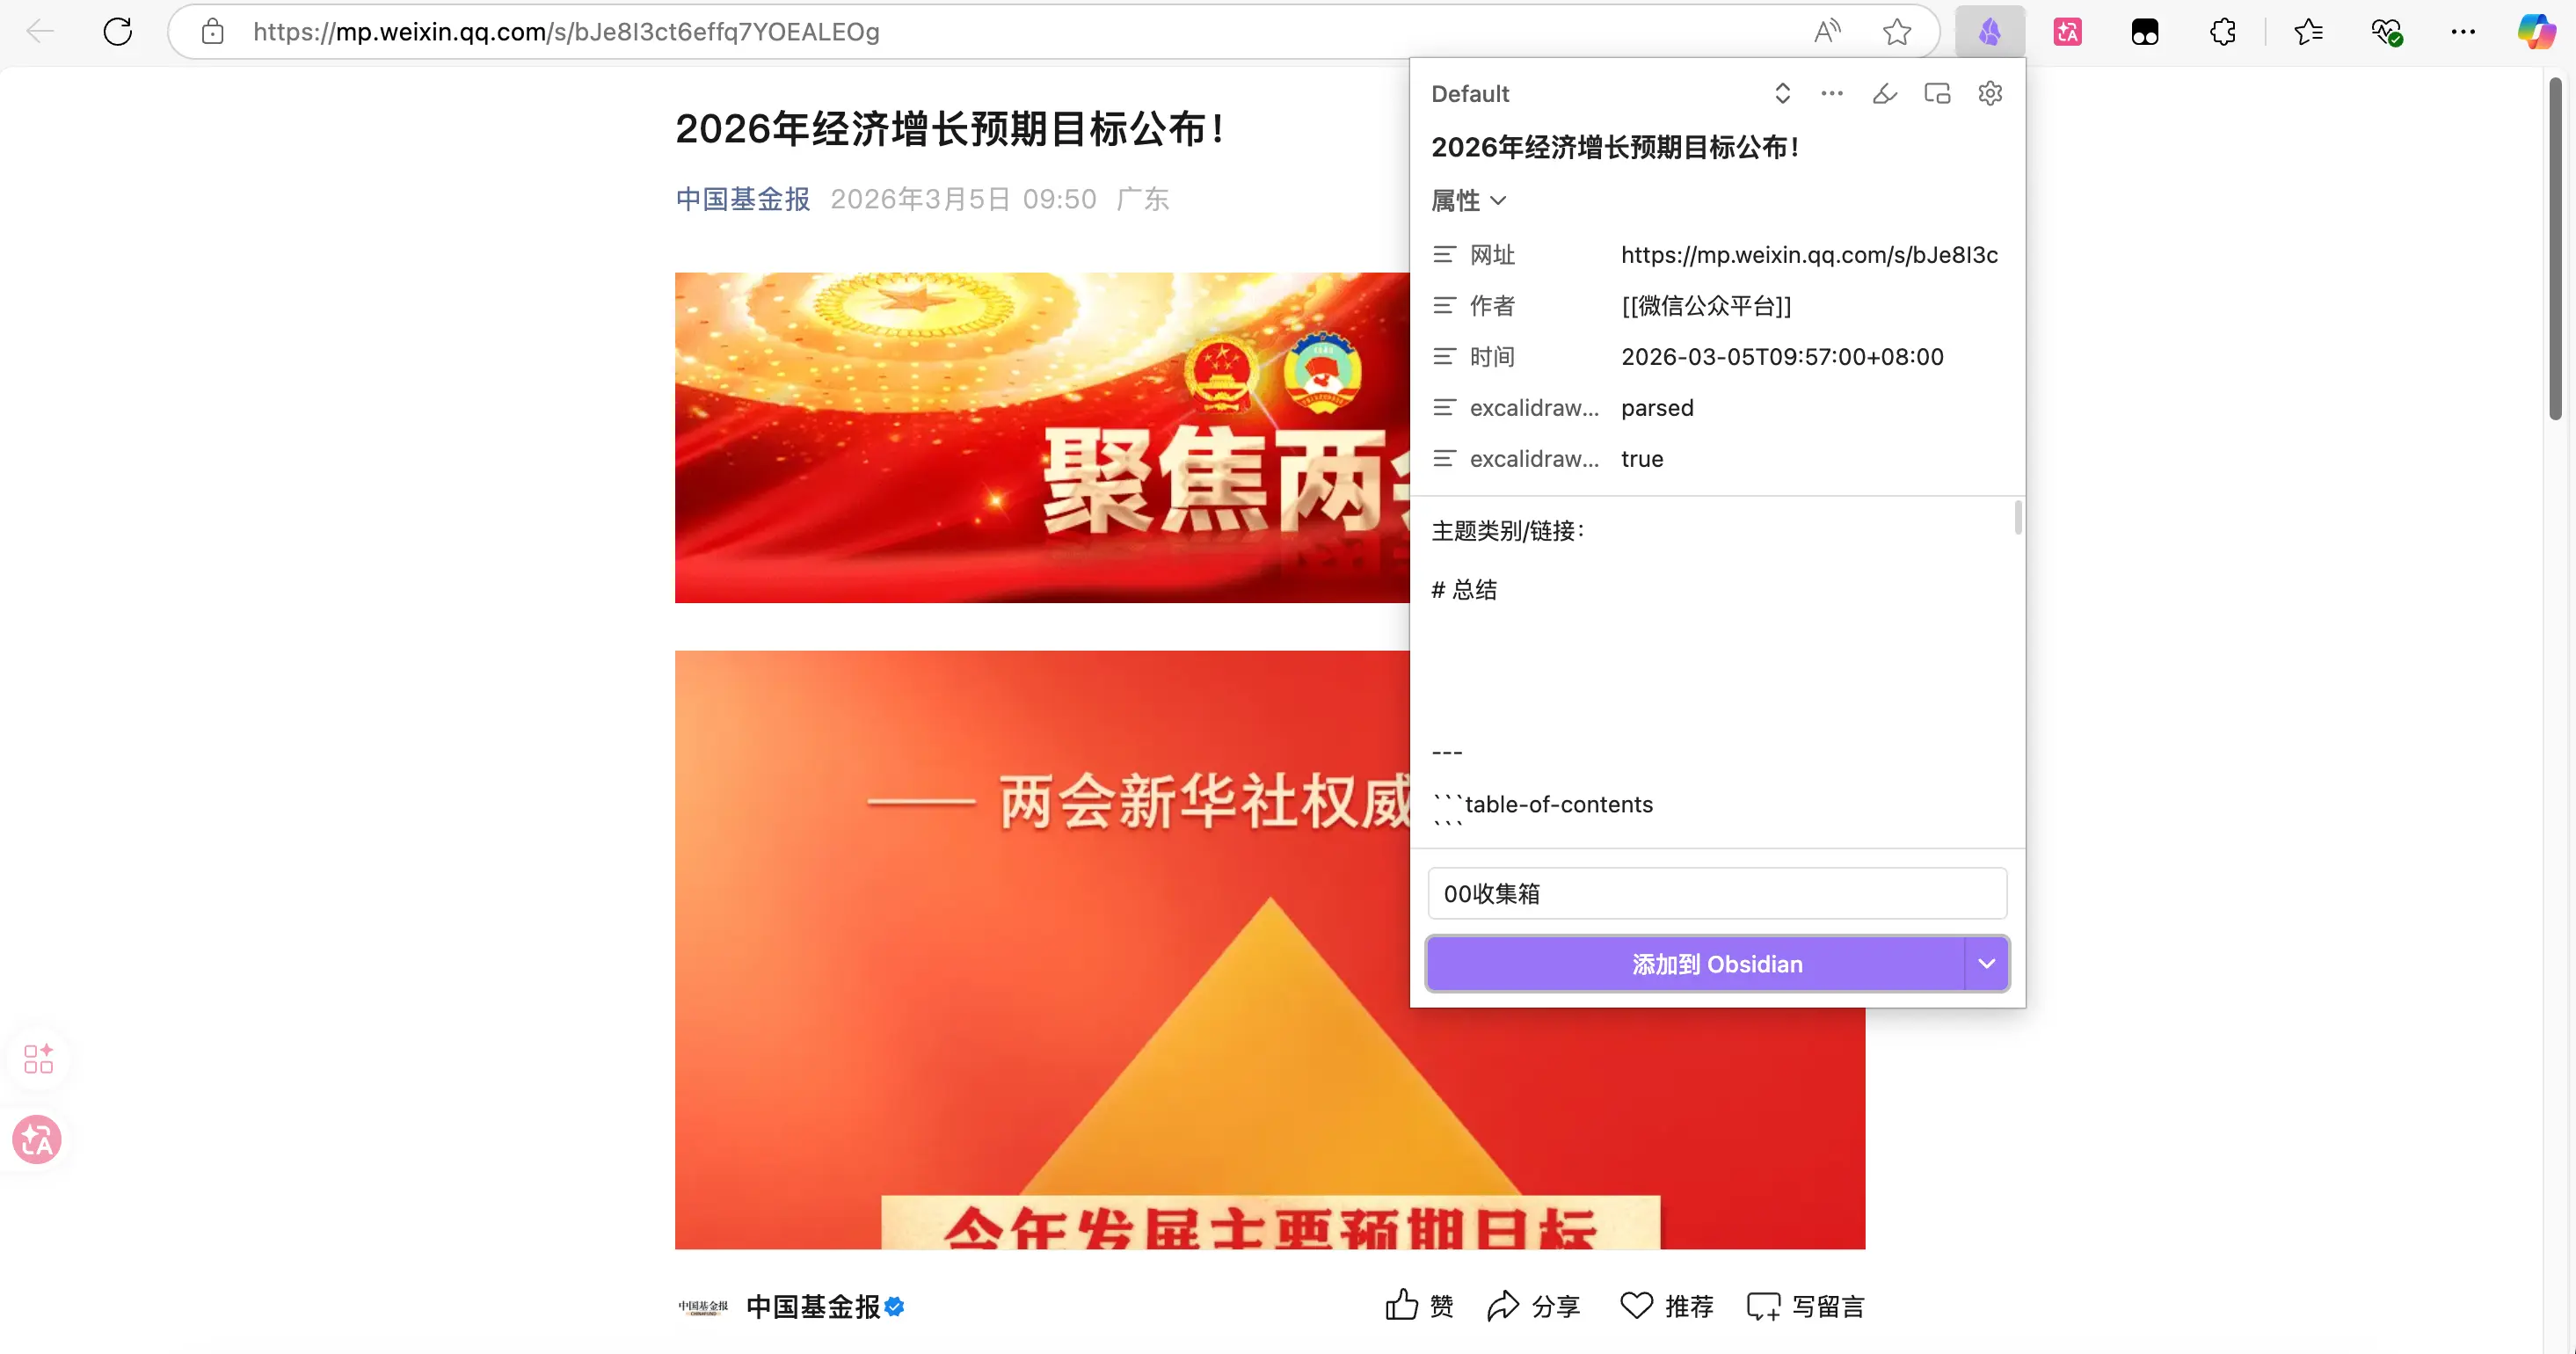
Step 3: Check the properties. The panel will automatically recognize the article title and URL. If the author field isn’t recognized, fill it in manually. The date is today, no need to change.
Step 4: Select a template. Choose the “Article Collection” template you created. If you have the AI interpreter enabled, you’ll see a spinning animation—AI is generating the summary, wait for it to finish.
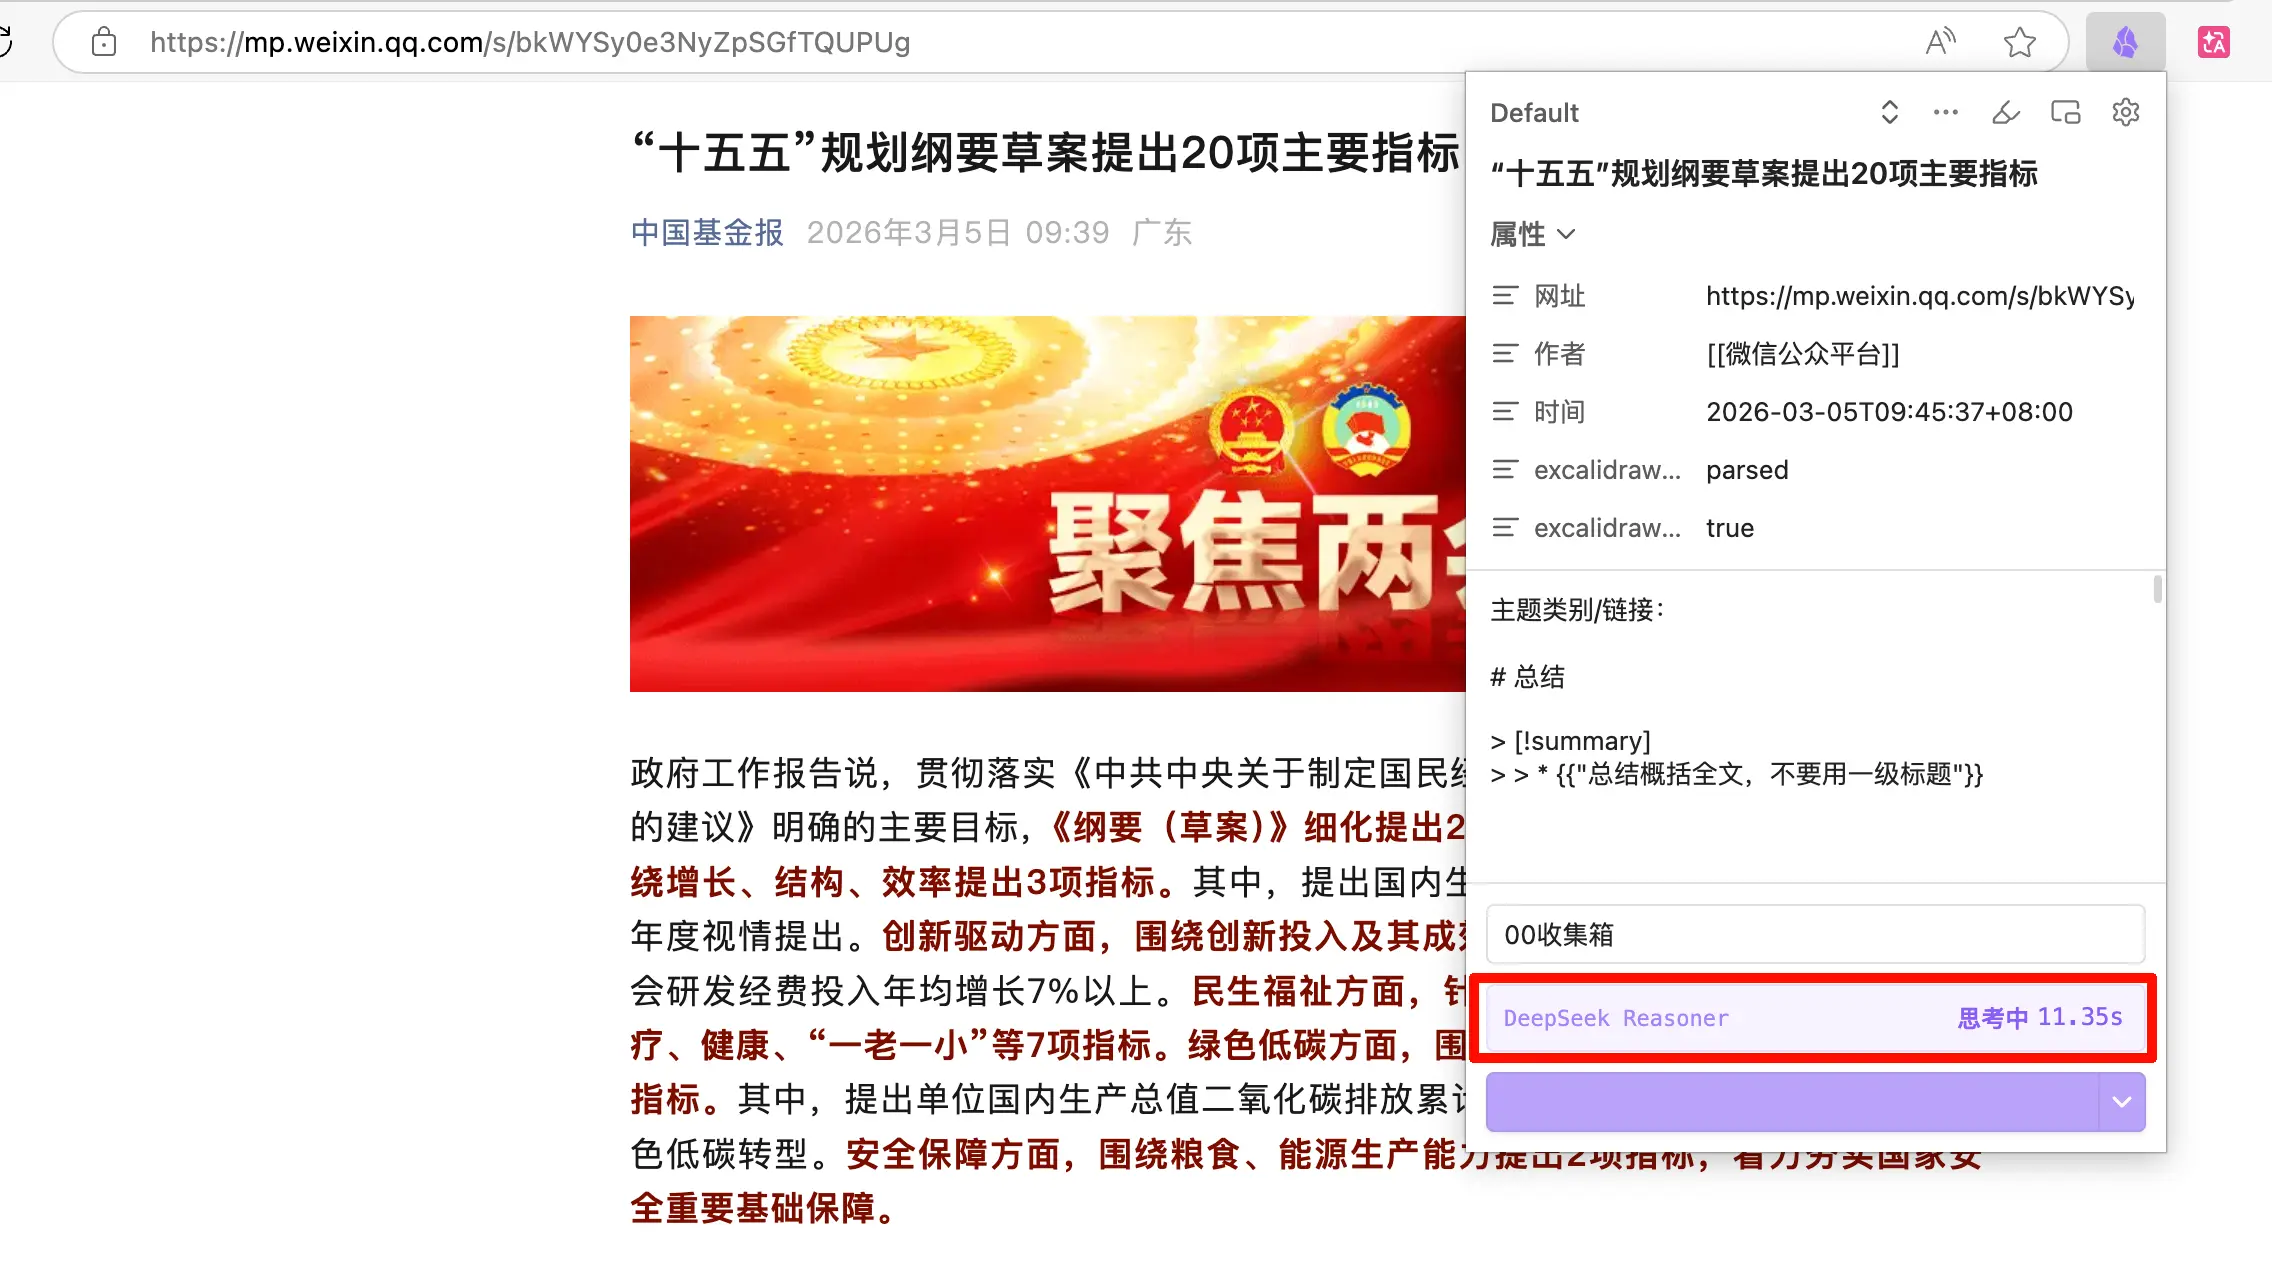
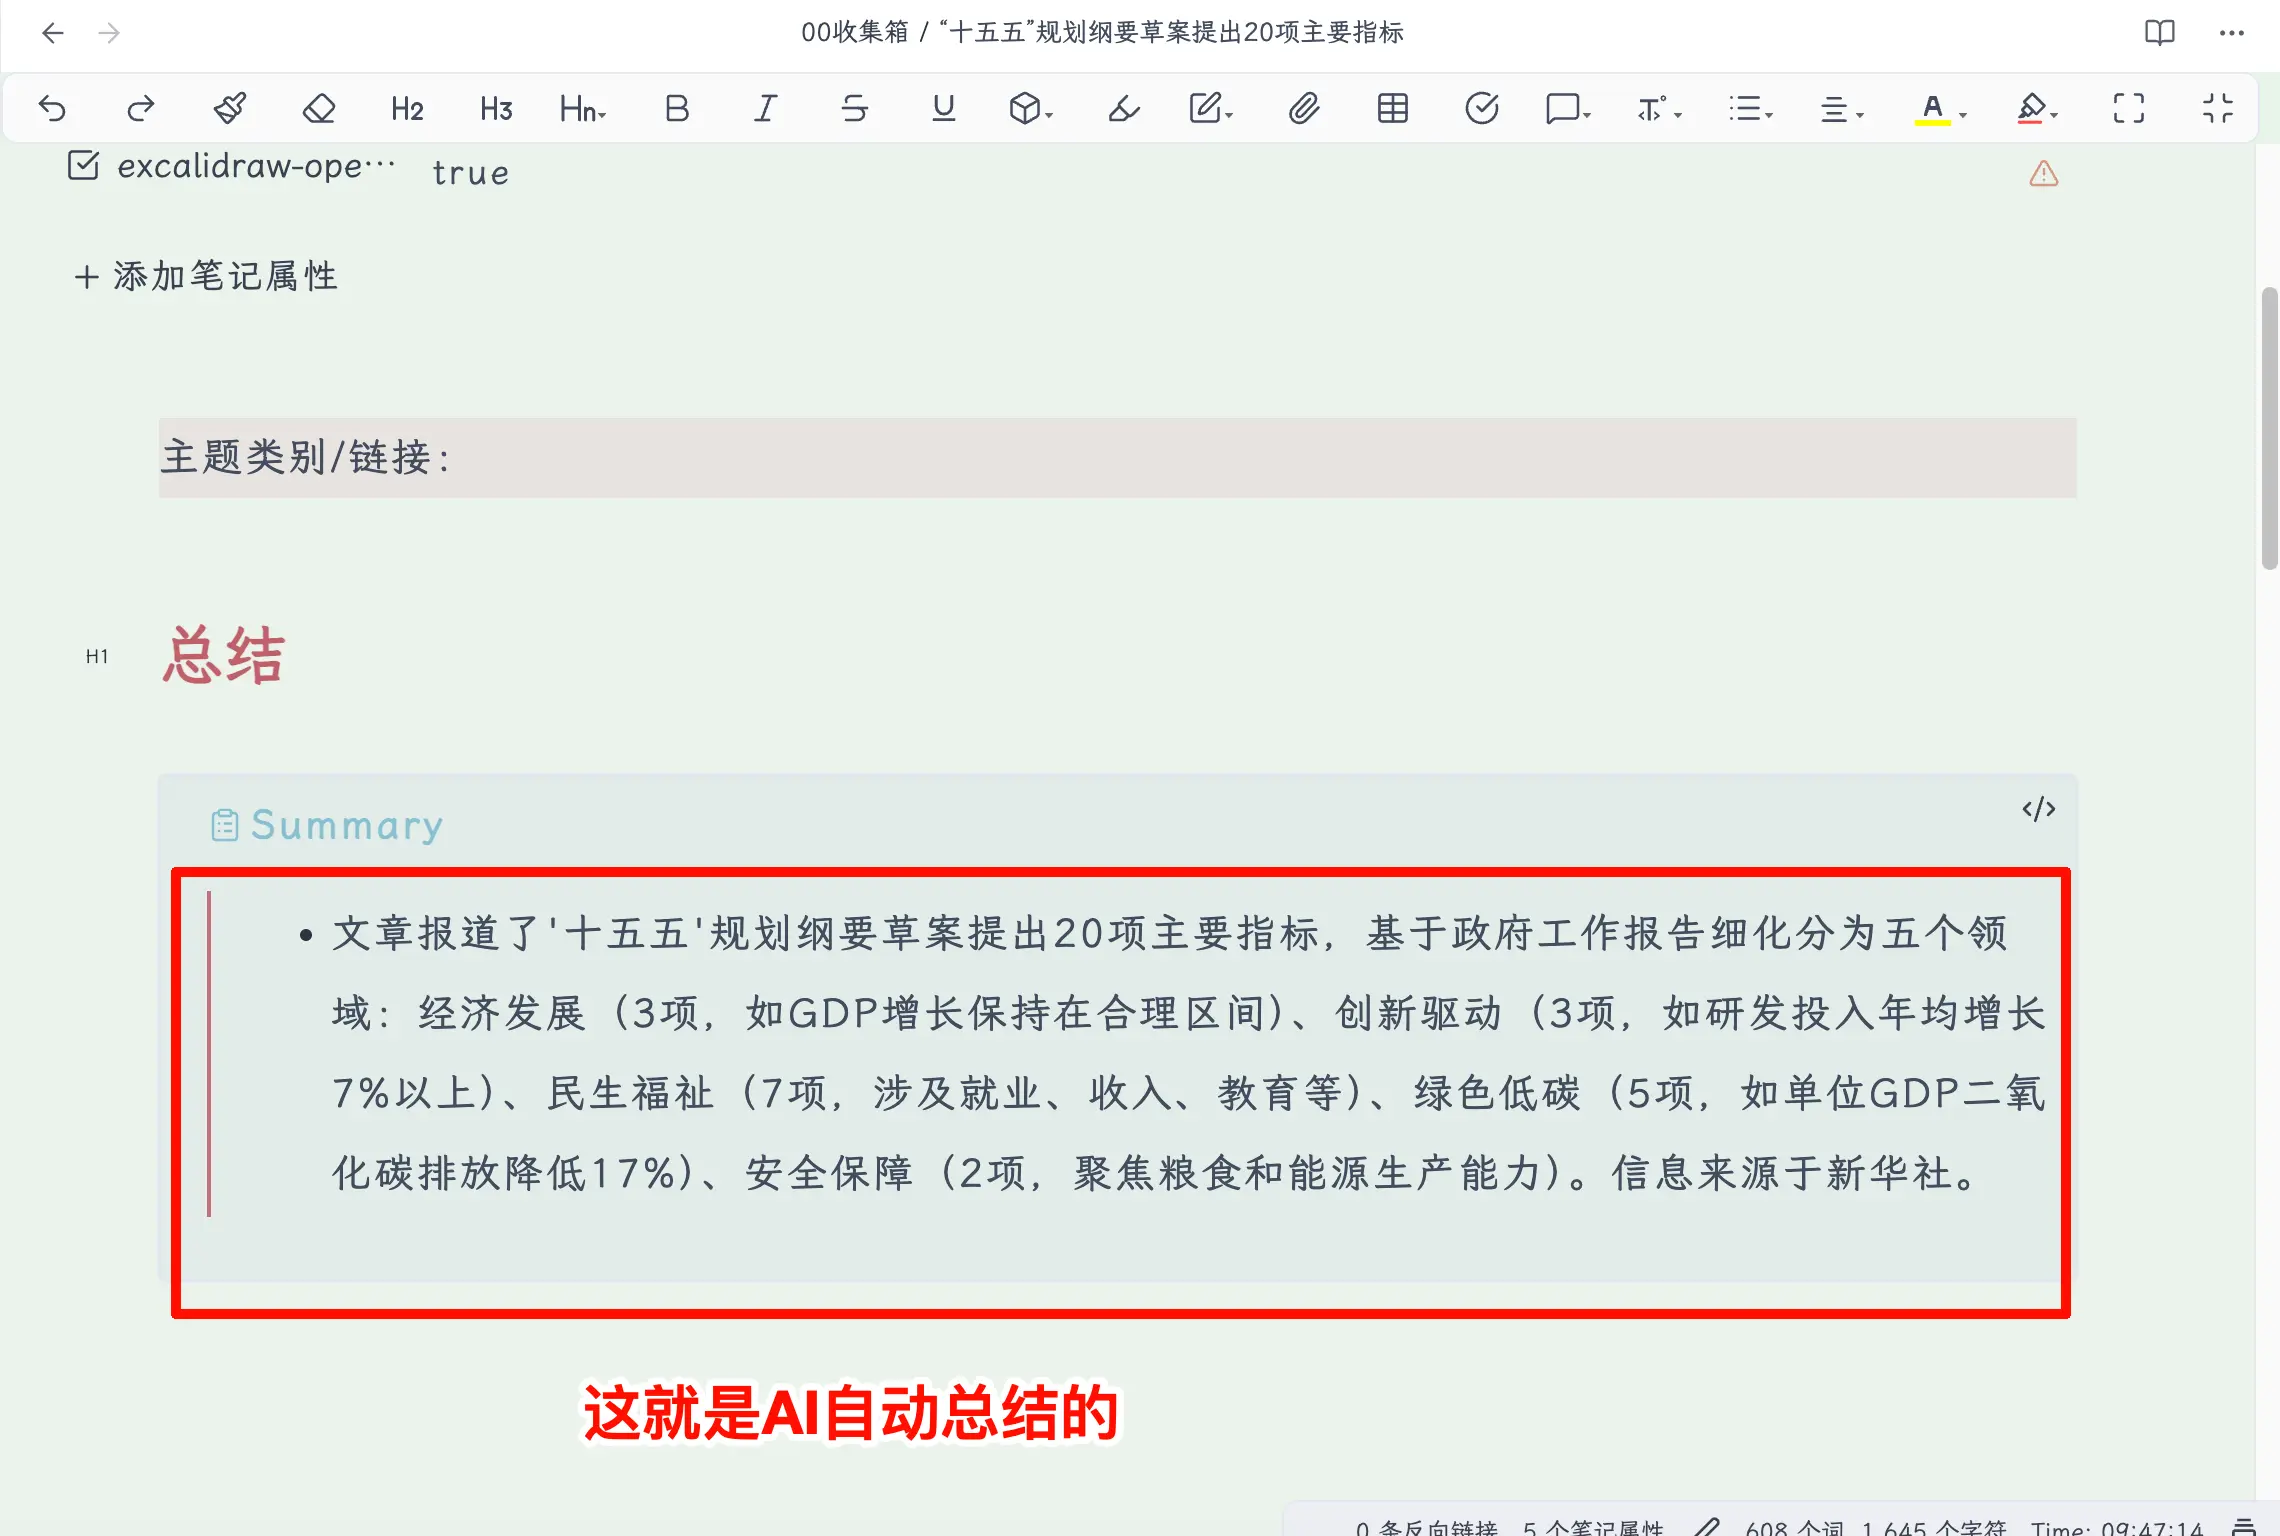
Step 5: Click “Add to Obsidian”. One second later, open Obsidian, go to your inbox folder, and the article is there. Title, link, date, AI summary—all present, and the content is clean Markdown.
Summary
What you learned today:
- Web Clipper is Obsidian’s official browser extension that saves web pages as Obsidian notes with one click, clean formatting, and automatic metadata.
- WeChat articles must be opened in a browser to be clipped; they can’t be used in the WeChat client.
- The AI Interpreter requires an API Key; once configured, it can automatically generate summaries and extract information during clipping.
- Custom templates = property variables + AI prompts; different templates for different content types make clipping more efficient.
Key points:
- Create a dedicated inbox folder; don’t dump clipped content directly into the vault root.
- First get the workflow working with the default template, then spend time customizing—templates can be changed anytime; getting started is more important.
- AI summaries are a bonus, not a necessity—you can clip normally without an API Key; you just miss the AI processing step.